
Tools
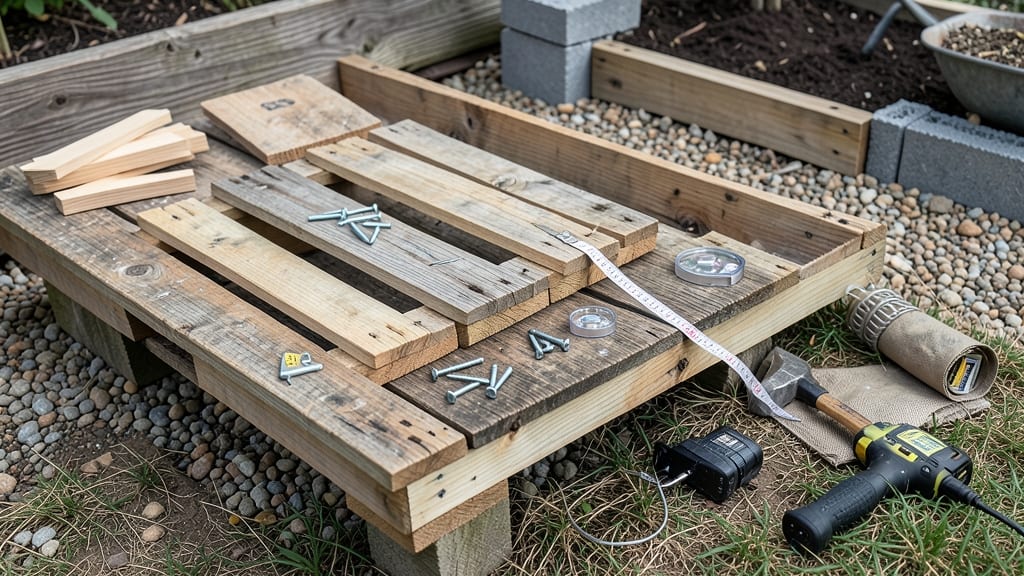
Learn how to build a raised garden with pallets—turning sturdy pallets into long-lasting raised beds for under $50. 🌱 I’ve built three of these over the years, and they’re the secret weapon for small spaces—no fancy lumber yard trips needed.
The key is picking the right pallets and assembling them right the first time. You’ll need four heat-treated pallets, a drill, screws, and a level—basic supplies that most DIYers already have. Avoid chemically treated pallets (look for the "HT" stamp) to keep your garden safe.
A simple design with drainage holes and a flat top means you can grow almost anything, from herbs to tomatoes, without soil erosion or pests. By the end, you’ll have a durable, custom-sized planter that lasts years. The best part?
It’s ready for planting in under an hour, and you’ll save money compared to store-bought beds. Plus, the rustic look fits any garden style. Works for balconies, patios, or backyard corners. Here’s how to make it happen without the hassle—no prior building skills required.
📚 In This Guide
- What you need
- Instructions
- Tips and common mistakes
- Wrapping up and next steps
What you need
- ● Pallets: 4-6 heat-treated or chemically untreated wooden pallets (standard size: 40" x 48"). Check for HT stamped (heat-treated) to avoid toxic chemicals.
- ● Outdoor-rated screws: 2.5"-3" deck screws (100-150 screws, stainless steel or galvanized to prevent rust).
- ● Wooden corner braces: 4-6 L-shaped metal or wooden braces (2" x 2" or 4" x 4" for stability).
- ● Landscape fabric: 1 roll (to block weeds and retain moisture).
- ● Garden soil: 2-3 cubic feet of high-quality potting mix or compost (avoid garden soil with weeds).
- ● Drill/driver: Cordless or corded (with Phillips/flathead bits).
- ● Measuring tape: 25-foot tape measure.
- ● Level: 24" or 48" bubble level for even placement.
- ● Safety gear: Work gloves, safety glasses, and a dust mask (for sanding, if needed).
- ● Wood stain/sealant: Outdoor-grade (e.g., spar urethane) to extend pallet lifespan.
- ● Drainage layer: Gravel or landscape rocks (1-2 inches) to improve water flow.
- ● Edging material: Bricks, stones, or metal flashing to define the garden’s perimeter.
- ● Drip irrigation kit: For hassle-free watering.
- ● Pallet sandpaper: 80-120 grit (if pallets are rough or splintery).
- ● Flat, level ground with good drainage (avoid low spots where water pools).
- ● Sunlight access: 6+ hours of direct sun for most vegetables/herbs.
- ● Permission to build on your property (check HOA rules or rental agreements if applicable).
- ● Basic DIY skills (or a friend to help with heavy lifting!).
Step-by-step instructions for building a raised garden with pallets
Here's the straightforward method I use to create sturdy, long-lasting raised beds from recycled pallets.
🪴 Step 1: Select and Prepare the Pallets
Choose HT-stamped heat-treated pallets (the gold standard for safety) that are clean and dry. Avoid chemically treated pallets marked with "MB" (methyl bromide) or "DB" (dibrom) as these contain toxic preservatives. I prefer standard 48-inch x 40-inch pallets for a 4-foot by 3-foot garden bed—perfect for four plants with ample spacing.
Inspect each pallet for loose boards or nails. Remove any protruding nails with a hammer and tongs, then sand rough edges lightly with 80-grit sandpaper. This prevents splinters and makes the wood safer for handling. Stack the pallets in your desired arrangement—two pallets side-by-side create a 4-foot width, while stacking two pallets vertically gives you 3-foot depth.
✂️ Step 2: Assemble the Frame and Add Support
Lay the pallets flat on the ground in your chosen configuration. For a 4-foot by 3-foot bed, place two pallets side-by-side and add two more pallets vertically on the ends to create a rectangle. Secure the corners by screwing 2x4-inch lumber across the joints using 2.5-inch deck screws—this reinforces the structure and prevents wobbling. I like to pre-drill holes to avoid splitting the wood.
For extra stability, especially if your bed will be taller than 10 inches, add corner braces made from scrap wood or additional 2x4s screwed diagonally between the pallets. This is where most DIY builds fail—skipping support leads to collapsing beds over time. Test the frame by gently pressing down on each corner. If it wobbles, add more screws or braces.
🌱 Step 3: Line, Fill, and Secure the Garden Bed
Lay down landscape fabric or cardboard (for weed suppression) inside the frame, then fill the bed with 6-12 inches of garden soil. I use a mix of topsoil, compost, and perlite for drainage. For a 4-foot by 3-foot bed, you’ll need about 1 cubic yard of soil—that’s roughly 27 cubic feet. Fill the bed in layers, tamping down each layer lightly to eliminate air pockets.
Top the bed with 2-3 inches of mulch (straw or wood chips) to retain moisture and suppress weeds. If you’re using untreated pallets, consider lining the inside with black plastic sheeting before adding soil to extend the bed’s lifespan. Water the soil thoroughly after filling to help it settle. Now it’s ready for planting—just add your favorite veggies, herbs, or flowers!
Tips & tricks for building a sturdy raised garden
Here's what I learned the hard way after building three wobbly raised beds—these simple tricks make all the difference.
Material Safety First: Always double-check pallet stamps before building. The HT stamp means heat-treated and safe for gardening, while MB or DB stamps indicate toxic chemicals. I once used a mislabeled pallet and had to rebuild my entire bed after plants wilted from chemical runoff. Trust me, this step saves headaches later!
The Support System: Don't skip the corner braces in Step 2—this is where most DIY gardens fail. For beds taller than 10 inches, add diagonal 2x4 braces between pallets. I've seen beds collapse under the weight of soil when this step is skipped. Test your frame by pressing down firmly on each corner before filling with soil.
Soil Layering Technique: When filling your 4-foot by 3-foot bed with 6-12 inches of soil, work in 3-inch layers. Tamp each layer lightly with a board or your hands to eliminate air pockets. This prevents soil from settling unevenly and keeps your plants growing at consistent levels. I use a 2x4 board to create an even surface between layers.
Optional Waterproofing: If using untreated pallets, line the inside with black plastic sheeting before adding soil. This extends your bed's lifespan by preventing wood rot. I've seen untreated beds last only 2-3 years without this protection, while lined beds often last 5+ years. The extra 10 minutes to install the plastic pays off big time.
Pro Tips for Build A Raised Garden With Pallets
- Here's what I learned the hard way after building three wobbly raised beds—these simple tricks make all the difference.
- Material Safety First: Always double-check pallet stamps before building. The HT stamp means heat-treated and safe fo...
- The Support System: Don't skip the corner braces in Step 2—this is where most DIY gardens fail. For beds taller than ...
Frequently asked questions
Got questions about building a raised garden with pallets?
Here are answers to the most common ones to help you plan and troubleshoot like a pro!
Can I use any type of pallet for a raised garden?
Not all pallets are safe for gardening! Only use heat-treated (HT) or chemically untreated pallets marked "HT" or "MB" (no "MC" or "CH" stamps). Avoid painted or chemically treated wood, as toxins can leach into soil. If unsure, sand rough edges and line the inside with landscape fabric for extra protection.
How long does it take to build a raised garden with pallets?
For a basic 4'x8' raised bed, most DIYers finish in 1–3 hours, depending on experience. Breaking it down:
- Prep (30 mins): Measuring, cutting pallets (if needed), and gathering tools.
- Assembly (1–2 hours): Building the frame, securing corners, and adding hardware.
- Finishing (30 mins–1 hour): Lining, filling with soil, and planting.
What if my pallets are uneven or wobbly?
Uneven pallets are common! Level them by:
- Adding shims (wood scraps or cardboard) under wobbly corners.
- Using adjustable brackets or corner braces for stability.
- Sinking the frame slightly into the ground (6–12 inches) and backfilling with gravel for weight.
Do I need to treat or seal the pallets before planting?
Sealing isn’t required, but it can extend your garden’s lifespan. If you choose to treat them:
- Use a food-safe, non-toxic sealant (like linseed oil or beeswax blend).
- Avoid pressure-treated pallets—they contain harmful chemicals.
- Skip sealing if using untreated wood; focus on lining with landscape fabric instead.
Are there eco-friendly alternatives to pallet wood?
Yes! If pallets aren’t available, try:
- Reclaimed wood: Old fences, barn wood, or construction scrap (sand and seal if needed).
- Cedar or redwood: Naturally rot-resistant and safe for gardens.
- Composite lumber: Recycled plastic wood (durable but pricier).
- Straw bales: A temporary, biodegradable option for short-term gardens.
Wrapping up and next steps
Building a raised garden with pallets is a rewarding project that breathes new life into your outdoor space—without breaking the bank! With just a few tools, some sturdy pallets, and a little elbow grease, you’ve created a durable, eco-friendly planter that’s ready to grow your favorite plants.
Whether you’re a seasoned gardener or just starting out, this DIY approach proves that creativity and sustainability go hand in hand.
Now that your raised bed is ready, it’s time to plant and watch it thrive! 🌱 Start by choosing your veggies, herbs, or flowers, then get your hands dirty—your future harvest (and bragging rights) are waiting. Happy gardening!