
Vegetables
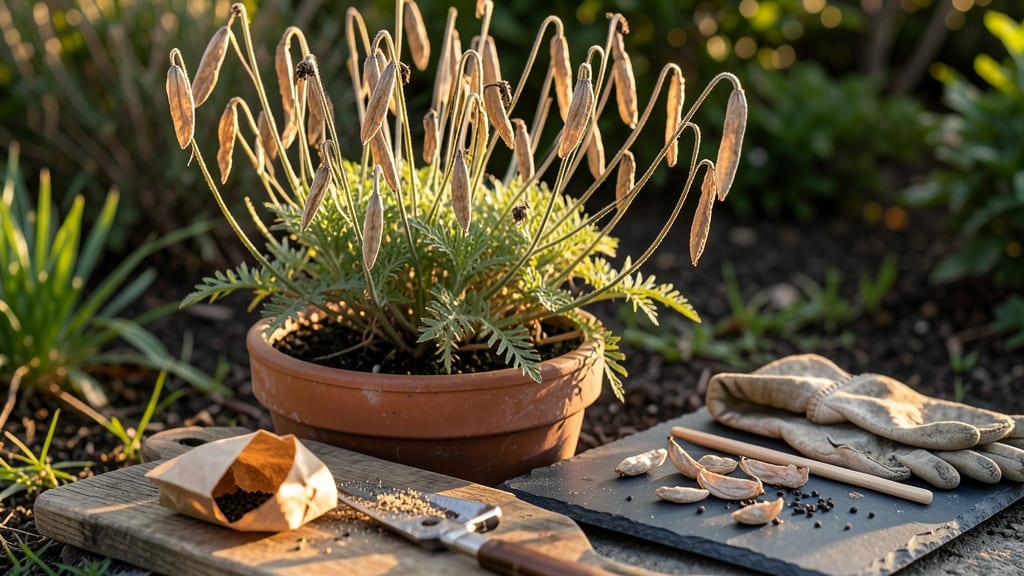
How to dry poppy pods at the perfect moment saves seeds—and saves you from soggy, ruined blooms. 🌸 The moment pods turn brown and papery, they’re ready, but wait too long and rain will turn your harvest into mush. I’ve learned the hard way that timing is everything when it comes to preserving those delicate seed heads.
You’ll need just a few simple things: sharp scissors or pruners, paper bags or breathable mesh sacks, and a dry, shaded spot. No fancy equipment—just patience and the right conditions.
The goal is to let pods dry slowly so seeds stay intact, avoiding the cracked, shriveled mess that happens when you rush the process.
Once dry, you’ll have seeds that keep for years, ready to sow next spring. The pods themselves make stunning dried arrangements too—imagine them in vases or wreaths, their papery texture catching the light. It’s like turning garden chores into decor.
This method works for all poppy varieties, from classic California poppies to towering opium poppies. Just be gentle when handling the dried pods—they’re brittle once fully dry. Store seeds in an airtight container in a cool, dark place, and you’re set for planting season.
📚 In This Guide
- What you need
- Instructions
- Tips and common mistakes
- Wrapping up and next steps
What you need
- ● Fresh poppy pods: Harvest them when they’re fully mature (brown, dry, and slightly papery) but before they split open naturally. Aim for 5–10 pods per batch (adjust based on your project scale).
- ● Sharp pruning shears or scissors: Use clean, sterilized tools to avoid damaging the pods or introducing disease. A bypass pruner works best for thicker stems.
- ● Brown paper bags or breathable fabric sacks: Choose unbleached, uncoated paper bags (like grocery bags) or muslin cloth bags to allow airflow. Size: 1–2 pods per small bag (or larger bags for bulk drying).
- ● Drying rack or tray: A wire cooling rack, baking sheet with parchment paper, or even a clean wooden cutting board works. Ensure it’s elevated for airflow.
- ○ Fan (optional but helpful): A small, low-heat box fan placed nearby speeds up drying. Use on low setting to avoid blowing pods around.
- ● Air-tight storage containers: Once dry, store seeds in glass jars with tight lids or food-grade plastic containers to keep them fresh for up to 1 year.
- ● Desiccant packets (silica gel): Place a few in your storage container to absorb excess moisture if your climate is humid.
- ● Labeling tags: Write the harvest date and variety on your containers to track freshness.
- ● Fine-mesh sieve or strainer: Helps separate seeds from chaff after drying (if you’re saving seeds for planting).
- ● Glassine envelopes: For delicate crafts or seed-saving, these protect pods from light and pests.
Step-by-step instructions for harvesting and drying poppy pods
Here's how to save seeds from your poppies before summer showers turn them to mush.
🌿 Step 1: Identify and Select Mature Pods
Poppy pods are ready when they turn from green to a dry, papery brown and begin splitting open along their seams. Look for pods that are slightly wrinkled but still intact—these contain fully mature seeds. Avoid pods that have already cracked open or show signs of mold, as the seeds inside may not be viable.
Gently grasp the pod between your thumb and forefinger, giving it a slight twist to test its readiness. If it releases easily, it's time to harvest. I like to work on cloudy mornings when the pods are less likely to drop their seeds prematurely. Collect pods by hand or use clean, sharp scissors to snip the stems just above the pod.
🪴 Step 2: Prepare Pods for Drying
Lay the harvested pods in a single layer on a clean, dry surface like a baking sheet lined with parchment paper. Space them out so they’re not touching—crowding them can trap moisture and encourage mold growth. Place the tray in a warm, dry location with good air circulation, like a sunny windowsill or a well-ventilated room.
If your home is particularly humid, you can speed up the drying process by placing the tray in a warm, dry spot with indirect sunlight. Avoid direct sunlight, which can overheat the pods and cause them to crack too quickly. Check the pods daily and gently shake them—if seeds rattle inside, they’re ready for the next step.
⏰ Step 3: Extract Seeds and Complete Drying
Once the pods are completely dry and brittle, place each one in a paper bag and gently squeeze or crush it to release the seeds. Shake the bag to separate the seeds from the chaff. Poppy seeds are tiny and dark, so you may need to sift them through a fine mesh strainer or sieve to remove any remaining pod debris.
Spread the seeds on a clean surface or in a shallow container and let them dry for an additional 2-3 days in a dry, warm environment. Properly dried seeds will feel firm and crisp to the touch. Store them in a sealed, airtight container—like a small glass jar—in a cool, dark place to preserve their viability for up to 3 years.
💧 Step 4: Store Seeds for Future Planting
Label your seed container with the poppy variety and the date of harvest. This helps you keep track of seed freshness and ensures you plant them within the optimal timeframe. Poppy seeds are lightweight, so a small amount can yield many plants—just a pinch will do for a full garden bed.
When it’s time to plant, scatter the seeds directly onto prepared soil in early spring or fall. They don’t need covering, as they require light to germinate. Keep the soil lightly moist until sprouts appear, which typically takes 1-2 weeks. Enjoy the process of watching new poppies bloom from seeds you carefully saved!
Tips & tricks for perfect poppy pod harvesting
Here's what I've learned after years of saving poppy seeds—these little tricks make all the difference when you're racing against summer rains.
Timing Secret: Harvest on overcast mornings to prevent premature seed release. The cooler temperatures and lower humidity help preserve the pods' integrity. I've found that working between 7-9 AM gives me the best results—pods are less likely to split open from the morning dew. If you must work in direct sunlight, wear gloves to protect your hands from the delicate pods' natural oils.
Drying Strategy: For faster drying in humid climates, place your tray of pods in a well-ventilated area with a small fan circulating air. The gentle airflow prevents moisture buildup while maintaining the pods' structural integrity. I've had great success using a box fan on low speed—just keep it at least 12 inches away to avoid damaging the pods with strong airflow. Check daily for that telltale seed rattle.
Seed Extraction: When crushing pods to release seeds, use a clean, dry paper bag and work in small batches. The friction from shaking helps separate seeds from chaff more effectively. I like to fold the bag's top over twice before shaking to contain any escaping seeds—poppy seeds are notorious for disappearing into the most unexpected places! For stubborn pods, gently tap them against a hard surface before squeezing.
Storage Wisdom: After your 2-3 days of final seed drying, let them cool completely before storing. Warm seeds can create condensation in your container, which reduces viability. I place my seeds on a clean paper towel for 30 minutes before transferring to jars—this extra step has saved me from moldy seeds in the past. For long-term storage, consider adding a small silica gel packet to your jar to absorb any residual moisture.
Pro Tips for Dry Poppy Pods
- Here's what I've learned after years of saving poppy seeds—these little tricks make all the difference when you're ra...
- Timing Secret: Harvest on overcast mornings to prevent premature seed release. The cooler temperatures and lower humi...
- Drying Strategy: For faster drying in humid climates, place your tray of pods in a well-ventilated area with a small ...
Frequently asked questions
Got questions about drying poppy pods? You’re not alone—here are the most common concerns and quick answers to keep your harvest stress-free!
When is the best time to harvest poppy pods for drying?
Harvest pods when they’re fully mature but still dry and papery—usually 3–4 weeks after flowering. Look for pods that are brown, slightly wrinkled, and starting to split open naturally. Avoid harvesting too early (seeds won’t be viable) or too late (they’ll scatter or mold). Morning harvests work best when dew is light.
How long does it take for poppy pods to dry completely?
Drying time varies, but most pods are ready in 1–2 weeks under ideal conditions (60–70°F, good airflow). Check daily: pods should rattle when shaken (indicating dry seeds inside) and feel hollow when tapped. If humidity is high, extend drying time to 3 weeks or use a dehydrator (set to 95°F).
Can I dry poppy pods indoors? What’s the best method?
Yes! Place pods in a single layer on a screen, paper towel, or mesh bag in a warm, dry, well-ventilated spot (like a sunny windowsill or near a fan). Avoid plastic bags—trapped moisture causes mold. For faster results, use a dehydrator (95°F) or oven (170°F, prop door open). Stir pods every few days to prevent sticking.
What if my poppy pods mold or get bugs during drying?
Mold or pests usually mean too much humidity or poor airflow. Act fast: move pods to a drier spot, increase airflow with a fan, or switch to a dehydrator/oven. If mold appears, discard affected pods immediately. For pests (like weevils), freeze pods for 48 hours or store them in an airtight container with dried lavender or diatomaceous earth.
What can I do with leftover poppy pods after drying?
Don’t toss them! Use dried pods for:
- Cooking: Sprinkle seeds on salads, soups, or baked goods (they’re nutty and delicious!).
- Crafts: Press pods into potpourri, wreaths, or homemade paper.
- Gardening: Save seeds for next year’s plants (store in a cool, dark place).
- Remedies: Poppy seeds (not pods) can be infused in oils for skincare.
Pro tip: If pods resist opening, freeze them for 24 hours to shock seeds loose!
Wrapping up and next steps
Drying poppy pods is a simple yet rewarding process that ensures you preserve their seeds for future planting or culinary uses.
By following these steps—harvesting at the right time, choosing the best drying method, and storing them properly—you’ll avoid waste and enjoy fresh seeds for years to come. Now that you’re equipped with the know-how, it’s time to put it into action! Grab those pods, pick your favorite drying technique, and relish the satisfaction of a job well done. 🌱✨
Next Steps:
- Try it out! Pick a sunny day and harvest a few pods to practice.
- Experiment. Compare air-drying vs. oven-drying to see which works best for you.
- Share the joy. Gift dried poppy seeds to fellow gardeners or bakers!