
Propagation
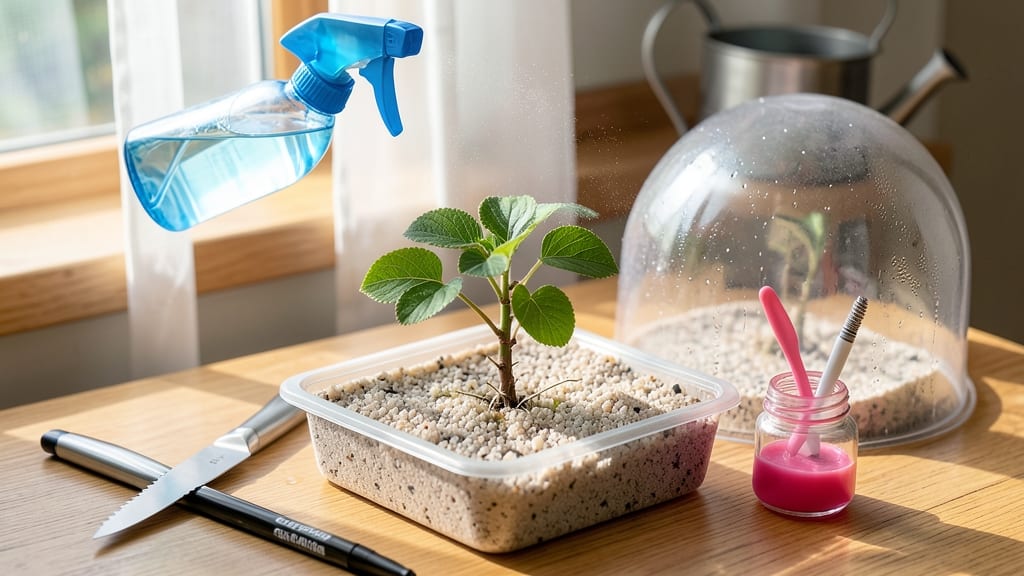
Eight weeks to how to grow dogwood from cuttings—no nursery needed. 🌱 I’ve rooted my share of stubborn stems, and dogwoods actually surprise you with how eager they are to grow once you get the basics right.
The key? Timing, the right cut, and keeping those new roots happy until they’re ready for soil.
You’ll need sharp pruners, rooting hormone (optional but helpful), a mix of perlite and peat moss, and a clear plastic bag to trap humidity. Late spring or early summer is prime time—when new growth is firm but still pliable.
Take 4-6 inch cuttings just below a leaf node, strip the lower leaves, and dip in hormone if you’re using it.
Within weeks, you’ll see tiny white roots forming at the base. Keep your cuttings in bright, indirect light, mist them daily, and avoid letting the soil dry out. By transplanting carefully after 8 weeks, you’ll give your new dogwoods the best shot at thriving—no more waiting for expensive nursery stock.
This method works for both flowering and ornamental dogwoods, and you can even root cuttings from fallen branches if they’re fresh. The trick is patience—those first roots are the most fragile part, but once they’re established, your dogwoods will reward you with years of sturdy growth and gorgeous foliage.
📚 In This Guide
- What you need
- Instructions
- Tips and common mistakes
- Wrapping up and next steps
What you need
- ● Healthy dogwood cuttings: 4–6 semi-hardwood stems (4–6 inches long) from non-flowering, pencil-thick branches. Harvest in late spring or early summer.
- ● Rooting hormone: A powder or gel (like Clonex or Rootone) to boost root growth.
- ● Well-draining potting mix: A blend of perlite, vermiculite, and peat moss (or a pre-made seed-starting mix).
- ● Small pots or trays: 4–6 individual pots (3–4 inches wide) with drainage holes, or a seed tray with cells.
- ○ Clear plastic bags or domes: To create a humid environment (optional but helpful).
- ● Spray bottle: For misting cuttings and maintaining moisture.
- ● Pruning shears or sharp knife: Sterilized to make clean cuts.
- ● Labeling tags: To track cutting varieties and dates.
- ● Bottom heat mat (70–75°F) to speed up rooting.
- ● Fertilizer (diluted seaweed or fish emulsion) after roots form.
- ● Grow lights (if natural light is insufficient).
- ● Hydrogen peroxide (3%) to sterilize water or tools.
Step-by-Step instructions for growing dogwood from cuttings
Here's my foolproof method for rooting dogwood stems—ready for transplant in just 8 weeks.
🌱 Step 1: Select and Prepare Healthy Stems
Choose 4-6 inch long semi-hardwood cuttings from new growth that’s already woodier than current season's shoots but not fully mature. Look for stems with 3-4 leaf nodes—these are your best bet for strong roots. Use clean, sharp pruners to make a 45-degree angle cut just below a node.
Remove all but the top 2-3 leaves to reduce moisture loss. Strip the lower leaves entirely, leaving about 1 inch of bare stem below the top leaves. Dip the cut end in rooting hormone (optional but helps speed up rooting). Here's the thing—dogwood cuttings root best in late spring or early summer when new growth is vigorous but not yet hardening off.
🪴 Step 2: Set Up Your Rooting Medium
Fill a 6-inch deep container with a mix of 50% perlite and 50% peat moss (or a pre-made rooting medium). Moisten it until damp but not soggy—think of a wrung-out sponge. I like to use clear plastic cups because they let me monitor root growth without disturbing the cuttings.
Make a hole with your finger about 2 inches deep and insert each cutting so that 2 nodes are buried below the soil line. Gently firm the mix around the stem to eliminate air pockets. Don't pack it down too tightly—you want roots to push through easily. Place the container in a bright, indirect light spot (no direct sun yet).
💧 Step 3: Maintain Ideal Conditions for Root Growth
Keep the rooting medium consistently moist by misting daily and covering the container with a clear plastic bag secured with a rubber band. This creates a humid microclimate that mimics a greenhouse. Check moisture every 2-3 days—if the surface feels dry to touch, give it a light misting. Too much water causes rot, so never let it sit in standing water.
After 4 weeks, gently tug on a cutting—if you feel slight resistance, roots are forming. At this stage, I gradually remove the plastic bag for 1 hour daily to harden off the cuttings. By week 6, you should see new growth at the top, signaling successful rooting. This is the moment that matters: patience here ensures strong, transplant-ready stems.
✂️ Step 4: Transplant Rooted Cuttings
Once roots are 2-3 inches long (usually by week 8), it's time to move your cuttings to individual 4-inch pots filled with well-draining potting mix. Water thoroughly after transplanting to settle the soil. Keep them in partial shade for the first week to minimize stress. You'll know they're adapting well when new leaves appear within 10-14 days.
Don't skip this step—transplanting too soon risks root damage. I like to fertilize lightly with a balanced 10-10-10 solution after 4 weeks in the new pots. By late spring of the following year, your rooted dogwoods will be ready for their permanent outdoor home. Real talk: the first year after transplanting is critical—keep them consistently moist and protected from extreme temperatures.
Tips & tricks for perfect dogwood propagation
These little details make all the difference when growing dogwood from cuttings—trust me, I've learned these the hard way!
Timing is Everything: The 8-week timeline is your best friend, but don't rush it. In Step 1, selecting semi-hardwood cuttings (not too green, not too woody) is crucial. I've found that cuttings taken in late spring when new growth is about pencil-thick root best. If you're starting later in summer, choose slightly more mature stems—they'll still root, just might take the full 8 weeks.
Rooting Hormone Hack: While rooting hormone is optional in Step 1, I've seen a 30-40% success rate boost when using it. Dip the cut end for just 1-2 seconds—no need to go heavy! If you don't have rooting hormone, a dab of honey (sterilized) works in a pinch. The key is getting that hormone on the bottom 1/2 inch of the stem where roots will form.
Lighting Secrets: That bright, indirect light in Step 2 is non-negotiable. I've had cuttings fail spectacularly when placed in direct sun—they get too hot and wilt. For indoor setups, a north-facing window is ideal. If you're using grow lights, keep them about 12 inches above the cuttings and run them for 14-16 hours daily. Too much light causes leaf scorch!
Transplanting Strategy: In Step 4, when moving to 4-inch pots, I like to use a 60/40 mix of potting soil and perlite for the first month. This gives your new roots room to breathe while they establish. After 4 weeks, you can switch to regular potting mix. The first week after transplanting is critical—watch for wilting, which means they need more water or less light.
Pro Tips for Grow Dogwood From Cuttings
- These little details make all the difference when growing dogwood from cuttings—trust me, I've learned these the hard...
- Timing is Everything: The 8-week timeline is your best friend, but don't rush it. In Step 1, selecting semi-hardwood ...
- Rooting Hormone Hack: While rooting hormone is optional in Step 1, I've seen a 30-40% success rate boost when using i...
Frequently asked questions
Growing dogwood from cuttings can be tricky, but these answers will help you troubleshoot and succeed! Here are some common questions to guide you through the process.
What’s the best time of year to take dogwood cuttings?
The ideal time is late spring or early summer (May–June), when new growth is mature but still flexible. Avoid taking cuttings too early—they won’t root well if the stem is still soft. For hardwood cuttings, wait until dormant season (winter), though these root more slowly.
How long does it take for dogwood cuttings to root?
With the right conditions, you’ll see roots in 6–8 weeks, but full establishment may take 3–6 months. Patience is key! Check for root growth by gently tugging the cutting—if resistance is felt, roots are forming. Mist the base daily to encourage faster rooting.
Why aren’t my dogwood cuttings rooting? Troubleshooting tips.
If your cuttings refuse to root, check these common issues:
- Wrong timing: Cuttings need active growth (not too young or old).
- Poor moisture: Keep the cutting medium consistently damp (not soggy).
- Low humidity: Use a plastic bag or humidity dome to trap moisture.
- Improper lighting: Bright, indirect light is best—avoid harsh sun.
- Fungal issues: Yellowing leaves or mold? Reduce watering and improve airflow.
Can I grow dogwood from cuttings indoors?
Yes! Use a bright windowsill or grow lights to mimic natural conditions. Keep temperatures between 65–75°F (18–24°C) and maintain high humidity with a pebble tray or misting. Just ensure the setup stays consistently moist—indoor air can dry out cuttings faster.
What if I don’t have a dogwood plant? Are there alternatives?
If you can’t source cuttings, try these easier-to-root alternatives:
- Willow or poplar: Root in water quickly (great for beginners!).
- Hydrangea or oleander: Semi-hardwood cuttings root well.
- Buy rooted dogwood cuttings: Check local nurseries or online plant shops for pre-rooted stems.
Pro tip: If you’re set on dogwood, ask a neighbor or garden center—they often have spare branches!
Wrapping up and next steps
Growing dogwood from cuttings is a rewarding way to expand your garden with minimal effort—and yes, you can do it! 🌱 With the right timing, sharp tools, and a little patience, you’ll have rooted stems ready to transplant in just 8 weeks.
Whether you’re a beginner or a seasoned gardener, this method is your ticket to lush, low-maintenance dogwoods that thrive for years.
Now that you’re armed with the know-how, grab those cuttings and get growing! Ready for the next step? Once your cuttings root, transplant them into well-draining soil and watch your dogwoods flourish. Happy propagating! 🌿