
Orchid Care
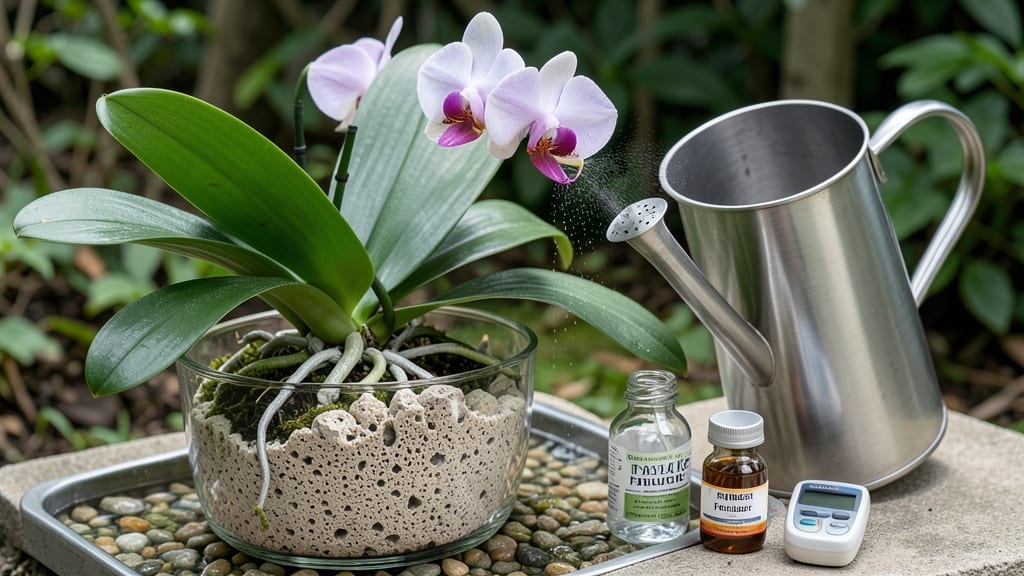
Orchids thriving in LECA prove soil isn't always the answer. 🌱 After years of battling root rot from soggy mixes, I switched to this lightweight, porous medium—and my orchids now grow stronger with fewer problems.
The secret lies in how LECA mimics the orchid's natural epiphytic roots, letting them breathe while absorbing exactly what they need.
You'll need just a few supplies: LECA balls (1/2" to 1" size), a clean plastic container with drainage holes, a balanced orchid fertilizer, and a spray bottle. The setup is simple—fill your container with LECA, nestle your orchid inside, and water until it drains freely.
No more guessing if roots are drowning or starving for oxygen.
Within weeks, you'll spot new roots clinging to the LECA's rough surface, and blooms arrive more reliably than with traditional potting mixes. The system cuts watering time by half and eliminates the risk of compacted soil. Even my black thumb orchids have stayed healthy for months this way.
This method works year-round, from humidity-loving Phalaenopsis to drought-tolerant Cattleyas. The only challenge? Remembering to fertilize regularly since nutrients come from water, not soil. Here's how to keep them thriving without the usual orchid headaches.
📚 In This Guide
- What you need
- Instructions
- Tips and common mistakes
- Wrapping up and next steps
What you need
- ● LECA (Lightweight Expanded Clay Aggregate): 1–2 gallons (or ~3–5 lbs), depending on orchid size (small pots: 1–2 inches; larger pots: 3+ inches)
- ● Specs: Clean, kiln-fired, and free of dust/debris (soak in water for 24 hours before use)
- ● Orchid: 1 healthy Phalaenopsis or Dendrobium (best for beginners) with roots intact
- ● Pot: Clear plastic or mesh pot (4–6 inches in diameter for small orchids; 8+ inches for larger ones)
- ● Why clear? Monitor root health and moisture levels easily!
- ● Hydroponic Nutrients: Balanced orchid-specific hydroponic fertilizer (e.g., Dyna-Gro Foliage Pro or Jack’s Classic)
- ● Dilution: Follow label instructions (typically ½–¼ strength for orchids)
- ● Water: Room-temperature, dechlorinated water (use a water conditioner or let tap water sit for 24 hours)
- ● Tools: Spray bottle (for misting roots)
- ● pH test kit (ideal range: 5.5–6.5)
- ● Scissors (sterilized, for trimming dead roots)
- ● Grow lights (LED or fluorescent, 10,000–12,000 lux for 12–14 hours/day if natural light is weak)
- ● Humidity tray or pebble tray (to maintain 50–70% humidity)
- ● Automatic misting system (for hands-off care)
- ● Support stake or moss (for climbing orchids like Vandas)
Step-by-Step instructions for growing orchids in LECA
Here's how to transform your orchids into thriving hydroponic plants with just water and these lightweight clay pebbles.
🪴 Step 1: Prepare Your LECA and Container
Start by rinsing the LECA (Lightweight Expanded Clay Aggregate) pebbles thoroughly under cool water to remove any dust. I like to use a colander and swirl them around until the water runs clear—this prevents clogging and ensures proper airflow. Choose a container with drainage holes that's at least 6 inches deep for each orchid, since roots need space to spread.
Fill the container about halfway with LECA, leaving room for your orchid's root system. Tap the sides gently to settle the pebbles evenly. The goal is a stable base that won't shift when you add the plant. Pro tip: I add a layer of hydroponic netting over the LECA before placing the orchid—this keeps roots contained and prevents them from floating away during water changes.
🌱 Step 2: Repot Your Orchid into LECA
Gently remove your orchid from its current pot and loosen any tightly bound roots with your fingers. You'll notice the roots look pale and stringy—this is normal! Place the plant on top of the LECA, ensuring the base of the rhizome (where the roots meet the plant) sits just above the pebbles. The roots should dangle freely into the LECA, not buried.
Here's where it gets tricky: don't pack more LECA around the orchid after placing it. The roots need to make contact with the pebbles naturally. I like to give the plant a light misting right after repotting to help it settle into its new environment. This prevents shock and encourages roots to start exploring the LECA immediately.
💧 Step 3: Establish Your Watering Routine
Fill a clean watering can or spray bottle with room-temperature, distilled water—tap water can contain minerals that build up on LECA over time. Water your orchid until the LECA is completely saturated, and you see water dripping freely from the drainage holes. This ensures the roots get fully hydrated without sitting in standing water.
Let the orchid sit for 30 minutes to absorb moisture, then drain any excess water from the saucer. From now on, you'll water when the top layer of LECA feels dry to the touch—usually every 5-7 days, depending on humidity and temperature. I keep a small notebook by my setup to track watering days and note any changes in the plant's appearance.
☀️ Step 4: Position for Optimal Light and Airflow
Place your LECA orchid in a spot with bright, indirect light—think east-facing window or a few feet from a south window. Too much direct sun will scorch the leaves, while too little light slows growth. You'll know the light is right when the leaves stay a vibrant green without yellowing or browning at the edges.
Airflow is critical with LECA orchids. Place a small fan nearby on a low setting to create gentle movement—this mimics natural conditions and prevents rot. I position my fan so it blows across the orchid for about 1-2 hours daily. Watch for new root growth along the LECA surface; healthy roots will turn green or silver-gray as they absorb moisture.
⏰ Step 5: Monitor and Adjust for Long-Term Success
Check your orchid weekly for signs of stress. Yellowing leaves often mean overwatering, while wrinkled leaves signal underwatering. If you notice white, fuzzy growth on the LECA or roots, that's mold—rinse the pebbles immediately and adjust your watering frequency. Healthy orchids in LECA should have firm, plump leaves and roots that cling to the pebbles.
Every 2-3 months, give your LECA a thorough rinse to remove mineral buildup. I use a 50/50 mix of distilled water and white vinegar in my spray bottle for this—it's gentle but effective. After rinsing, let the LECA dry completely before repotting. This simple maintenance keeps your orchids thriving for years without soil.
Tips & tricks for perfect hydroponic orchid care
Here's what nobody tells you about keeping orchids thriving in LECA—these tricks make all the difference between survival and spectacular growth.
LECA Cleanliness: That initial rinsing in Step 1 is non-negotiable. Dust and debris on LECA can block airflow and trap moisture, creating the perfect conditions for mold. I take it a step further by soaking the pebbles in a bucket of water for 10 minutes before rinsing—this loosens any stubborn dust that might hide in the crevices. After rinsing, spread them on a clean towel to dry completely before repotting. This prevents any hidden moisture from causing root rot right from the start.
Root Contact Technique: In Step 2, the key is letting those orchid roots find their own way into the LECA. I've seen beginners pack extra pebbles around the roots, thinking they're helping—but this actually suffocates them. Instead, position the plant so the roots naturally drape over the edges. For extra security, I use a small piece of plastic mesh (like window screen) to gently hold the plant in place while still allowing roots to make contact with the pebbles below.
Watering Precision: The 30-minute absorption period in Step 3 is your opportunity to observe how your orchid drinks. If water drains too quickly (within 5 minutes), your container might be too large—orchids only need enough LECA to support their root system, not fill a giant pot. Conversely, if water pools after 30 minutes, you're overfilling. Aim for a container where the LECA level reaches about 2 inches below the rim after saturation. This gives roots plenty of surface area while preventing waterlogging.
Light and Airflow Balance: That 1-2 hours of daily airflow in Step 4 is perfect, but here's the secret: rotate your orchid every 2-3 days. Plants grow toward light, so one side will inevitably get more exposure. This ensures even growth and prevents lopsided development. I also adjust my fan position weekly to cover different sides of the plant—this mimics natural wind patterns and strengthens the stems.
Pro Tips for Grow Orchids In Leca
- Here's what nobody tells you about keeping orchids thriving in LECA—these tricks make all the difference between surv...
- LECA Cleanliness: That initial rinsing in Step 1 is non-negotiable. Dust and debris on LECA can block airflow and tra...
- Root Contact Technique: In Step 2, the key is letting those orchid roots find their own way into the LECA. I've seen ...
Frequently asked questions
How often should I water orchids in LECA?
Water your orchids in LECA when the top layer feels dry to the touch—usually every 3-5 days, depending on humidity and temperature. Overwatering is a risk, so always check moisture levels before adding water. A quick dip in water for 5-10 minutes (instead of soaking) keeps roots happy without soggy stress.
What if my orchid roots turn black or mushy?
Black or mushy roots are a red flag for rot, often caused by overwatering or poor drainage. Remove affected roots with sterilized scissors, repot in fresh LECA, and adjust your watering schedule. Ensure your container has drainage holes and avoid letting roots sit in standing water. With proper care, your orchid can bounce back!
Can I use tap water for LECA orchids?
Tap water is fine if it’s free of chlorine, fluoride, or heavy metals. If your water is treated, let it sit out for 24 hours to dissipate chlorine. For best results, use rainwater, distilled water, or filtered water to prevent mineral buildup in LECA. Your orchids will thank you with vibrant blooms!
How do I transition an orchid from soil to LECA?
Gently rinse off soil from roots with lukewarm water, then soak the orchid in a fungicide solution (like hydrogen peroxide, 3%) for 10 minutes to prevent pests/disease. Repot into LECA, ensuring roots are fully submerged in water for the first 24 hours. Gradually reduce water exposure over a week to acclimate the plant.
What’s the ideal temperature for LECA orchids?
Most orchids thrive in 60–80°F (15–27°C) during the day and a 10°F (5°C) drop at night to mimic their natural tropical environment. Avoid drafts or extreme heat—LECA doesn’t insulate like soil, so temperature fluctuations can stress roots. A small fan for airflow (without direct blasts) helps maintain consistency.
Wrapping up and next steps
Growing orchids in LECA is a rewarding journey that combines creativity with care—no soil required! 🌱 With the right setup, proper hydration, and a little patience, you’ll soon enjoy thriving orchids that bloom beautifully. Remember, consistency is key, and small adjustments will help you refine your technique over time.
Ready to take the next step? Experiment with different orchid varieties or even expand your LECA garden with other plants. Your green thumb is just getting started—keep nurturing it! 🌟