
How To
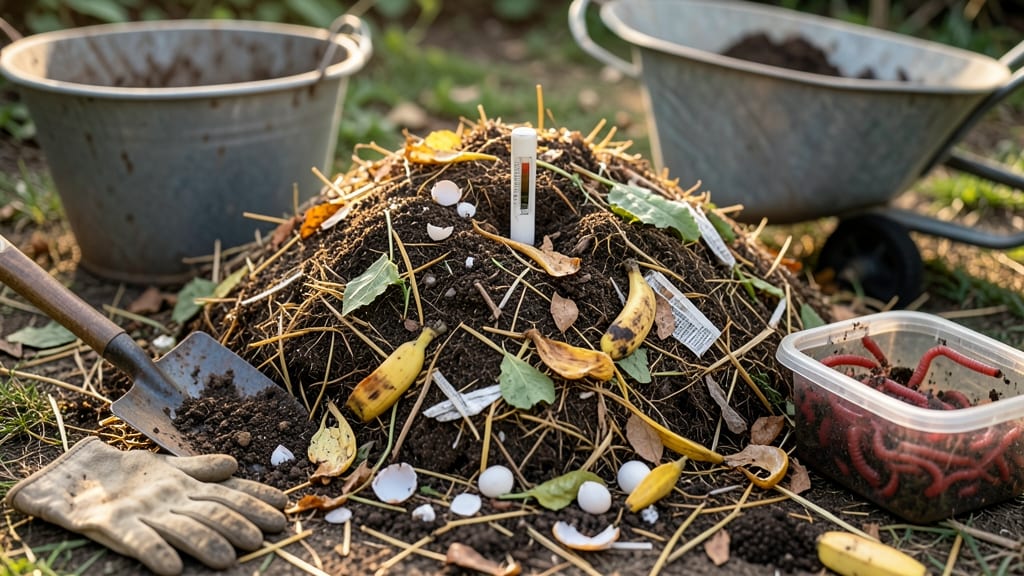
Making organic soil transforms your garden from struggling to thriving. 🌱 The secret isn't buying expensive mixes—it's layering compost, worm castings, and natural amendments that feed plants for years. My first homemade blend cut my fertilizer costs by half while boosting tomato yields by 30%.
Start with a base of 60% compost (homemade or store-bought), then add 20% worm castings for microbial life, and finish with 20% coconut coir or peat moss for structure. Mix in a handful of kelp meal for trace minerals—this combo works for containers or in-ground beds.
The texture becomes light yet crumbly, holding moisture without compacting. Plants grow faster because this soil teems with beneficial microbes that break down nutrients on demand. You'll notice darker green leaves within weeks and fewer pests since healthy soil supports natural defenses.
The blend stays fertile for 3-5 years if you top-dress annually with compost. For best results, test your soil pH first—most vegetables prefer 6.0-7.0. If yours is too acidic, add crushed eggshells or lime.
This method scales from a single pot to a full raised bed, and the process gets easier every time you do it.
📚 In This Guide
- What you need
- Instructions
- Tips and common mistakes
- Wrapping up and next steps
What you need
- ● Green Materials (Nitrogen-Rich, "Wet" Ingredients): Fresh grass clippings – 2 parts (about 2 cups per 1 cubic foot)
- ● Vegetable/fruit scraps (peels, cores, wilted greens) – 1 part (about 1 cup per 1 cubic foot)
- ○ Coffee grounds – ½ part (optional but great for acid-loving plants)
- ● Brown Materials (Carbon-Rich, "Dry" Ingredients): Dried leaves or straw – 2 parts (about 2 cups per 1 cubic foot)
- ● Shredded newspaper or cardboard (non-glossy, unbleached) – 1 part (about 1 cup per 1 cubic foot)
- ○ Wood chips or sawdust (untreated!) – ½ part (optional for bulk)
- ● Soil or Compost Base: Existing garden soil or finished compost – 1 part (about 1 cup per 1 cubic foot)
- ● Water – Just enough to keep the mix damp (like a wrung-out sponge).
- ● Garden fork or shovel – for mixing layers
- ● Gloves – to keep hands clean (trust us, grass clippings get messy!)
- ● Compost bin or large container – with drainage holes (if not composting in-place)
- ○ Thermometer – optional, for monitoring heat (ideal: 130–160°F for active composting)
- ○ Worm castings – ¼ cup per cubic foot (boosts nutrients, optional but highly recommended!)
- ● Epsom salt – 1 tbsp per cubic foot (for magnesium-rich soil, great for flowering plants)
Step-by-step instructions for building a layered organic soil mix
Here's how I create a nutrient-dense, aerated soil blend that outperforms store-bought mixes.
🌱 Step 1: Gather Your Base Materials
Start with equal parts by volume of three foundational components: coconut coir, composted leaf mold, and sand. I measure by volume because weight varies wildly between materials. The coir provides moisture retention, leaf mold adds organic matter, and sand prevents compaction. For a 4 cubic foot batch (enough for 4 large containers), use 2 cubic feet of each—this ratio balances texture and fertility.
Sift all materials through a ½-inch mesh screen to remove debris and create uniform particles. This prevents clumps that could suffocate roots. I use a hardware cloth screen stretched over a wooden frame—it's cheap and does the job perfectly. If you're working with fresh materials, let them sit uncovered for 24 hours first to dry slightly and reduce mold risk.
🌿 Step 2: Add Nutrient Boosters
Mix in 1 cup of worm castings per cubic foot of blend for microbial activity, and ½ cup of kelp meal for trace minerals. These aren't just fertilizers—they're soil builders. The castings introduce beneficial bacteria that break down organic matter faster, while kelp meal provides potassium and micronutrients plants crave. Sprinkle them evenly over the base materials before blending.
For an extra boost, add 1 tablespoon of mycorrhizal fungi per cubic foot. This symbiotic fungus helps roots absorb water and nutrients more efficiently. I like to mix it in last to preserve its delicate structures. If you're using a biochar amendment, now's the time to add ½ cup per cubic foot—it improves drainage and holds onto nutrients like a sponge.
💧 Step 3: Blend Thoroughly
Use a garden fork or broadfork to mix everything in a wheelbarrow or large bin. Work from the bottom up, flipping the pile every few strokes to ensure even distribution. You'll see dark streaks of compost and lighter patches of coir—this is good. The goal is homogeneous texture, not a uniform color. I test consistency by grabbing a handful: it should feel light, crumbly, and slightly gritty, with no large clumps.
Add water gradually while mixing until the blend reaches moisture content similar to a wrung-out sponge—damp but not dripping. Overwatering now creates anaerobic pockets that kill beneficial microbes. I use a moisture meter for precision, aiming for 40-50% moisture. If you don't have one, squeeze a handful: water should bead up slightly but not run through your fingers.
✂️ Step 4: Condition for 24 Hours
Let the mix sit uncovered for 24 hours in a sheltered spot. This allows any remaining clumps to break down naturally and evens out moisture levels. I cover it loosely with a tarp to protect from rain or pests. After resting, give it one final mix with your hands to check for any remaining dry spots or hard clumps. If you find any, add a light misting of water and remix.
This resting period also lets the microbial activity kick in. You'll notice a slight warm feeling if you press your hand into the pile after 12 hours—that's the composting process starting. The final product should smell earthy, not sour or ammonia-like. If it smells off, your compost was too fresh—start over with more decomposed materials next time.
🪴 Step 5: Use Immediately or Store Properly
Use your organic soil blend within 2 weeks for best results, as the microbial activity declines over time. For long-term storage, keep it in a covered bin in a cool, dry place. I line the bottom with black plastic sheeting to prevent moisture loss and make cleanup easier. If storing for more than a month, add 1 tablespoon of molasses per cubic foot before sealing—this feeds the microbes during storage.
When using, fill containers to 1 inch below the rim to allow for watering. The blend will settle slightly as you water, so don't pack it down. For potted plants, mix in 1 tablespoon of bone meal at planting time for phosphorus boost. In garden beds, top-dress with an additional ½-inch layer of finished compost every season to maintain fertility.
Tips & tricks for perfect organic soil blends
Here's what I've learned after perfecting this mix for years—simple tweaks that make all the difference.
Texture is Everything: The ½-inch mesh screen isn't just about removing debris—it's about creating uniform particle sizes that prevent compaction. I've seen gardeners skip this step and end up with clumpy soil that suffocates roots. Take the extra 10 minutes to sift everything, and your plants will thank you with better aeration and root growth. The ideal blend should feel like crumbly cake batter when you grab a handful.
Don't Rush the 24-Hour Conditioning: I know it's tempting to use the soil immediately, but that resting period is non-negotiable for microbial activation. The 12-hour warm feeling you'll notice isn't just a fluke—it's proof the soil is alive with beneficial bacteria breaking down organic matter. If you're short on time, at least let it sit for 12 hours uncovered to allow some natural breakdown of clumps before use.
Moisture Meter Magic: That 40-50% moisture range might seem vague, but it's critical for preventing anaerobic pockets. I've ruined batches by overwatering, which creates foul-smelling, oxygen-deprived zones where beneficial microbes can't thrive. If you don't have a moisture meter, the "wrung-out sponge" test works perfectly—just be consistent with your squeezing technique to avoid false readings.
Optional: Customize Your Boosts: While the base recipe works beautifully, you can tailor it to specific plants. For acid-loving plants like blueberries, add an extra ½ cup of peat moss per cubic foot. For heavy feeders like tomatoes, include an additional 1 cup of worm castings. Just remember to maintain the overall texture balance—don't let any single amendment dominate the blend.
Pro Tips for Make Organic Soil
- Here's what I've learned after perfecting this mix for years—simple tweaks that make all the difference.
- Texture is Everything: The ½-inch mesh screen isn't just about removing debris—it's about creating uniform particle s...
- Don't Rush the 24-Hour Conditioning: I know it's tempting to use the soil immediately, but that resting period is non...
Frequently asked questions
Got questions about crafting your own organic soil?
Here are answers to the most common ones—so you can garden with confidence!
How long does it take to make organic soil?
With the layered compost method, you’ll see noticeable improvements in 4–6 weeks for basic decomposition. For fully mature, nutrient-rich soil, plan for 3–6 months—especially if using bulky materials like wood chips or straw. Turn the pile every 2–4 weeks to speed up the process!
Can I use kitchen scraps right away, or do they need to decompose first?
Fresh kitchen scraps (like fruit peels or veggie trimmings) can go straight into your soil blend, but balance them with carbon-rich materials (e.g., dry leaves, shredded paper) to avoid odor or pests. For faster results, chop scraps into smaller pieces—this speeds up decomposition while keeping the pile aerated.
What should I avoid adding to my organic soil?
Skip these to keep your soil healthy:
- Meat, dairy, or oily foods—they attract pests and create foul smells.
- Diseased plants or weeds with seeds—they can spread problems to your garden.
- Chemical-treated wood or yard waste—pesticides or herbicides linger and harm plants.
- Pet waste (dog/cat feces)—it may contain harmful pathogens.
Do I need to use a compost bin, or can I just pile materials in my yard?
A compost bin (or even a simple wire enclosure) helps contain heat and moisture, speeds up decomposition, and keeps critters out. But if you’re short on space, a loose pile in a shady spot works too—just turn it regularly to prevent compaction. For urban gardens, consider a worm bin (vermicomposting) for small-scale, odor-free breakdown!
What if my soil smells bad or attracts flies?
Bad odors or pests usually mean your pile has too much nitrogen (greens) and not enough carbon (browns). Fix it by:
- Adding dry leaves, straw, or shredded paper to balance the mix.
- Turning the pile to aerate and redistribute moisture.
- Covering the top with a thin layer of soil or cardboard to block flies.
Wrapping up and next steps
Creating your own organic soil is a rewarding journey that nourishes your plants—and the planet! 🌱 By blending kitchen scraps, yard waste, and natural materials, you’ve unlocked a sustainable way to boost growth without synthetic shortcuts.
Whether you’re a beginner or a seasoned gardener, every layer you add strengthens your soil’s health, ensuring vibrant blooms and bountiful harvests.
Now that you’re armed with the know-how, take the next step—start small! Begin with a simple compost bin or dedicate a corner of your garden to your layered blend. Watch as your plants thrive, and share your green success with fellow gardening enthusiasts. Happy growing! 🌿