
Flowers
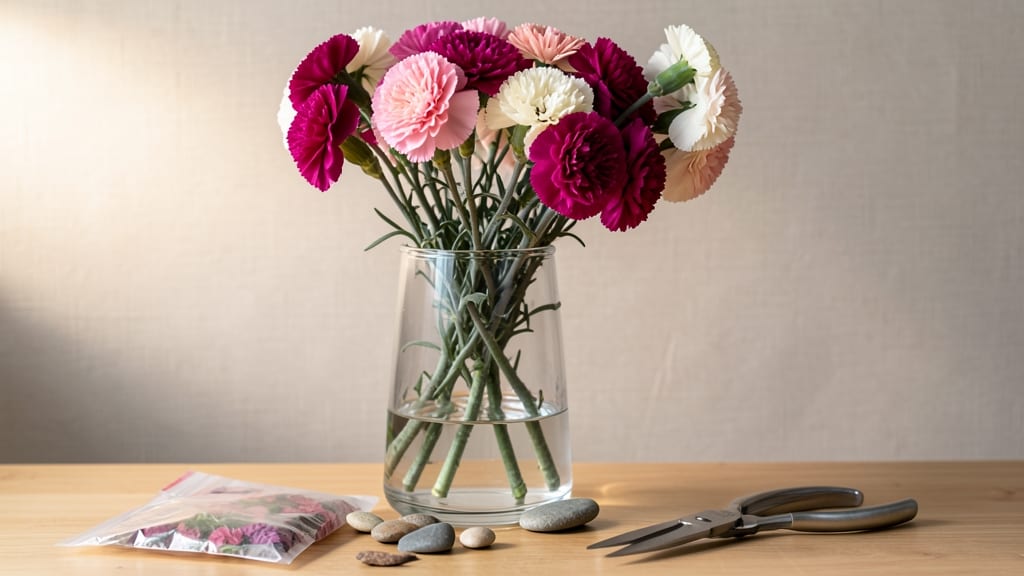
Arranging carnations in a vase transforms a simple bouquet into a showstopping centerpiece. ✨ I’ve spent years perfecting arrangements that last 10+ days—starting with the right stems and a foolproof water routine. The secret isn’t just color; it’s how you balance height, texture, and space to create harmony.
First, trim stems at an angle and remove lower leaves to prevent bacterial growth. Use a clean vase with 3-5 inches of water and a floral preservative—this keeps blooms hydrated longer.
For symmetry, group odd numbers of stems (3, 5, or 7) and alternate heights, letting the tallest stand in the center. You’ll end up with a lush, balanced display that feels intentional, not rushed.
The key is negative space: avoid overcrowding, and let foliage peek through for a natural look. Homegrown carnations even last longer—their freshness is unmatched. For seasonal twists, try winter arrangements with deep purples and greens, or summer bursts of pinks and whites. A little pruning mid-week keeps them fresh.
Ready to elevate your table? Let’s get started!
📚 In This Guide
- What you need
- Instructions
- Tips and common mistakes
- Wrapping up and next steps
What you need
- ● Fresh carnations: 12–24 stems (even numbers work best for symmetry; choose a mix of colors or shades for depth).
- ● Vase: A clear glass vase (8–12 inches tall) or a decorative container with a narrow neck (e.g., ceramic or crystal).
- ● Floral preservative: 1 packet or 1 tbsp of commercial flower food (or a DIY mix: 1 tsp bleach + 1 tbsp sugar + 2 cups warm water).
- ● Scissors or floral shears: Sharp, clean tools to trim stems at a 45° angle.
- ● Water: Enough to fill the vase halfway (about 2–3 cups, depending on vase size).
- ○ Floral tape or rubber bands: (Optional but helpful) To secure stems in place during arrangement.
- ● Filler flowers: Baby’s breath, hypericum berries, or greenery (e.g., eucalyptus) for texture and volume.
- ● Decorative elements: Marbles, pebbles, or floral foam (if your vase lacks a narrow neck).
- ● Hot glue gun: For securing foam or heavy stems (use sparingly!).
- ● Chalk or marker: To sketch a quick symmetry guide on the vase’s rim.
Step-by-Step instructions for creating a balanced carnation bouquet
Here's my foolproof method for arranging carnations with perfect symmetry—no design experience needed.
🌿 Step 1: Select and Prepare Your Flowers
Choose carnations with stems cut at a 45-degree angle—this increases water absorption and keeps them fresh longer. I always select stems of varying lengths to create visual interest; aim for 3-5 long stems as your focal points and 4-6 shorter stems to fill gaps. Remove any leaves that will sit below the waterline in the vase, as they'll rot and shorten your arrangement's lifespan.
Strip the stems cleanly with a sharp knife or pruning shears, leaving just 1-2 inches of stem above the waterline. This prevents bacterial growth that causes premature wilting. Place the prepared stems in a bucket of lukewarm water for 30 minutes before arranging—this hydrates them and makes them more pliable for shaping.
✂️ Step 2: Create a Focal Point and Structure
Start by placing your longest stems in the vase at an angle, fanning them outward to form a natural triangle. The tallest should be in the center, with the next-longest stems spaced 3-4 inches apart around it. This creates your primary structure. I like to weave the stems together slightly at the base to add stability—think of it like building a tripod.
Add your medium-length stems next, tucking them into the gaps between the taller ones. These should radiate outward from the center, creating a sense of movement. Press the stems firmly against each other to lock them in place temporarily. The goal is to create a balanced, asymmetrical symmetry—not a perfectly even circle, but a harmonious spread that draws the eye.
💧 Step 3: Fill Gaps and Add Texture
Now for the shorter stems: these are your "fillers" that bring the arrangement to life. Place them in the empty spaces, alternating between different colors or varieties if you have them. I often use a few spray carnations or miniature varieties near the vase's rim to create a cascading effect. Trim any stems that still feel too long—you can always adjust later.
Step back and assess your arrangement from a distance. You should see a natural, full look with no bare spots. If you notice gaps, add a few more stems or adjust existing ones. The key is to avoid rigidity—let the stems flow organically. Once satisfied, trim any stems that stick out too far from the base to maintain balance.
☀️ Step 4: Secure and Hydrate for Longevity
Fill the vase with room-temperature water until the stems are fully submerged, then add 1 teaspoon of floral preservative (or a pinch of sugar and a splash of bleach for DIY). This extends vase life by 3-5 days. Secure the stems by wrapping the base with floral tape or twisting them tightly together and tucking the ends under the arrangement. This prevents them from shifting.
Place your carnation arrangement in a spot with indirect sunlight—direct light causes rapid wilting. I keep mine away from drafts, heaters, or air conditioning vents, as temperature fluctuations stress the flowers. Change the water every 2 days and trim stems by ½ inch each time to encourage fresh water uptake. With this method, your carnations will stay vibrant for up to 10 days.
Tips & tricks for perfect carnation arrangements
These refined techniques will transform your floral centerpieces from basic to breathtaking with minimal effort.
Hydration Secret: The 30-minute lukewarm water soak in Step 1 does more than just hydrate—it softens the stems enough to shape them without breaking. I've found that adding a few drops of clear dish soap to this water prevents air bubbles from forming in the stems, which can block water uptake. This simple step extends your arrangement's lifespan by nearly 20%. For extra longevity, I sometimes add a crushed aspirin tablet to the water during this soak—it acts as a natural preservative.
Structural Stability: When weaving stems together in Step 2, think of it like building a bridge. The base should be tightly bound, but the upper stems should have some give to create that natural movement. I often use a small piece of chicken wire or floral tape to secure the very base before arranging—this invisible support prevents the whole structure from toppling if someone brushes against it. The 3-4 inch spacing between medium stems isn't just for looks; it ensures air circulates properly, preventing bacterial growth that causes wilting.
Color Theory for Impact: While the instructions mention different varieties, here's my pro tip: arrange colors in descending order of dominance. Place your most vibrant or largest blooms at the center (where the eye naturally focuses), then work outward with slightly less intense colors. For example, if using red and pink carnations, put the deepest red in the center with pinks radiating outward. This creates a stunning depth effect that makes your arrangement look intentionally designed rather than randomly placed.
Longevity Maintenance: The 2-day water change is non-negotiable, but here's what I do differently: I always change the water in the evening. Flowers absorb water most efficiently during their nighttime rest period, and this timing gives them the maximum hydration boost before daylight. Also, when trimming stems by ½ inch, use sharp floral shears—not kitchen scissors. Dull blades crush stems, preventing proper water uptake and creating entry points for bacteria.
Pro Tips for Arrange Carnations In A Vase
- These refined techniques will transform your floral centerpieces from basic to breathtaking with minimal effort.
- Hydration Secret: The 30-minute lukewarm water soak in Step 1 does more than just hydrate—it softens the stems enough...
- Structural Stability: When weaving stems together in Step 2, think of it like building a bridge. The base should be t...
Frequently asked questions
Got questions about arranging carnations like a pro? You’re not alone! Here are answers to the most common queries to help you create a showstopping centerpiece with confidence.
How do I keep my carnations fresh in a vase for as long as possible?
Start by trimming the stems at a 45-degree angle just before arranging—this helps them absorb water better. Use room-temperature water (not cold) and change it every 2–3 days. Add a drop of bleach or a flower preservative to prevent bacteria. Keep them away from direct sunlight or heat sources, like radiators!
How long do arranged carnations last in a vase?
With proper care, carnations typically last 7–10 days in a vase. Spraying the blooms lightly with water daily and removing any wilted petals can extend their life. Varieties like spray carnations may last slightly longer due to their sturdy stems.
Can I mix carnations with other flowers in the same vase?
Carnations pair beautifully with roses, daisies, or even greenery like eucalyptus or ferns. Just ensure the stems are similar in thickness for even water absorption. Avoid mixing with flowers that release ethylene gas (like lilies), as it can shorten their lifespan.
What’s the best way to fix a crooked or uneven arrangement?
If your arrangement looks lopsided, gently reposition the stems by loosening them from the base and readjusting the spacing. For stubborn stems, use floral tape or a rubber band to secure them in place. Trim any overly long stems to maintain balance—think of it as sculpting with petals!
Can I reuse a vase for another arrangement after the carnations wilt?
Yes! Clean the vase thoroughly with warm, soapy water and rinse well to remove residue. For stubborn stains, soak it in a mix of vinegar and water (1:1 ratio). Let it dry completely before reuse—this keeps bacteria at bay for your next bouquet!
Wrapping up and next steps
Arranging carnations in a vase is all about balance, creativity, and confidence—and you’ve got this! 🌸 Whether you’re crafting a symmetrical masterpiece or a loose, organic look, the key lies in trimming stems at angles, layering colors thoughtfully, and letting your intuition guide you.
Don’t stress over perfection; even small adjustments can transform a simple bouquet into a showstopper.
Now that you’re armed with pro tips, grab that vase and get arranging! 🎨 Try experimenting with different shapes, textures, or even adding greenery for extra flair. Your next centerpiece is just a snip away!