
Tools
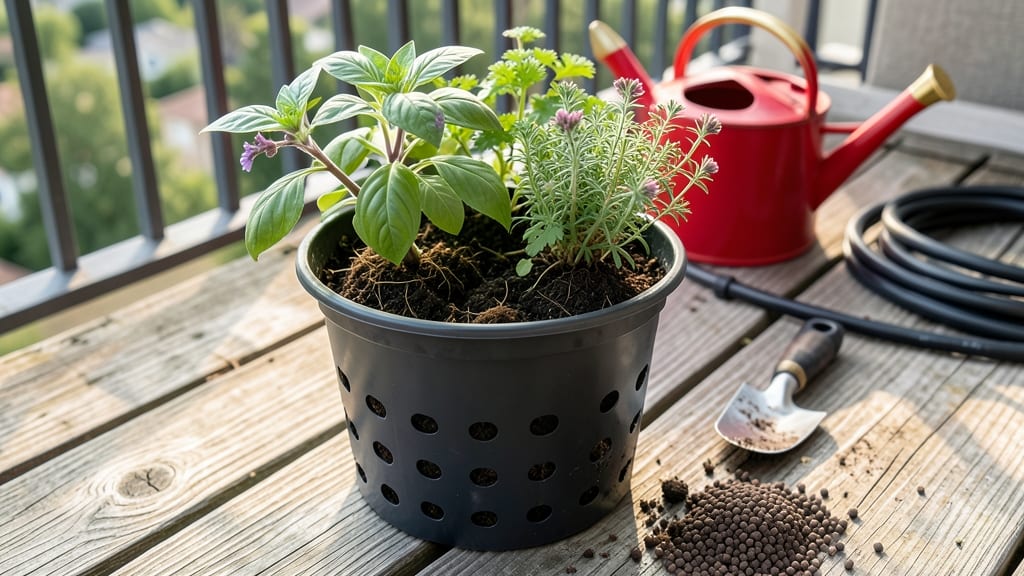
Building a bucket garden changed how I grow food in my tiny apartment. 🌱 No yard? No problem. These stackable planters turn 5-gallon buckets into a thriving vertical garden that fits anywhere—balcony, patio, or even a sunny windowsill.
You’ll need just five things: food-grade buckets (with lids for rain protection), drill, screws, potting mix, and a handful of your favorite plants. Herbs like basil and parsley thrive here, but you can grow tomatoes, peppers, or even flowers too.
The key is drilling drainage holes—skip this, and your plants will drown faster than you can water.
Within weeks, you’ll watch roots spread through the soil, leaves turn vibrant green, and your harvest grow right outside your door. The best part? Move the whole system when seasons change—no digging, no mess, just fresh soil and new growth every time.
Perfect for renters, small spaces, or anyone tired of struggling with traditional gardens. Let’s get those buckets planted—your future self will thank you for the fresh herbs and veggies growing at eye level.
📚 In This Guide
- What you need
- Instructions
- Tips and common mistakes
- Wrapping up and next steps
What you need
- ● 5-gallon buckets: 5–10 buckets (clean, food-grade plastic with drainage holes or a drill to add them). Avoid treated wood or metal.
- ● Drill with ½-inch bit: For creating drainage holes (if buckets don’t have them).
- ● Drill bit or screwdriver: To make overflow holes near the top of each bucket (¼-inch diameter).
- ● Potting soil: 1–2 cubic feet per bucket (lightweight, well-draining mix like a 60/40 blend of peat moss and perlite).
- ● Gravel or pebbles: 1–2 cups per bucket (for drainage at the bottom).
- ● Plants or seeds: Choose compact varieties (e.g., lettuce, herbs, cherry tomatoes, or strawberries).
- ● Watering can or hose with a gentle spray nozzle: For even moisture without overflow.
- ○ Bucket stacker kit: Optional (plastic or metal brackets to secure buckets vertically).
- ○ Level: Optional (to ensure even stacking for stability).
- ○ Saucer trays or drip pans: Optional (to catch runoff and recycle water).
- ○ Slow-release fertilizer: Optional (like osmocote pellets for nutrient boosts).
- ○ Landscape fabric: Optional (to line buckets and prevent soil from washing out).
- ○ Paint or marker: Optional (to label buckets by plant type).
Step-by-Step instructions for building a stackable bucket garden
Here's how I create a sturdy, space-saving bucket garden system that fits any balcony or patio.
🪴 Step 1: Select and Prepare the Buckets
Choose 5-gallon plastic buckets with lids (the lids become saucers when flipped upside down). Drill 4-6 drainage holes in the bottom of each bucket using a 1/4-inch bit—this prevents root rot by allowing excess water to escape. I like to place the holes in a circular pattern around the edges so water drains evenly.
Clean the buckets thoroughly with soapy water and a scrub brush to remove any manufacturing residue. Rinse well and let them dry completely before adding soil. If using painted or decorative buckets, ensure the paint is non-toxic—some paints can leach chemicals into the soil and harm plants.
☀️ Step 2: Add Drainage Layers and Potting Mix
Place a 2-inch layer of gravel or broken pottery at the bottom of each bucket. This layer ensures water drains freely and prevents soil from clogging the drainage holes. I use river rocks because they’re lightweight and won’t decompose over time like organic materials might.
Fill the remaining space with a high-quality potting mix—avoid garden soil, which compacts and suffocates roots. I blend 2 parts potting mix with 1 part perlite for extra aeration. Leave about 1 inch of space at the top of each bucket to accommodate watering without spilling.
🌱 Step 3: Plant Your Seeds or Transplants
Dig a hole in the center of each bucket twice as wide as the root ball of your plant. For seeds, follow the packet instructions for depth—typically ¼ to ½ inch below the soil surface. Gently press the soil around the seed or transplant to remove air pockets, which can cause wilting.
If planting multiple seeds, space them 2-3 inches apart to avoid overcrowding. Water lightly after planting to settle the soil. I like to use a spray bottle for seeds to avoid displacing them, while transplants can handle a deeper watering to help them establish roots.
💧 Step 4: Stack and Position for Optimal Growth
Stack the buckets in a stable arrangement, ensuring the heaviest or largest plants are at the bottom. Use the bucket lids as saucers to catch runoff and keep your space clean. Place the stack in a location with at least 6 hours of sunlight daily—most vegetables and herbs thrive in full sun. South- or west-facing spots work best.
Rotate the buckets a quarter turn every few days so plants grow evenly toward the light. You’ll notice leggy growth if they’re stretching toward one side—this is your cue to adjust their position. For shade-loving plants like lettuce or spinach, partial shade is fine, but sun-lovers like tomatoes or peppers will need more light.
⏰ Step 5: Water and Maintain Consistently
Water each bucket deeply once a week, allowing water to run through the drainage holes until it appears in the saucer below. Adjust frequency based on weather—buckets dry out faster in hot, dry conditions. I check moisture by sticking my finger 1 inch into the soil; if it feels dry, it’s time to water.
Fertilize every 4-6 weeks with a balanced liquid fertilizer (like 10-10-10) diluted to half strength. Over-fertilizing can burn roots in confined spaces, so less is often more. Watch for pests like aphids or spider mites—buckets can become hotspots for infestations, so inspect leaves regularly and treat early with neem oil if needed.
Tips & tricks for perfect stackable bucket gardens
Here's what nobody tells you about creating a thriving vertical garden that actually works.
Drainage Design: When drilling those 4-6 drainage holes in Step 1, space them evenly around the edges—not just clustered in one spot. Uneven drainage can cause water to pool in one corner, leading to root rot. I also recommend using a 1/4-inch bit and making the holes slightly larger than the gravel pieces you'll use. This prevents clogging over time, which is a common issue with smaller holes.
Bucket Stability: In Step 4, when stacking your buckets, place the heaviest containers at the bottom and distribute weight evenly. I've seen wobbly stacks topple after just a few days—especially when watered. For extra stability, consider adding a small weight like a brick inside the bottom bucket or using non-slip mats between stacked buckets. This is particularly important if you're growing heavy plants like tomatoes.
Soil Mix Secrets: The 2:1 ratio of potting mix to perlite in Step 2 is perfect for most plants, but for heavy feeders like peppers or eggplants, I add a handful of worm castings to the mix. This gives them a nutrient boost without overloading the confined space. Just be sure to mix it thoroughly so you don't create nutrient pockets that can burn roots. The perlite should make up about 20% of your mix—don't skimp on this aeration component.
Sunlight Strategy: That 6-hour sunlight requirement in Step 4 can be tricky in apartments with limited windows. If your space only gets morning or afternoon sun, rotate your buckets daily to give plants equal exposure. For shade-loving plants like lettuce, you can actually extend your growing season by placing them in the shadiest spot during peak summer heat. The key is monitoring plant health—wilting leaves mean they're not getting enough light, while yellowing can indicate too much.
Pro Tips for Build A Bucket Garden
- Here's what nobody tells you about creating a thriving vertical garden that actually works.
- Drainage Design: When drilling those 4-6 drainage holes in Step 1, space them evenly around the edges—not just cluste...
- Bucket Stability: In Step 4, when stacking your buckets, place the heaviest containers at the bottom and distribute w...
Frequently asked questions
Got questions about bucket gardening?
Here are answers to the most common ones to help you grow with confidence—no green thumb required!
What’s the best material for DIY bucket gardens?
Use 5-gallon food-grade buckets (like those from paint or hardware stores) for durability and drainage. Avoid treated wood or plastic without drainage holes—roots need airflow! For aesthetics, repurpose clean, sturdy containers like ceramic pots or even old bathtubs (with holes drilled).
When is the best time to start a bucket garden?
Plant in spring or early summer after the last frost (check your local frost dates). For warm-weather crops like peppers or tomatoes, wait until soil temps hit 60°F+. If you’re in a mild climate, you can start year-round with shade-loving greens or herbs!
How often should I water my bucket garden?
Buckets dry out faster than ground soil. Water daily in hot weather (morning is best) and check moisture by sticking your finger 1–2 inches deep. Add 1–2 inches of mulch (like straw) to retain moisture. Overwatering? Ensure buckets have drainage holes to prevent root rot!
Can I grow anything in a bucket garden?
Yes! Try herbs (basil, mint), greens (lettuce, spinach), tomatoes, peppers, or strawberries. Avoid large root veggies (like potatoes or carrots) unless you use deep buckets (18"+). For heavy feeders (tomatoes), mix compost or slow-release fertilizer into the soil.
How do I keep pests out of my bucket garden?
Prevent pests with physical barriers: Use fine mesh over drainage holes or elevate buckets. For bugs like aphids, spray with neem oil or soapy water. Encourage beneficial insects (like ladybugs) by planting companion herbs (e.g., marigolds). Rotate crops yearly to disrupt pest cycles!
What do I do if my plants look wilted or unhealthy?
Check for 3 common issues:
- Underwatering: Wilting leaves? Water deeply and add mulch.
- Overwatering: Yellow leaves + mushy stems? Let soil dry slightly and ensure drainage.
- Nutrient deficiency: Pale leaves? Mix in balanced fertilizer or compost.
If pests are the culprit, isolate the plant and treat with organic sprays.
Wrapping up and next steps
Building a bucket garden is a game-changer for small spaces—it’s simple, space-efficient, and packed with potential! 🌱 Whether you’re growing herbs, veggies, or flowers, this DIY project proves you don’t need a yard to enjoy fresh, homegrown goodness.
With just a few supplies and a little creativity, you’ve got a thriving vertical garden ready to go.
Now that you’re inspired, take the next step: grab your buckets, pick your plants, and start stacking! Share your progress or ask questions in the comments—we’d love to see (and help with) your green thumb journey. Happy gardening!