
Tools
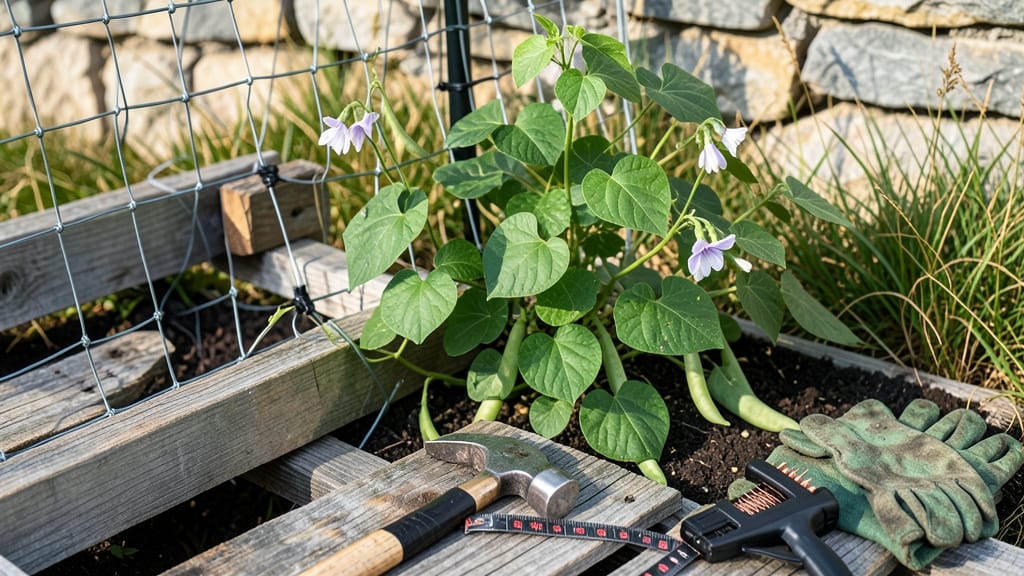
That $20 trellis how to build a cheap trellis transformed my tiny patio into a vertical jungle. 🌿 The best part? It took me less than an hour to build with materials I already had lying around.
No fancy tools, no complicated cuts—just sturdy support that lets vines climb like they own the place.
The secret is using 2x4s for the frame and chicken wire or bamboo stakes for the climbing surface. For roses, go tall with a 6-foot frame; for cucumbers or beans, keep it 4 feet and wider. My first attempt wobbled, but adding diagonal braces fixed that forever.
You'll end up with a customizable structure that doubles your growing space without breaking the bank. The bamboo version I built last year still stands strong after two growing seasons, and the cost? Under $15 for all materials.
Works for any garden style—modern, cottage, or urban. Here's exactly how to make yours without special skills or expensive tools.
📚 In This Guide
- What you need
- Instructions
- Tips and common mistakes
- Wrapping up and next steps
What you need
- ● Wooden stakes or posts (4–6): 2x4s (2–4 ft long) or bamboo poles (1–2 inches in diameter). Budget tip: Check thrift stores or repurpose old fence posts!
- ● Horizontal supports (2–3): 1x2 or 2x2 lumber (6–8 ft long), cut to fit your trellis width.
- ○ Trellis lattice or mesh (optional but recommended): Chicken wire, plastic lattice sheets, or even old window screens (cut to size).
- ● Galvanized wire or zip ties: For securing lattice/mesh to the frame.
- ● Wood screws or nails: 1.5–2.5 inches long (galvanized for outdoor use).
- ● Hacksaw or handsaw (for cutting wood)
- ● Drill/driver or hammer
- ● Measuring tape
- ● Pencil (for marking cuts)
- ○ Level (optional but helpful for straight lines)
- ● Concrete mix or heavy rocks: To anchor stakes for extra stability.
- ● Paint or stain: For a polished look (if using wood).
- ● Decorative lattice: Picket-style wood or metal panels for a fancier vibe.
Step-by-Step instructions for building a sturdy DIY trellis
Here's how I build a budget-friendly trellis that lasts seasons—no fancy tools or expensive materials required.
🪴 Step 1: Gather Materials and Measure Your Space
For a 4-foot tall trellis (enough for vining plants like cucumbers or beans), you'll need two 6-foot wooden stakes (2x2 or 2x3 lumber works perfectly) and four 4-foot horizontal slats (1x2 or 1x3). I use leftover wood from deck projects or buy rough-cut lumber from a salvage yard to keep costs under $15. Measure the width of your planting area—3-4 feet is ideal for most garden beds.
Mark the height of each horizontal slat on your stakes at 12 inches, 24 inches, and 36 inches from the bottom. This creates three evenly spaced rungs for vines to climb. Use a pencil to make light but visible marks—you'll be sanding later anyway. Here's the thing: if your stakes are shorter than 6 feet, adjust the slat heights proportionally. For example, 5-foot stakes would get marks at 10 inches, 20 inches, and 30 inches.
✂️ Step 2: Cut and Sand All Pieces
Cut your stakes to your desired height (I like 4 feet for most garden applications) and your horizontal slats to the width of your planting area. A hand saw or reciprocating saw works fine—no need for a fancy miter saw. Sand all edges and surfaces with 80-grit sandpaper first to remove splinters, then switch to 120-grit for a smooth finish. This step prevents splinters in your hands and protects vines from rough edges.
I always sand outside to avoid dust everywhere. Run your fingers over each piece—if you feel any roughness, go back with the sandpaper. Pro tip: Wipe down the wood with a damp cloth after sanding to remove dust. This ensures your finish (if you choose to stain or paint) will last longer. If you're skipping finish, the sanding alone prevents rot from splinters embedded in the wood.
💧 Step 3: Assemble the Trellis Frame
Lay two stakes parallel on the ground, about 3-4 feet apart, with the marked lines facing up. Place the first horizontal slat between them at the 12-inch mark and secure it with two 3-inch deck screws (or galvanized nails if you prefer). I use a cordless drill with a 1/4-inch bit—it's faster than a hammer and gives you more control. Angle the screws slightly downward into the stakes for extra stability.
Repeat with the remaining slats at 24 inches and 36 inches. For extra strength, add a diagonal brace between the bottom of one stake and the top of the opposite stake using a 4-foot scrap piece of wood. This prevents the trellis from wobbling when heavy vines climb. Test the structure by gently pushing the top—it should feel rigid, not flexible. If it sways, add another screw to each joint.
☀️ Step 4: Install and Secure in Your Garden
Dig two holes at your planting site, 6-8 inches deep and 2-3 inches wider than your stakes. This ensures stability without needing concrete. Place the trellis in position, then backfill the holes with soil, tamping firmly every 4 inches to eliminate air pockets. For windy areas, tie the stakes to existing garden posts with zip ties or soft garden twine—this keeps the trellis upright even when vines are heavy with fruit.
Here's where most people go wrong: they skip securing the base. If your trellis leans after the first strong wind, your vines will struggle. I like to add two short wooden stakes driven into the ground at a 45-degree angle against the main trellis legs. This creates a buttress effect, making the structure nearly unmovable. Water your plants immediately after installation—they'll appreciate the stable support right away.
🌱 Step 5: Add Finishing Touches for Longevity
Brush on outdoor wood sealant or linseed oil to protect the wood from moisture and rot. I use a natural linseed oil because it's non-toxic and penetrates deeply. Apply with a wide paintbrush, working in the direction of the wood grain. Let it dry for 4-6 hours before planting nearby. This step extends the trellis's life by 2-3 seasons—especially important if you're reusing materials.
For extra durability, wrap the bottom 6 inches of each stake with plastic tree guard or aluminum foil to prevent rot from soil moisture. This is the part that always fails first if left untreated. Once your trellis is in place, train vines by gently weaving them through the slats as they grow. You'll see them latch on within 2-3 weeks, creating a natural lattice that supports both the plant and your harvest.
Tips & tricks for building a sturdy DIY trellis
Here's what I've learned after building trellises for years—these small details make all the difference between a flimsy structure and one that lasts seasons.
Material Selection: When choosing your 2x2 or 2x3 lumber, look for straight, dry wood without cracks or knots. Cedar or redwood are naturally rot-resistant, but even pine will work if properly sealed. I've found that 1x2 slats are ideal—they're wide enough for vines to grip but light enough to handle easily. If you're using reclaimed wood, inspect each piece for hidden damage that might weaken the structure over time.
Precision Marking: In Step 1, when marking your 12-inch, 24-inch, and 36-inch lines, use a level to ensure they're perfectly horizontal. I like to make two parallel lines at each mark—one for the top edge of the slat and one for the bottom. This creates a visual guide when positioning your slats during assembly. A slight misalignment can create weak spots that wobble under heavy vines.
Assembly Stability: The diagonal brace in Step 3 is non-negotiable for windy areas. I've seen trellises collapse after just one strong gust because they lacked this reinforcement. For extra security, use 3-inch deck screws at each corner joint—two screws per connection is the absolute minimum. If you're using nails, pre-drill holes to prevent splitting, especially with softer woods like pine.
Installation Foundation: When digging your 6-8 inch deep holes in Step 4, don't just eyeball the width. Your holes should be 2-3 inches wider than your stakes to prevent rocking. I pack the soil in layers, tamping firmly every 4 inches—this creates a solid base that won't settle unevenly over time. For particularly windy locations, consider adding a concrete footing at the base of each stake for maximum stability.
Pro Tips for Build A Cheap Trellis
- Here's what I've learned after building trellises for years—these small details make all the difference between a fli...
- Material Selection: When choosing your 2x2 or 2x3 lumber, look for straight, dry wood without cracks or knots. Cedar ...
- Precision Marking: In Step 1, when marking your 12-inch, 24-inch, and 36-inch lines, use a level to ensure they're pe...
Frequently asked questions
Got questions about building a budget-friendly trellis? You’re not alone! Here are answers to the most common concerns—from timing to troubleshooting—to help you DIY with confidence.
What’s the best time of year to build a trellis?
Plant your trellis before your climbing plants (like cucumbers or beans) start growing—typically in early spring (March–April in most climates). If you’re using it for vines like grapes or kiwi, install it in late winter so plants have time to climb as they grow. For winter squash or pumpkins, a late-spring setup works too!
Can I reuse materials like old fencing or pallets?
Repurposing materials like wooden pallets, scrap lumber, or even old fencing can slash costs. Just check for sturdy, untreated wood (avoid chemically treated lumber near edible plants). Sand rough edges, reinforce weak spots with screws or brackets, and seal with non-toxic paint if needed. Pro tip: Check local "free stuff" groups or construction sites for discarded materials!
How do I keep my cheap trellis from collapsing under heavy vines?
Stability is key! Use 4x4 posts buried 1–2 feet deep or anchor your trellis with stakes and twine for wind resistance. For taller structures, add diagonal braces between posts. If using lightweight materials like PVC pipes, secure them tightly with zip ties or metal straps. Monitor growth: Prune vines if they become too dense or risk toppling the frame.
What plants work best with a DIY trellis?
Trellises excel with climbing or sprawling plants like:
- Vegetables: Cucumbers, pole beans, peas, squash, and tomatoes (indeterminate varieties).
- Fruits: Grapes, kiwi, passionfruit, and even strawberries (for vertical gardens).
- Flowers: Morning glories, clematis, or sweet peas.
What if my trellis leans or wobbles after assembly?
Don’t panic! First, check if the posts are uneven or not buried deep enough. Dig deeper or add support stakes. For wobbly frames, tighten all connections (screws, knots, or ties) and add cross-bracing between posts. If using wire mesh, ensure it’s taut and secured at the top and bottom. A quick hammer test (tap posts gently) can reveal hidden instability.
Wrapping up and next steps
Building a sturdy trellis on a budget is easier than you think! With just a few simple materials and a little creativity, you’ve got a functional, under-$20 climbing support ready to elevate your garden.
Whether you’re training vines, growing flowers, or saving space, your new trellis will make gardening even more rewarding.
Now that you’re equipped with the know-how, grab those tools and get building! 🌱 Next, put your trellis to work by choosing the perfect plants—like cucumbers, beans, or roses—to climb and thrive. Happy gardening!