
How To
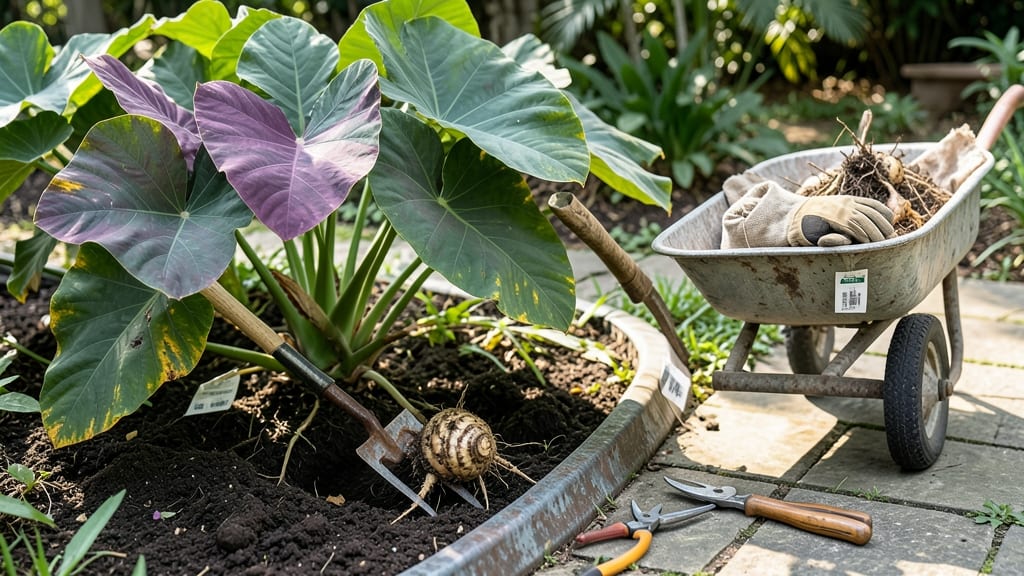
Frost is creeping in, and your elephant ears won’t survive it. 🌿 Digging up these dramatic foliage plants in fall isn’t just about saving them—it’s about reviving their roots for next year’s bold statement in the garden.
I’ve learned the hard way that timing and technique make all the difference between thriving tubers and sad, mushy losses.
The secret starts with tools—a sharp spade, gloves, and a wheelbarrow for hauling those heavy tubers. You’ll also need a dry, cool spot (like a garage or basement) to store them through winter.
Most gardeners in USDA zones 7-10 need to dig before the first frost, but even in warmer climates, dormant tubers appreciate a break from the ground.
When you dig, slice the leaves back to 4-6 inches and brush off soil to check for rot. Healthy tubers feel firm and papery—discard any that’re soft or shriveled.
Store them in dry peat moss or shredded leaves in a breathable container, and they’ll wake up ready to grow again in spring.
Common mistakes? Digging too late (frost kills tubers) or storing them too wet (rot sets in). Pro tip: Label your tubers now—next year, you’ll thank yourself when those giant leaves return to steal the show. Here’s how to do it right the first time.
📚 In This Guide
- What you need
- Instructions
- Tips and common mistakes
- Wrapping up and next steps
What you need
- ● Garden fork or digging spade – A sturdy heavy-duty fork (18–24” long) or a wide, sharp-edged spade (12–16” blade) to loosen soil and lift roots without damage.
- ● Garden gloves – Thick, reinforced gloves (waterproof preferred) to protect hands from sharp soil and rhizome edges.
- ● Pruners or sharp knife – For trimming dead foliage and overgrown rhizomes (sterilized with rubbing alcohol).
- ● Wheelbarrow or large bucket – A 5-gallon capacity (or larger) to haul dug-up tubers and debris.
- ● Burlap sacks or cardboard boxes – For storing rhizomes (avoid plastic—it traps moisture!).
- ● Hose or watering can – To rinse soil from roots before storage.
- ● Labeling tags & marker – If storing multiple varieties, label sacks to avoid mix-ups!
- ● Rhizome knife – A clean, serrated knife for dividing large tubers (if propagating).
- ● Disinfectant spray – 10% bleach solution to spray tools between cuts and prevent disease.
- ● Compost bin – For disposing of old leaves (skip if diseased).
- ● Cold frame or insulated container – If storing in freezing climates (below 20°F/-7°C).
- ● Garden twine – To secure burlap sacks if storing outdoors.
Step-by-Step instructions for digging up elephant ears in fall
Here’s the foolproof method I use every autumn to rescue my elephant ears before frost—no root damage, no stress, and no lost plants.
🌿 Step 1: Time It Right for Optimal Recovery
Wait until after the first hard frost but before the ground freezes solid. This usually means late October or early November, depending on your zone. You’ll know it’s time when the leaves start yellowing and wilting—nature’s signal that the plant is redirecting energy to its roots. Digging too early stresses the plant, while waiting too late risks frozen, brittle roots.
I mark my calendar 4-6 weeks before the average first frost date in my area. This gives me a window to work without rushing. If you’re unsure, check the weather forecast for a 3-day stretch of 50°F or warmer—ideal for handling the roots without shocking them.
🪴 Step 2: Gather Tools and Prep the Work Area
You’ll need a sharp shovel or garden fork, gloves (elephant ear leaves are abrasive), and a wheelbarrow or tarp to transport the roots. Clear a 3-foot radius around the plant to work comfortably. I like to lay down a thick layer of cardboard under the plant first—this protects the roots from the shovel’s edge and makes lifting easier later.
If you’re digging multiple plants, organize your tools in order of use: shovel first, wheelbarrow second, gloves last. Trust me, you don’t want to be fumbling for gloves while standing in a muddy hole with wet leaves clinging to your hands. Keep a bucket of water nearby too—you’ll want to rinse the roots clean immediately after digging.
✂️ Step 3: Cut Back the Foliage and Loosen the Soil
Start by cutting the stems down to 6 inches above the soil with clean pruners. This reduces weight and prevents the heavy leaves from tearing roots when you lift. Next, use your shovel to score the soil in a 12-inch radius around the plant, about 3 inches deep. This loosens the root ball without severing it—think of it like drawing a circle around a pizza slice.
Gently rock the shovel back and forth to separate the root ball from the surrounding soil. If the plant is large, you might need to dig a trench around the edges first. The goal is to lift the entire root system intact—even a few broken roots can set back next year’s growth. I tap the shovel’s base lightly against the soil to encourage the root ball to release cleanly.
💧 Step 4: Lift, Rinse, and Inspect the Roots
Once the soil is loosened, slide your shovel under the root ball and lift straight up. If the plant resists, wiggle it gently side to side—never pull or twist. Place the root ball on your tarp or cardboard, then rinse it thoroughly with water to remove old soil. This helps you spot any rotted or damaged roots (they’ll be mushy or blackened) that need trimming.
Use sterilized pruners to snip away any dead or broken roots, but leave the healthy ones intact. A healthy root system will look firm, white, and slightly fibrous. If you find large, woody roots, don’t panic—these are normal and will regrow quickly in spring. Let the roots air-dry for 1-2 hours in a shaded spot before storing.
🪴 Step 5: Store Roots for Winter Revival
Fill a clean, breathable container (like a cardboard box lined with peat moss or shredded newspaper) with dry, sterile potting mix or sand. Bury the roots horizontally, spacing them 3-4 inches apart to prevent rot. Label the container with the variety and date—next year’s growth depends on it. Store in a cool, dark place (like a garage or basement) where temperatures stay 40-50°F.
Check the roots monthly for signs of rot (smelly, slimy spots) or drying out (brittle, shriveled). If you notice either, adjust your storage conditions immediately. In late winter, reduce watering—the roots are dormant and won’t need much moisture. By early spring, you’ll see new shoots pushing through the soil, signaling it’s time to replant.
Tips & tricks for perfect elephant ear root revival
Between us, I’ve dug up elephant ears for years—and let’s just say I’ve learned what not to do. These tricks will help you avoid the rookie mistakes that lead to broken roots or winter losses.
Timing is Everything: The 4-6 week window before frost isn’t just a suggestion—it’s critical. If you dig too early, the plant will still be actively growing and vulnerable to damage. If you wait too late, the roots become brittle and break easily. I check the weather app for that 3-day stretch of 50°F or warmer right before I dig. This gives me the perfect balance of cool enough to handle the roots without shocking them, but warm enough to work comfortably.
Tool Prep Prevents Disaster: That sharp shovel isn’t just for digging—it’s for protecting your roots. Before you start, run your shovel through a 10-minute soak in a 1:10 bleach-to-water solution to sterilize it. I also keep a small spray bottle of water nearby to mist the roots as I work. This keeps them from drying out while you’re digging, which makes lifting the root ball much easier. Don’t skip the gloves either—elephant ear leaves are like sandpaper, and you’ll thank me later when your hands aren’t raw.
Root Inspection is Non-Negotiable: When you’re rinsing those roots in Step 4, take your time. Healthy roots should be firm and white, not soft or blackened. I use a toothpick to gently probe any questionable spots—if it pierces easily, trim it. The 1-2 hour drying time isn’t just about moisture; it’s your chance to do a final inspection. Any roots that feel slimy or smell funky need to go. Trust me, a little extra time now saves you from rotten surprises in spring.
Storage Hack for Busy Gardeners: If you’re storing multiple varieties, use smaller containers (like gallon-sized ziplock bags) for each type. Label them with both the variety name and the date—next spring, you won’t believe how helpful this is when you’re replanting. I also add a small handful of dry sand to the bottom of each container before adding the roots. This improves drainage and prevents rot during those monthly checks. The goal is to mimic the plant’s natural dormant conditions as closely as possible.
Pro Tips for Dig Up Elephant Ears In Fall
- Between us, I’ve dug up elephant ears for years—and let’s just say I’ve learned what not to do. These tricks will hel...
- Timing is Everything: The 4-6 week window before frost isn’t just a suggestion—it’s critical. If you dig too early, t...
- Tool Prep Prevents Disaster: That sharp shovel isn’t just for digging—it’s for protecting your roots. Before you star...
Frequently asked questions
Got questions about digging up elephant ears (Colocasia) in fall? You’re not alone! Here are some of the most common concerns—and straightforward answers—to help you tackle the task with confidence.
When is the BEST time to dig up elephant ears in fall?
Wait until after the first hard frost (when foliage turns brown and dies back) but before the ground freezes solid. This usually means late October to mid-November in most climates. Digging too early can stress the tubers, while waiting too long risks frost damage. Aim for 50-60°F soil temps for ideal conditions.
Do I need special tools to dig up elephant ears?
Not necessarily! A sturdy garden fork, shovel, or even a digging bar works well. For large tubers, a hand fork helps pry them out without slicing. Wear gloves—elephant ear tubers can be slippery and may have sharp edges. A wheelbarrow or tarp makes transporting them easier too!
Can I leave elephant ears in the ground over winter?
In USDA Zones 8-11, they’re often hardy enough to overwinter with a thick mulch layer (straw or leaves, 4-6 inches). In colder zones (7 or below), dig them up and store tubers in a cool, dark, dry place (50-60°F). If you skip digging, mark their location to avoid accidentally damaging them come spring!
What if my elephant ears rot or mold after digging?
This usually happens from wet storage or bruised tubers. Cure them first: Let freshly dug tubers dry in a shady spot for 1-2 days. Store in a well-ventilated container with dry peat moss or sand (not plastic bags!). If mold appears, toss affected tubers and disinfect storage areas with a 10% bleach solution.
Are there alternatives if I can’t dig them up this fall?
If digging isn’t feasible, try mulching heavily (6+ inches of straw/leaves) to insulate the tubers. In spring, they’ll often resprout. For small plants, you can also divide and replant portions in containers—just keep them in a garage or shed until warmer weather. Just don’t skip storage in freezing climates!
Wrapping up and next steps
Digging up elephant ears (Colocasia) in fall doesn’t have to be a daunting task—with the right tools, timing, and care, you can revive your tubers for next year’s garden with ease! 🌱 The key is patience, gentle handling, and proper storage to ensure healthy regrowth.
Whether you’re a seasoned gardener or a beginner, these steps will help you preserve your plants and enjoy their lush foliage for seasons to come.
Now that you’re armed with the know-how, roll up your sleeves and give it a try! After digging, why not share your progress or explore other fall gardening tips to keep your green thumb thriving? Happy planting! 🌿