
Tools
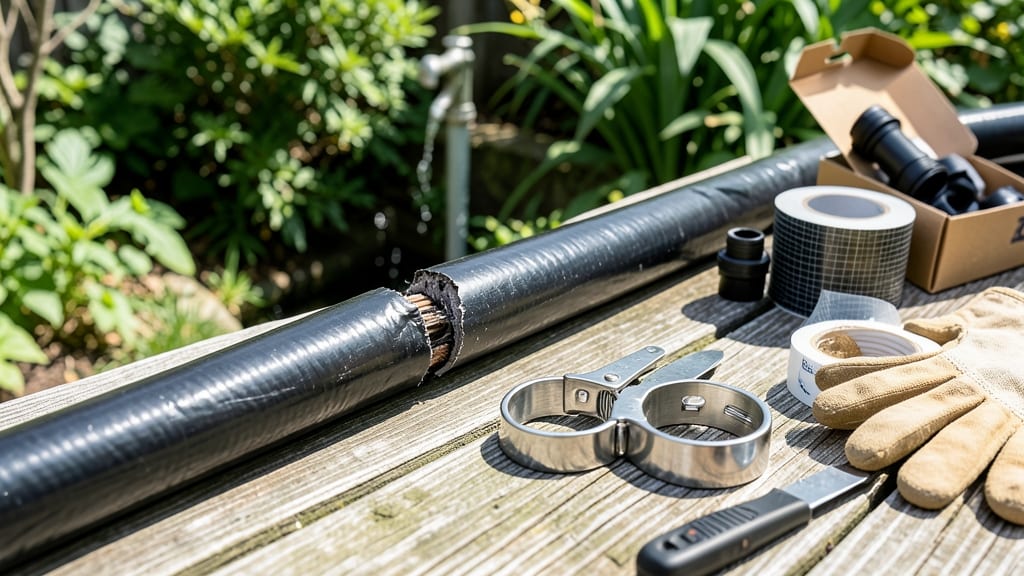
How to fix a cut garden hose can derail your watering plans faster than you can say "drip, drip, drip." 💧 The good news? A quick fix gets you back to sprinkling gardens in minutes—not hours. I’ve patched more hoses than I can count, and the right clamp or connector makes all the difference.
You’ll need just three things: a hose repair clamp (or epoxy if you’re feeling fancy), sandpaper to clean the cut edges, and a rag for wiping away debris.
No fancy tools—just what’s in your garage. The key is acting fast before the cut expands or collects dirt, which ruins repairs.
Once you’ve cleaned the edges and applied your patch, a quick pressure test (turn on the water) confirms it’s leak-free. That satisfying whoosh of water means your hose is back in action—no more wasted water or soggy patches where the leak was hiding.
Pro tip: Store hoses coiled loosely on hooks to prevent kinks and cuts next season. A little prevention saves you from last-minute fixes when your tomatoes are thirsty. Ready to patch that hose?
📚 In This Guide
- What you need
- Instructions
- Tips and common mistakes
- Wrapping up and next steps
What you need
- ● Garden hose repair clamp (1–2, depending on the cut size) – Look for a metal or heavy-duty plastic clamp with a rubber gasket (½" to ¾" size fits most hoses).
- ● Hose repair tape (1 roll) – Choose a self-fusing, waterproof tape (like Flexzall or Gorilla Tape) for quick fixes.
- ○ Hose repair sleeve (1, optional but handy) – A rubber or neoprene sleeve (½" to ¾") for extra durability.
- ● Sandpaper or emery cloth (medium-grit, 100–120) – To rough up the hose edges for better adhesion.
- ● Rubbing alcohol or acetone (small bottle) – For cleaning the hose surface before taping.
- ● Scissors or utility knife – To trim excess tape or hose material.
- ● Pliers or wrench – For tightening the repair clamp securely.
- ● Rag or paper towel – To wipe away debris or moisture.
- ● Hose epoxy or sealant – For a permanent fix (e.g., J-B Weld or Loctite marine adhesive).
- ● Heat gun or lighter – To melt and fuse certain repair tapes (check product instructions).
- ● New hose section (if the cut is large) – A pre-cut replacement piece (½"–¾") with connectors.
- ● Waterproof duct tape – As a temporary last-resort (not ideal for long-term use).
Quick Step-by-Step guide to repairing a cut garden hose
Here’s my go-to method for fixing a cut hose in minutes—no special tools needed.
🪴 Step 1: Clean and Dry the Cut Edges
First, grab the damaged section of your hose and examine the cut. Use a clean rag or paper towel to wipe away any dirt, moisture, or debris from the inner and outer surfaces. This ensures the repair holds tight. If the hose is wet, let it dry completely for at least 10 minutes—water on the edges prevents adhesive from gripping properly.
Run your fingers along the cut to feel for any jagged edges or frayed rubber. Smooth them out gently with your thumb or a flat tool like a butter knife. The cleaner and smoother the edges, the stronger your repair will be. Skip this step, and your patch might leak again after the first use.
🔧 Step 2: Apply a Rubber Cement or Epoxy Patch
For a quick fix, I reach for a tube of rubber cement or a two-part epoxy designed for hoses. Squeeze a small bead of adhesive along both edges of the cut, about ¼ inch wide. Press the edges together firmly and hold for 10-15 seconds to let the adhesive bond. If you’re using epoxy, follow the package instructions for mixing and curing time—usually 5-10 minutes of pressure.
For a more permanent solution, cut a small patch of rubber hose repair tape (like duct tape but designed for rubber) or a pre-made hose repair sleeve. Apply the patch over the cut, pressing the edges down firmly. Some tapes require a second layer for extra strength—just overlap the first patch by ½ inch and press again. This method works best for smaller cuts under ½ inch wide.
⏰ Step 3: Test the Repair Under Pressure
Once the adhesive or patch is fully set, turn on the water and let it run through the hose for 2-3 minutes. Watch the repaired section closely for any signs of leaking. If you see water seeping through, the patch wasn’t sealed properly—dry the area again, reapply adhesive, and press firmly for another 30 seconds.
For extra security, wrap the repaired area with a layer of waterproof electrical tape (like Scotch Super 33+). This adds an extra barrier against leaks and protects the repair from UV damage if the hose sits in the sun. Test it again after taping to confirm it holds pressure.
💧 Step 4: Store or Use the Hose Properly
After testing, coil the hose loosely to avoid kinks near the repair. If you’re storing it for later, keep it in a dry place away from direct sunlight, which can degrade rubber over time. For immediate use, avoid dragging the hose over rough surfaces—this can tear the patch or cause new leaks.
Here’s the thing—if the cut is larger than ¾ inch, a patch might not hold long-term. In that case, consider replacing the damaged section or buying a new hose. But for small cuts, this method works like a charm and saves you from buying a whole new hose.
Tips & tricks for quick hose repairs
Here's what I've learned from fixing dozens of garden hoses—these little tricks make all the difference between a temporary fix and a repair that lasts.
Prep is everything: In Step 1, don't rush the drying time. I've seen people skip the full 10 minutes, and that's when the adhesive fails. Use a hairdryer on low heat to speed up drying if you're in a hurry—just don't overheat the rubber. Also, smooth those edges with a butter knife if your fingers can't do the job; you'll get a much cleaner seal that won't leak.
Adhesive application secret: When applying the rubber cement in Step 2, work quickly but carefully. The key is to get that ¼-inch bead of adhesive right along the edge—too little and it won't hold, too much and you'll get a messy repair. I like to use a toothpick to help guide the adhesive into the exact spot. For epoxy, mix only what you need immediately since it starts curing fast.
Pressure testing pro move: During Step 3's 2-3 minute pressure test, watch for bubbles forming under the patch. These are your first warning signs of a weak seal. If you see them, shut off the water immediately, dry that area again, and reapply adhesive. I've saved many a repair by catching bubbles early—don't let them turn into leaks!
Optional extra protection: While not required, I always add that waterproof electrical tape as an extra layer of defense. It's not just about leaks—this tape also protects against UV rays that can degrade rubber over time. Just make sure to test again after adding it to confirm everything holds.
Pro Tips for Fix A Cut Garden Hose
- Here's what I've learned from fixing dozens of garden hoses—these little tricks make all the difference between a tem...
- Prep is everything: In Step 1, don't rush the drying time. I've seen people skip the full 10 minutes, and that's when...
- Adhesive application secret: When applying the rubber cement in Step 2, work quickly but carefully. The key is to get...
Frequently asked questions
Got questions about fixing a cut garden hose? You’re not alone! Here are some of the most common concerns—and quick answers to get you back to leak-free watering in no time.
Can I use duct tape to fix a cut garden hose temporarily?
Yes! Duct tape is a great short-term fix for small cuts or leaks. Just wrap it tightly around the damaged area (clean and dry first) to seal the hole. For longer-lasting repairs, though, opt for a hose repair clamp or epoxy-based patch—duct tape may fail under high pressure.
How long will a repaired hose last before needing another fix?
With the right materials (like a hose repair clamp or epoxy), a properly patched hose can last months or even years, depending on usage. Avoid high-pressure scenarios or extreme weather, which can weaken the repair over time. Replace the hose if the cut is large or the rubber is brittle.
Do I need to wait for the hose to dry before repairing it?
A wet hose won’t adhere well to patches or clamps. Turn off the water, drain the hose, and let it dry completely (especially if it’s been sitting in the sun). For stubborn moisture, use a towel or let it air-dry for 10–15 minutes before applying your fix.
What’s the best way to fix a hose cut during rainy or cold weather?
Cold or wet conditions can make repairs trickier, but you can still do it! Work in a sheltered area (like a garage or under a tarp) to keep materials dry. Use flexible epoxy or a clamp designed for outdoor use—both bond better in cooler temps. Avoid rubber cement in freezing conditions, as it may not cure properly.
Is there a permanent fix for a cut garden hose, or should I just replace it?
If the hose is otherwise in good shape (no cracks, kinks, or extreme wear), a permanent repair is totally doable! Use a high-quality hose repair kit with epoxy or a metal clamp for durability. However, if the hose is old, brittle, or has multiple leaks, replacing it may save you hassle long-term.
Still stuck? Drop your question in the comments—we’ve got you covered!
Wrapping up and next steps
Fixing a cut garden hose doesn’t have to be a frustrating chore—with the right tools and a little patience, you can restore your watering system in no time! 🌱 Whether you used a hose repair clamp, a slip coupling, or even a DIY patch, your hose is now leak-free and ready for action. Next up? Test it out with a quick water flow check to ensure your fix holds strong under pressure.
Now that you’ve mastered this quick patch, why not upgrade your watering game? Consider investing in a durable hose or exploring smart irrigation solutions for even easier maintenance. Happy gardening! 💦