
Propagation
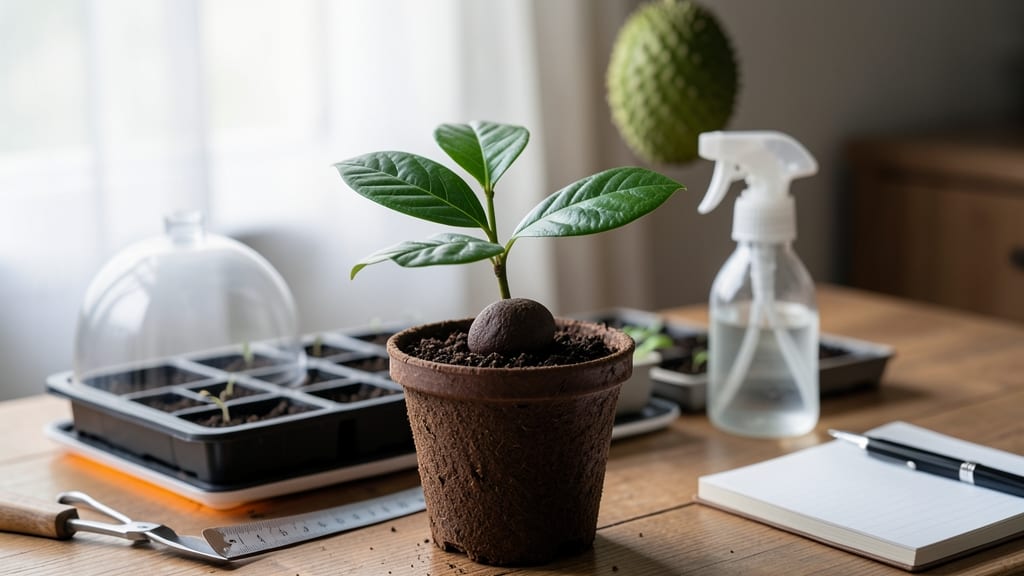
Germinating soursop seeds feels like waiting for a tropical vacation to arrive. 🌱 Those glossy black seeds hide a stubborn little sprout that can take weeks—or even months—to break through. But with the right prep work, you’ll double your chances of success without losing patience.
The secret starts with scarification: nicking the seed coat with sandpaper or soaking it in warm water for 24-48 hours to break dormancy. Soursops thrive in 75-85°F soil, so a heat mat or sunny windowsill is your best friend.
Keep the soil damp (not soggy) and wrapped in plastic to trap humidity—just like their rainforest home. When that first pale shoot appears, resist the urge to move it.
Soursops are sensitive to transplant shock, so let it grow 2-3 inches tall before gently transferring it to a pot with well-draining soil. The wait is long, but that first leaf? Worth every day of anticipation.
This method works best in zones 10-12, but patient growers in cooler climates can try it indoors with grow lights. Just be ready for a marathon, not a sprint—these seeds aren’t called "slowpokes" for nothing.
📚 In This Guide
- What you need
- Instructions
- Tips and common mistakes
- Wrapping up and next steps
What you need
- ● Fresh soursop seeds: 2–5 viable seeds (harvested from ripe fruit, cleaned and dried for 1–2 days).
- ● Well-draining potting mix: 1 small pot (4–6 inches in diameter) filled with a blend of: 60% coconut coir or peat moss
- ● 30% perlite or coarse sand
- ● 10% vermiculite or orchid bark
- ● Spray bottle: For gentle moisture application (avoid overwatering!).
- ● Plastic wrap or humidity dome: To create a mini greenhouse effect.
- ● Small tray or saucer: To catch excess water and maintain humidity.
- ● Grow lights or sunny windowsill: A warm, bright spot (70–85°F / 21–29°C).
- ● Label & marker: To track planting dates (patience is key—germination can take 3–6 weeks!).
- ● Seed germination kit: Pre-moistened seed-starting pads for hands-off soaking.
- ● Heating mat: Speeds up germination (set to 75–85°F / 24–29°C).
- ● Fertilizer (diluted): A balanced liquid fertilizer (e.g., 5-5-5 NPK) for seedlings after sprouting.
- ● Humidity tray with pebbles: For extra moisture control.
- ● Pruning shears: For trimming future leaves (once your sapling grows!).
Step-by-Step instructions for germinating soursop seeds
Here’s how I’ve learned to bypass the long wait—getting those first green shoots in weeks instead of months.
🌱 Step 1: Extract and Prepare the Seeds
Start by carefully opening a ripe soursop fruit and removing the large, flat seeds. Rinse them thoroughly under cool water to remove any pulp clinging to the surface—this prevents mold later. I like to soak them for 10 minutes in a 1% bleach solution (1 part bleach to 9 parts water) to sterilize without damaging the seed. Rinse again after soaking.
Soursop seeds have a tough outer shell, so I use a knife or file to lightly scratch the surface on one side—just enough to break through the outer layer. This trick mimics natural weathering and speeds up germination. Don’t go overboard; you’re not trying to split the seed in half, just creating a tiny opening for moisture to penetrate.
💧 Step 2: Soak for 24-48 Hours
Place the prepared seeds in a bowl of lukewarm water (around 75°F) and let them soak for 24-48 hours. You’ll know they’re ready when the outer coating softens and you see a tiny white root emerging from the scratched side. I check them after 24 hours—if nothing’s happening, give them another 12 hours. Over-soaking can lead to rot, so don’t leave them in water beyond 48 hours.
While soaking, I like to change the water every 12 hours to keep it fresh and oxygenated. This prevents bacterial growth and ensures the seeds get the hydration they need without drowning. Once the root is ¼ inch long, they’re ready for planting. If you’re impatient (like me), you can gently rub the seed between your fingers to encourage the root to grow faster—just don’t crush it.
☀️ Step 3: Plant in a Warm, Moist Environment
Fill a small pot (around 4 inches deep) with a light, well-draining mix—I use a blend of 50% peat moss and 50% perlite for airflow. Plant the seeds ½ inch deep, with the scratched side facing down. This ensures the root has a clear path to grow downward. Space them 2 inches apart since soursop seedlings grow quickly and need room.
Cover the pot with clear plastic wrap or a humidity dome to trap warmth and moisture. Place it in a warm spot (ideally 80-85°F)—a seedling heat mat works wonders if your home runs cooler. Keep the soil evenly moist but not soggy; mist lightly every 2-3 days if the surface feels dry. Germination can take 2-4 weeks, so patience is key. I’ve seen some pop up in 10 days if conditions are perfect, but don’t rush it.
🌿 Step 4: Provide Light and Care for Seedlings
The moment you see tiny green sprouts, remove the plastic wrap immediately to prevent mold. Place the pot under bright, indirect light—a grow light set 6 inches above the seedlings works best for the first 2 weeks. Direct sunlight can scorch the delicate leaves, so avoid placing them in a hot window. You’ll know they’re getting enough light when the leaves are deep green and sturdy, not pale or stretched.
Water gently at the base, keeping the soil consistently moist but never waterlogged. Soursop seedlings are sensitive to overwatering, so I wait until the top inch of soil feels dry before adding more. Once the seedlings reach 4-6 inches tall, you can transplant them into larger pots or the ground. Harden them off by gradually exposing them to outdoor conditions over 1-2 weeks before moving them permanently.
⏰ Step 5: Monitor and Troubleshoot Growth
Watch for yellowing leaves—this usually means the soil is too wet or the roots are bound. If you see mold on the soil surface, remove the top layer and let it dry out before adding fresh mix. Leggy seedlings (thin stems with large gaps between leaves) signal a need for more light. Adjust the grow light or move the pot closer to a brighter window.
Soursop seedlings grow slowly at first, but once they’re established, they thrive. I’ve found that fertilizing lightly with a balanced liquid fertilizer (diluted to half strength) every 4-6 weeks encourages stronger growth. Avoid heavy fertilizers early on—they can burn tender roots. With the right care, you’ll have a 4-foot-tall sapling in about 6 months, ready to bear fruit in 3-5 years with patience and love.
Tips & tricks for speed-sprouting soursop seeds
Between us, these little tricks cut the waiting game from months to weeks—no magic, just smart prep work.
The Bleach Soak Secret: That 10-minute bleach soak in Step 1 isn't just sterilizing—it's your first line of defense against moldy seeds. I've ruined batches by skipping this, so trust me: mix that 1% solution fresh (never reuse) and rinse immediately after. The bleach breaks down over time, so don't cut corners here. For extra peace of mind, I place seeds on a paper towel to dry completely before scratching.
Root Rub Technique: When you're impatient after 24 hours in Step 2, gently rub the seed between your palms for 10 seconds. The friction mimics natural weathering and often triggers that first root to emerge within hours. Just don't press too hard—you're not trying to polish the seed, just encourage the tiny opening you created to work its magic. This is where most people give up, but it's the difference between 3-week germination and 6-week waiting.
Warmth Hack: That 80-85°F range in Step 3 isn't just ideal—it's critical. If your home runs cooler, place your seedling pot on top of your fridge (not inside) or use a heating pad set to low. I've seen seeds pop up in 10 days with this setup, while others took 3 weeks without the extra warmth. Pro tip: Use a small thermometer to monitor the soil temperature—it should stay consistently in that range day and night.
Light Transition: When you see those first sprouts in Step 4, don't rush to full sun. Start with 4-6 hours of indirect light daily and gradually increase by 1 hour every 2 days. I use a grow light on a timer for 12 hours/day during the first week, then switch to natural light. This prevents the classic "sunburn shock" that turns leaves yellow and crispy. Think of it like sunbathing—you wouldn't go from zero to full sun exposure either.
Pro Tips for Germinate Soursop Seeds
- Between us, these little tricks cut the waiting game from months to weeks—no magic, just smart prep work.
- The Bleach Soak Secret: That 10-minute bleach soak in Step 1 isn't just sterilizing—it's your first line of defense a...
- Root Rub Technique: When you're impatient after 24 hours in Step 2, gently rub the seed between your palms for 10 sec...
Frequently asked questions
Got questions about germinating soursop seeds?
You’re not alone—this tropical fruit can be finicky! Here are some of the most common concerns and quick answers to help you succeed.
How long does it take for soursop seeds to germinate?
Soursop seeds typically sprout in 2 to 6 weeks, depending on conditions. Warmth (75–85°F), consistent moisture, and humidity speed things up. If you’re patient and keep conditions ideal, you’ll see tiny sprouts peeking through the soil sooner than later!
What if my soursop seeds rot instead of sprouting?
Overwatering or poor drainage is usually the culprit. Let the soil dry slightly between waterings and use a well-draining mix (like perlite + coconut coir). If mold appears, reduce moisture and improve airflow. Healthy seeds should stay firm—squishy ones are a red flag!
Can I germinate soursop seeds in water like avocado pits?
Not ideal! Soursop seeds don’t thrive in water germination—they’re prone to rot. Instead, plant them directly in soil (1–2 inches deep) for the best results. If you’re curious, you can pre-soak them for 24 hours to soften the shell, but skip the long-term water method.
Do soursop seeds need light to germinate?
Nope! In fact, darkness is better during germination. Cover the pot with a plastic bag or place it in a shaded spot until sprouts appear. Once they break through the soil, move them to bright, indirect light to prevent leggy seedlings.
How do I know if a soursop seed is still viable?
Fresh seeds (from ripe fruit) have the best chance. Test viability by floating them: if they sink, they’re likely good; if they float, they’re probably dead. Also, healthy seeds feel firm and heavy—light or shriveled ones won’t sprout.
Wrapping up and next steps
Germinating soursop seeds may take patience, but with the right techniques—like soaking, warmth, and consistent moisture—you can unlock the potential of this tropical treasure! 🌱 Whether you’re aiming for a lush backyard tree or a thriving houseplant, your efforts will soon reward you with vibrant new growth.
Once your seedlings sprout, the next logical step is transplanting them into nutrient-rich soil and providing them with the care they need to flourish.
Don’t let challenges discourage you—every gardener starts somewhere, and your soursop sapling could be the beginning of something extraordinary. Happy growing! 🌿