
Pests
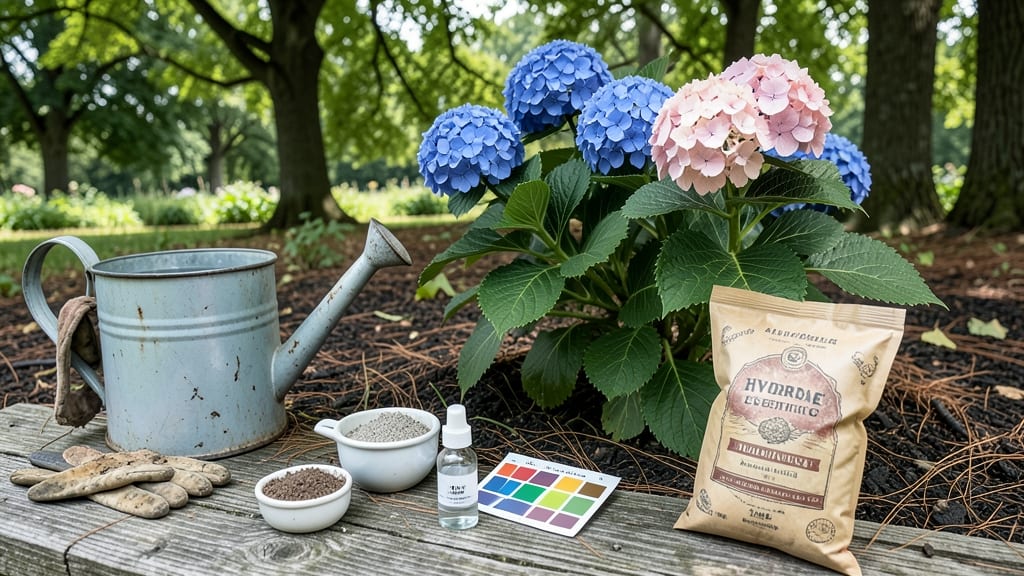
Here’s how to get hydrangeas to change color—and why your stubborn blooms are about to transform in shades of blue, pink, or everything in between. 💙💖 The secret lies in soil pH, and after years of trial and error, I’ve cracked the code. Most gardeners overlook this simple science, but a few adjustments can turn your bushes into a living rainbow overnight.
The key? Testing your soil’s acidity first—aim for pH 5.5 or lower for blue flowers or pH 6.5 or higher for pink. Add elemental sulfur (for acidity) or hydrated lime (for alkalinity) in small doses, then water deeply. Results take 4-6 weeks, but the payoff is worth it.
You’ll see flowers shift color as the season progresses, with deeper hues in cooler weather. The trick is consistency—re-test soil every 2-3 months and reapply amendments if needed. No more guessing: just science-backed color control.
Perfect for gardeners tired of dull blooms or those who want to experiment with seasonal color changes. Here’s how to make it happen without the guesswork.
📚 In This Guide
- What you need
- Instructions
- Tips and common mistakes
- Wrapping up and next steps
What you need
- ● Aluminum sulfate (for blue blooms) – 1 lb (16 oz) per 10 gallons of water (or follow label instructions). Choose a food-grade, horticultural-grade product.
- ● Lime or hydrated lime (for pink blooms) – ½ lb per 100 sq ft of soil. Use pelletized lime for easier application.
- ● pH testing kit – Digital or liquid test strips to monitor soil pH (target 5.0–5.5 for blue, 6.0+ for pink).
- ● Garden hose with spray nozzle – For even watering and soil amendment distribution.
- ● Gloves and safety goggles – Protect your hands and eyes when handling lime or aluminum sulfate.
- ● Watering can or bucket – 5-gallon capacity for mixing amendments.
- ○ Garden trowel or fork – For gently loosening soil around hydrangea roots (optional but helpful).
- ● Slow-release fertilizer – Balanced 10-10-10 or acid-loving plant formula to boost overall health.
- ● Mulch (pine bark or oak leaves) – Helps maintain soil acidity naturally over time.
- ● Rain gauge – To track moisture levels and avoid over/under-watering.
- ● Spray bottle – For foliar feeding (mix amendments lightly with water).
Instructions for hydrangea color transformation
Here's how I've successfully shifted blooms from pink to blue—and back again—using simple soil science.
💧 Step 1: Test Your Current Soil pH
Use a soil pH test kit to determine your current levels. Dig a 6-inch sample from around the hydrangea roots and follow the kit instructions. Most garden centers sell these for under $10. I've found hydrangeas often sit in the neutral range (pH 6.5-7.0), which produces purple blooms—neither true blue nor pink.
Take notes on your results. Blue hydrangeas thrive in acidic soil (pH 5.0-5.5), while pink varieties prefer alkaline conditions (pH 6.0-7.0). If you're unsure which variety you have, both can shift colors with the right adjustments—just know some modern cultivars are more color-stable than others.
🌱 Step 2: Adjust Soil pH Based on Desired Color
For vibrant blue blooms, amend the soil with elemental sulfur or peat moss. Work 2-3 tablespoons of sulfur into the top 6 inches of soil around each plant, then water thoroughly. I like to mix in 1-2 inches of peat moss as well—this lowers pH gradually over time. Re-test soil after 4-6 weeks to confirm you've reached pH 5.0-5.5 before expecting color changes next season.
For blushing pink flowers, raise pH by adding wood ash or hydrated lime. Sprinkle ½ cup of wood ash (from untreated wood) around the base, then water in. For more dramatic shifts, use 1-2 tablespoons of hydrated lime per plant. Water immediately after application to prevent root burn. Monitor pH again in 4-6 weeks—you're aiming for pH 6.0-7.0 for consistent pink blooms.
☀️ Step 3: Maintain Consistent Moisture and Fertilization
Hydrangeas are thirsty plants that need 1-2 inches of water weekly—more during extreme heat. I water deeply at the base rather than overhead to prevent fungal issues. The color transformation requires consistent moisture because pH adjustments only work when roots actively absorb nutrients. Use a moisture meter to check soil depth—aim for 40-60% moisture at all times.
Apply a balanced, acid-loving fertilizer (like 10-10-10) in early spring. Avoid high-nitrogen formulas, which can stress plants during color shifts. I've found that fertilizing in late summer with a low-phosphorus formula encourages next year's blooms to develop the new color. Always water after fertilizing to prevent root burn.
⏰ Step 4: Monitor and Retest Over Two Seasons
Color changes typically take one full growing season to become visible. I mark my hydrangeas with colored flags to track progress—blue flags for acid treatments, pink for alkaline. Take monthly pH readings during the growing season to ensure stability. If blooms don't shift as expected, you may need to adjust your amendments further.
Here's the thing—some hydrangea varieties are more responsive than others. If you're growing Endless Summer types, they'll often show bicolor blooms as they transition. For true color consistency, consider planting two hydrangeas side by side—one treated for blue, one for pink—as a living experiment. The results are always more dramatic than expected!
Tips & tricks for vibrant hydrangea color transformation
These garden secrets will help you achieve dramatic color shifts—without the guesswork.
Soil Testing Accuracy: Don't rely on kit color charts alone—cross-reference with a digital pH meter for precise readings. I've found that some kits can vary by 0.5 pH points, which is enough to throw off your color goals. Test multiple spots around your plant since soil pH can vary even within the same garden bed.
Layered Amendments for Stability: When adjusting pH, work amendments into the soil in layers over multiple weeks rather than all at once. For blue blooms, I apply 1 tablespoon of sulfur every 2 weeks for 6 weeks total. This gradual approach prevents shocking the roots while ensuring consistent pH levels. The same principle applies for alkaline treatments—spread out your wood ash applications.
Seasonal Timing Matters: The optimal time to adjust soil pH is in early spring before new growth begins. This gives roots several months to adapt to the new conditions before flowering season. If you must adjust mid-season, focus on maintaining moisture levels—hydrangeas are more sensitive to pH changes when stressed by heat or drought.
Visual Tracking System: Create a simple tracking system using colored flags or labels on your plants. Blue flags for acid treatments, pink for alkaline, and purple for neutral. Include the date of each pH adjustment and test result. I've found this visual record helps me spot patterns—like when my morning-glory hydrangeas respond faster to sulfur than my oakleaf varieties.
Pro Tips for Get Hydrangeas To Change Color
- These garden secrets will help you achieve dramatic color shifts—without the guesswork.
- Soil Testing Accuracy: Don't rely on kit color charts alone—cross-reference with a digital pH meter for precise readi...
- Layered Amendments for Stability: When adjusting pH, work amendments into the soil in layers over multiple weeks rath...
Frequently asked questions
Got questions about transforming your hydrangeas into stunning blues or rosy pinks?
You’re not alone! Here are some of the most common queries—and their straightforward answers—to help you master the color-changing magic.
How long does it take for hydrangeas to change color after adjusting soil pH?
Patience is key! You’ll start seeing subtle shifts in 2–4 weeks, but full color transformation can take up to 3 months—especially for established plants. New growth (like fresh blooms or leaves) will reflect the pH change first. Test your soil again in 6–8 weeks if results are slow.
Can I use vinegar or lemon juice to turn my hydrangeas blue?
While vinegar (white only) or lemon juice can temporarily lower pH, they’re not ideal for long-term results. Overuse risks burning roots or disrupting soil microbes. Instead, opt for sulfur-based amendments (like aluminum sulfate) or peat moss for a safer, sustainable blue shift.
What’s the best time of year to adjust hydrangea soil pH?
Spring or early fall is your sweet spot! Avoid winter (dormant season) or summer heatwaves. For blue hydrangeas, amend soil in late winter before buds swell. For pink, add lime in early spring when roots are active but blooms haven’t formed yet.
My hydrangeas turned brown after changing the soil pH—what went wrong?
Brown leaves or stems often signal over-acidification (too much aluminum sulfate) or root stress. Flush the soil with water to dilute excess chemicals, then add compost or lime to balance pH. If damage is severe, trim dead growth and monitor moisture—hydrangeas hate soggy roots!
Can I change my hydrangeas from pink to blue (or vice versa) every year?
Hydrangeas are flexible, but gradual adjustments work best. Avoid drastic pH swings (e.g., from 6.0 to 5.0 in one season). Start with small amendments (like ½ cup of sulfur or lime per plant) and observe changes. Pro tip: Keep a soil pH journal to track progress!
Wrapping up and next steps
Changing your hydrangeas’ color is easier than you think—just tweak the soil’s pH and give them the right care! 🌸 Whether you dream of vibrant blues or romantic pinks, understanding soil acidity and a little patience will transform your garden.
Start small with a single plant, experiment, and watch the magic unfold.
Now that you’re armed with these acid test secrets, grab your gloves and get growing! Ready to take the next step? Test your soil today and let your hydrangeas bloom in their boldest hues yet!