
Size
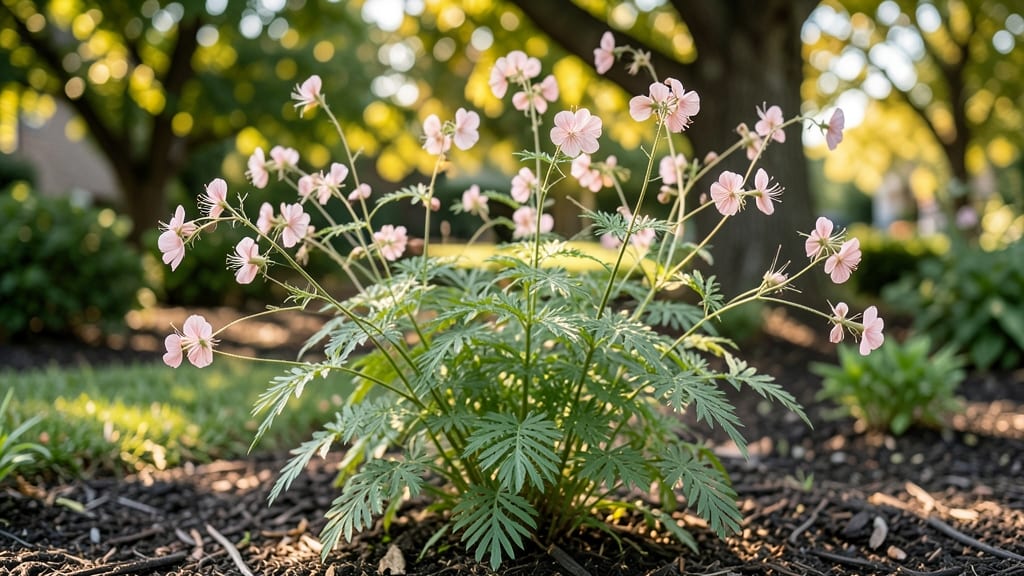
Growing gaura plants feels like cheating—drought-resistant blooms that practically grow themselves. 🌿 I’ve watched these airy, fern-like plants survive through Texas summers with barely a sip of water, their delicate pink and white flowers dancing in the breeze for months.
The secret isn’t fancy soil or constant attention—it’s sunlight, well-draining dirt, and patience. Gaura thrives in full sun where other plants wilt, and its deep roots mean less frequent watering. Even my black thumb can’t kill these; they bounce back from neglect like nothing else in my garden.
By midsummer, you’ll have clouds of blooms that attract butterflies while keeping weeds at bay. The plants stay compact, so they work in borders, containers, or even between stepping stones—no pruning required unless you want to encourage bushier growth. Perfect for low-maintenance gardeners or anyone tired of fussy perennials.
Here’s how to get started without stressing over it.
📚 In This Guide
- What you need
- Instructions
- Tips and common mistakes
- Wrapping up and next steps
What you need
- ● Gaura plants: Start with healthy nursery-grown gaura plants (e.g., Gaura lindheimeri or Gaura coccinea) or seeds. Pro tip: 💡 Choose established plants for faster blooms!
- ● Well-draining soil: A mix of native soil (or potting mix) + sand or perlite (50/50 ratio) to prevent root rot.
- ● Sunlight access: A spot with full sun (6+ hours/day) or partial shade (for hot climates).
- ● Watering can or hose: With a gentle spray nozzle to avoid disturbing roots.
- ○ Gloves (optional but recommended): To protect hands from prickly stems (especially Gaura coccinea).
- ● Fertilizer (low-nitrogen): A balanced 10-10-10 or low-phosphorus option (e.g., fish emulsion or compost tea).
- ● Pruning shears: Sharp, sterilized shears for deadheading or shaping.
- ● Mulch: Organic mulch (e.g., straw or pine needles) to retain moisture and suppress weeds.
- ● Epsom salt: A tablespoon per gallon of water once a month for magnesium boosts.
- ● Support stakes: For tall varieties (e.g., ‘Siskiyou Pink’) to prevent flopping.
- ● Rain gauge: To track watering needs—gaura hates soggy soil!
- ● Plant tags: To label varieties (especially if growing multiple types).
Step-by-step instructions for growing gaura plants
Here's how to grow these airy, drought-tolerant beauties that bloom nonstop with almost no work.
🌱 Step 1: Choose the Perfect Planting Location
Gaura thrives in full sun—at least 6 hours daily—but tolerates light shade in hotter climates. I always pick the sunniest, driest spot in my garden because these plants despise soggy roots. The key is well-draining soil; if your yard has heavy clay, amend with 2-3 inches of compost mixed into the top 12 inches of soil.
Test your spot by planting a few seeds first. If they sprout quickly but then wilt within days, your soil drains too slowly. Gaura's delicate roots need to breathe, so avoid low-lying areas where water pools. A slight slope helps excess moisture run off naturally.
🪴 Step 2: Plant Gaura at the Right Time and Depth
For best results, plant in early spring after the last frost when soil warms to 55°F. Dig holes twice as wide as the root ball but only as deep as the container it came in. Gaura hates being buried too deep—this encourages rot and weak stems.
Space plants 18-24 inches apart for full, airy blooms. I like to plant in clusters of 3-5 to create a natural, drifting effect. Gently firm the soil around roots and water deeply to settle everything. You'll know it's right when water drains through within 10-15 minutes.
☀️ Step 3: Water Deeply but Infrequently
Gaura's drought resistance comes from deep roots, so water deeply every 7-10 days once established. The first year needs more frequent watering—about once a week—until roots spread. You'll see healthy plants develop thick, woody stems after their first season.
Water at the base in the morning to prevent fungal issues. Let the top 2 inches of soil dry out between waterings. Overwatering is the fastest way to kill gaura—yellowing leaves or mushy stems mean you're drowning these desert-loving plants.
✂️ Step 4: Prune for Longer Blooming Seasons
Deadhead spent blooms by pinching off the flower stems just above a set of leaves. This encourages nonstop blooming from early summer until frost. I do this every 2-3 weeks throughout the season. Gaura also benefits from a mid-season trim after the first flush of flowers.
Cut back one-third of the plant's height in late spring to promote bushier growth. Never shear into bare wood—always leave some foliage. After flowering, you can cut back again to 6-8 inches tall to tidy up for next year's growth.
🌿 Step 5: Overwinter for Repeat Performance
In colder zones (Zone 5 and below), cut back stems to 2-3 inches tall in late fall and mulch with 2-3 inches of straw or shredded leaves. Gaura is hardy to Zone 5 but needs protection from winter winds. In warmer climates, no special care is needed—these plants keep blooming until frost.
The following spring, remove old mulch and add fresh compost. You'll see new growth emerge from the base within 3-4 weeks of warm soil. Gaura's natural habit is to self-seed, so you'll often find volunteers popping up in unexpected spots—just transplant them to fill gaps.
Tips & tricks for growing gaura plants
These simple tricks will help your gaura thrive with less effort and more stunning blooms.
Soil Test Tip: Before planting, perform a simple soil drainage test in your chosen spot—dig a hole about 12 inches deep, fill it with water, and time how long it takes to drain. If it takes longer than 10-15 minutes, your soil drains too slowly for gaura. Mix in 2-3 inches of coarse sand or perlite with that 2-3 inches of compost to improve drainage dramatically. This small step prevents the most common gaura killer: root rot.
Planting Depth Secret: When planting, use the container as your guide—plant at the exact same depth it grew in the nursery. The top of the root ball should sit just below soil level, never buried deeper. I've seen beginners plant gaura too deep by accident, which causes stems to weaken and eventually rot. A quick visual check during planting saves headaches later.
Watering Wisdom: The "top 2 inches dry" rule is your best friend. Stick your finger into the soil—if it feels dry at that depth, it's time to water. In hot climates, you might need to water every 5-7 days instead of the 7-10 day guideline. Gaura's drought resistance is real, but young plants need consistent moisture to establish their deep root systems.
Pruning Pro Tip: For continuous blooms, make deadheading part of your weekly garden routine. Pinch off spent blooms just above a leaf node with your fingers—no sharp tools needed! This simple 2-minute task every 2-3 weeks keeps your gaura flowering until frost. I also recommend wearing gloves; gaura stems can be surprisingly prickly when dry.
Pro Tips for Grow Gaura Plant
- These simple tricks will help your gaura thrive with less effort and more stunning blooms.
- Soil Test Tip: Before planting, perform a simple soil drainage test in your chosen spot—dig a hole about 12 inches de...
- Planting Depth Secret: When planting, use the container as your guide—plant at the exact same depth it grew in the nu...
Frequently asked questions
Got questions about growing gaura? You’re not alone! Here are answers to the most common concerns—from timing to troubleshooting—so you can grow these drought-resistant beauties with confidence.
How long does it take for gaura plants to bloom after planting?
Gaura typically blooms within 60 to 90 days after planting, depending on the variety and growing conditions. If you start seeds indoors in early spring, you might see flowers as early as late spring or early summer. For faster results, opt for nursery-bought plants—they often bloom within 4 to 6 weeks of planting.
Can gaura survive winter, or do I need to dig it up?
Gaura is perennial in USDA zones 5–9, meaning it can overwinter in the ground if protected. In colder zones (below 5), mulch heavily with straw or leaves to insulate roots. If you’re in a harsh climate, you can cut back dead foliage in late winter—new growth will emerge in spring. No need to dig up unless you’re in a freeze-prone microclimate!
Why is my gaura wilting even though it’s drought-tolerant?
While gaura loves dry soil, overwatering or poor drainage can cause wilting. Check if the soil stays soggy—gaura hates "wet feet." If roots are mushy, repot in well-draining soil or move to a sunnier spot. Heat stress (like afternoon sun in hot climates) can also wilt leaves temporarily. Provide afternoon shade in extreme heat to revive it.
How do I keep gaura blooming all season?
Deadhead spent blooms regularly (every few days) to encourage continuous flowering. Gaura also thrives with low to moderate fertilization—use a balanced 10-10-10 or slow-release fertilizer once in early spring. Avoid over-fertilizing, as too many nutrients can reduce blooms. Prune leggy stems in early spring to promote bushier, flower-packed growth.
What are some low-maintenance alternatives to gaura?
If gaura’s delicate blooms aren’t your style, try these drought-tolerant, low-care perennials:
- Lavender – Fragrant, thrives in poor soil, and loves sun.
- Russian Sage – Silvery foliage with purple spikes; ultra-drought-resistant.
- Black-Eyed Susan (Rudbeckia) – Bright yellow blooms that attract pollinators.
- Sedum (Stonecrop) – Succulent-like, thrives in heat and neglect.
Wrapping up and next steps
Growing gaura plants is a breeze—whether you're a seasoned gardener or just starting out! 🌸 With their drought-resistant nature and low-maintenance charm, these cheerful blooms are perfect for adding color to your garden with minimal effort.
Just remember: sunlight, well-draining soil, and occasional deadheading are your best friends for keeping them thriving.
Now that you’re armed with all the tips, why not take the next step? Grab a pair of shears, pick a sunny spot, and plant your first gaura this weekend!
Before you know it, your garden will be bursting with whimsical, fluttering blooms that bring joy all season long. Happy gardening! 🌿✨