
Size
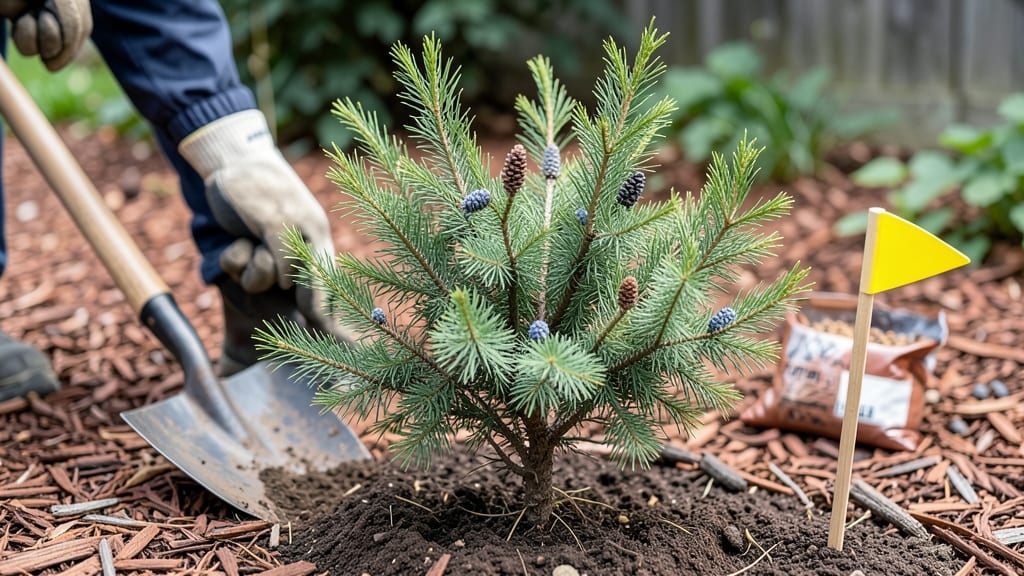
How to grow juniper feels like inviting a low-maintenance evergreen into your landscape. 🌿 I’ve watched mine thrive with almost no attention—just the right spot and occasional pruning—and now I’m sharing the secrets that make juniper such a standout plant. The key starts with soil: juniper loves well-draining mixes, whether in-ground or containers. Too much moisture? Roots rot. Too dry? It handles it like a champ. Sunlight needs are simple too—full sun for best color and growth, but it tolerates partial shade if you’re in hotter climates. Once established, juniper practically cares for itself. Water deeply but infrequently, and prune only to shape or control size. My 3-foot tall hedge stays lush year-round with almost no effort, and the pine-scented foliage adds a fresh, woodsy aroma to any space. Whether you want a privacy screen, ground cover, or striking specimen plant, juniper delivers. It’s the evergreen that won’t let you down—even if you forget to water it for a week.
📚 In This Guide
- What you need
- Instructions
- Tips and common mistakes
- Wrapping up and next steps
What you need
- ● Juniper plant: Choose between: Seeds (from mature berries—patience required!)
- ● Cuttings (4–6 inches long, from healthy branches)
- ● Nursery-grown sapling (1–3 years old, fastest option)
- ● Well-draining soil: Mix of: 60% sandy or loamy soil
- ● 30% perlite or coarse sand
- ● 10% compost or peat moss (for nutrients)
- ● Planting container or garden spot: Container: 12–18 inches deep, with drainage holes (1–2 plants per 5-gallon pot)
- ● Garden bed: Full sun (6+ hours/day) or partial shade (for tender varieties)
- ● Watering can or hose with nozzle (gentle spray setting)
- ● Pruners or shears (sterilized, sharp for cuttings)
- ○ Rooting hormone (optional but highly recommended for cuttings)
- ● Mulch (2–3 inches of pine bark, wood chips, or gravel to retain moisture)
- ● Slow-release fertilizer (balanced 10-10-10 or organic options like fish emulsion)
- ● pH test kit (ideal range: 6.0–7.5; junipers tolerate slightly acidic to neutral soil)
- ● Windbreak or stakes (for young plants in exposed areas)
- ● Pest control: Neem oil or insecticidal soap (for spider mites or aphids)
- ● Garden gloves (to protect your hands from prickly branches!)
Step-by-Step instructions for growing juniper plants
Juniper thrives with minimal fuss—here’s how to cultivate these hardy evergreens for year-round texture and fragrance.
🌱 Step 1: Choose the Right Juniper Variety and Location
Juniper comes in shrub, tree, and ground-cover forms, so select based on your space. For example, Juniperus horizontalis (creeping juniper) thrives as a low border, while Juniperus virginiana (eastern redcedar) grows tall for privacy. Plant in full sun to partial shade—most varieties tolerate 6+ hours of direct sunlight daily, though some like Juniperus chinensis handle light shade.
Juniper prefers well-draining soil with a pH between 6.0 and 7.5. If your soil is heavy clay, amend with sand or gravel to prevent root rot. Test drainage by digging a 6-inch hole—if water pools after 30 minutes, improve the site before planting. I always check soil moisture levels first; junipers despise soggy roots.
🪴 Step 2: Plant at the Correct Depth and Spacing
Dig a hole twice as wide as the root ball but only as deep—planting too deep suffocates the roots. Loosen the root ball gently if it’s tightly bound, then place the juniper so the top of the root ball sits level with the surrounding soil. Backfill with native soil, pressing lightly to eliminate air pockets but not compacting too firmly.
Space shrub varieties 3–6 feet apart, depending on maturity size. For example, Juniperus sabina (savina juniper) stays compact at 3 feet wide, while Juniperus scopulorum (Rocky Mountain juniper) spreads 8–10 feet. Mulch with 2–3 inches of organic mulch (like pine straw or bark) to retain moisture and suppress weeds—just keep it 6 inches away from the trunk to prevent rot.
☀️ Step 3: Water Deeply and Adjust Care for Establishment
Water deeply once a week for the first two months after planting, ensuring moisture reaches 12 inches down. Juniper roots are shallow but drought-tolerant once established—overwatering is the real enemy. You’ll know it’s time to water when the top 2 inches of soil feel dry to the touch.
After the first season, reduce watering to once every 2–3 weeks unless your area experiences extreme heat or drought. Fertilizer isn’t usually needed, but if growth is slow, apply a balanced 10-10-10 fertilizer in early spring at half strength. I skip fertilizer entirely in poor soils—junipers adapt better with minimal intervention.
✂️ Step 4: Prune for Shape and Health
Prune junipers in late winter or early spring before new growth begins. Use clean, sharp pruners to make cuts just above a leaf node or bud. Remove dead, diseased, or crossing branches first—these compete for nutrients and weaken the plant. For shaping, trim no more than 1/3 of the plant’s growth in a single season to avoid stress.
Juniper responds well to informal pruning—let it grow naturally for a relaxed look, or shear shrub varieties for a manicured edge. Avoid heavy pruning in late summer; new growth won’t harden off before winter. I prune mine lightly each year, focusing on removing only what’s necessary—junipers recover slowly from aggressive cuts.
🌿 Step 5: Monitor for Pests and Diseases
Juniper bags (a fungal disease) and spider mites are the most common issues. Bagworm infestations appear as small, silk-covered bags on branches—remove them by hand or spray with neem oil in early summer. Spider mites thrive in dry conditions; treat with a strong spray of water to dislodge them or apply insecticidal soap if outbreaks persist.
Prevent problems by watering at the base (not overhead) and avoiding dense plantings that trap humidity. Healthy junipers rarely need intervention, but I inspect mine monthly in spring and summer for early signs of stress. Yellowing needles often signal overwatering or poor drainage, while browning tips mean underwatering or salt buildup from mulch.
Tips & tricks for perfect juniper planting
These hard-won insights will help you avoid the most common juniper-growing pitfalls while maximizing your plants' natural resilience.
Site Preparation Secret: The 30-minute drainage test in Step 1 is non-negotiable—don't skip it! I've seen too many junipers fail because people assumed their soil would drain properly. If water lingers after 30 minutes, mix in at least 25% sand or coarse gravel by volume to create proper drainage channels. For heavy clay soils, consider planting in raised beds where you can control the soil composition entirely.
Planting Depth Caution: When placing your juniper in Step 2, resist the urge to bury it deeper than the root ball. I learned this the hard way when my first juniper struggled for years because I planted it too deep—roots need oxygen, not suffocation. Use a level to ensure the top of the root ball sits exactly at ground level, then backfill with native soil only. The key is creating a snug fit without compacting the soil too tightly around the roots.
Watering Wisdom: The critical two-month watering schedule in Step 3 requires patience. Many gardeners overwater during this period, thinking more moisture is better. Instead, focus on deep saturation—water should penetrate 12 inches down, not just wet the surface. Use a moisture meter or your finger to check the top 2 inches of soil before watering again. Junipers hate soggy roots but thrive on occasional deep drinks.
Pruning Precision: When pruning in Step 4, remember that junipers respond poorly to aggressive cuts. I always use sharp pruners and make clean cuts just above a leaf node or bud. For shaping, never remove more than one-third of the plant's growth in a single session—this prevents stress and maintains the plant's natural vigor. The best time to prune is late winter or early spring when new growth is about to begin, giving your juniper plenty of time to recover.
Pro Tips for Grow Juniper
- These hard-won insights will help you avoid the most common juniper-growing pitfalls while maximizing your plants' na...
- Site Preparation Secret: The 30-minute drainage test in Step 1 is non-negotiable—don't skip it! I've seen too many ju...
- Planting Depth Caution: When placing your juniper in Step 2, resist the urge to bury it deeper than the root ball. I ...
Frequently asked questions
Got questions about growing juniper? You’re not alone—this hardy evergreen has a few quirks that can leave beginners scratching their heads. Here are answers to the most common queries to help you cultivate thriving juniper plants with confidence!
How fast does juniper grow, and when can I expect it to mature?
Juniper growth is slow but steady! Most varieties grow 1 to 2 feet per year, with mature size reached in 5 to 10 years depending on the species. Dwarf junipers mature faster (3–5 years), while larger types like Juniperus virginiana can take a decade or more. Patience pays off—slow growth means long-term landscape impact!
Do junipers need a lot of water, or are they truly drought-tolerant?
Absolutely drought-tolerant once established! Water deeply but infrequently—newly planted junipers need 1 inch of water weekly for the first year. After that, reduce to monthly watering (or less in rainy climates). Overwatering is the #1 killer—let soil dry out between waterings to mimic their natural, arid habitats.
What pests or diseases should I watch for, and how do I treat them?
Junipers are tough, but they can fall prey to spider mites, bagworms, or juniper blight. Prevention is key:
- Spider mites: Spray with water to dislodge them; use insecticidal soap if severe.
- Bagworms: Handpick or treat with Bt (Bacillus thuringiensis) in late summer.
- Fungal blight: Improve airflow, avoid overhead watering, and prune infected branches.
Can junipers survive winter, and do they need protection?
Most junipers are hardy to USDA zones 3–9, but young plants or tender varieties (like Juniperus chinensis ‘Sargentii’) may need winter protection. Mulch heavily (3–4 inches) and water before freezing to prevent root damage. For extra safety, wrap young plants in burlap or use frost cloth.
Can I grow juniper in containers, and what’s the best soil mix?
Yes! Junipers thrive in containers with well-draining soil. Use a mix of:
- 60% cactus/succulent mix
- 30% perlite or pumice
- 10% compost
Wrapping up and next steps
Growing juniper is a rewarding journey that brings fragrant, low-maintenance beauty to your garden with minimal effort! Whether you're planting seeds, cuttings, or young saplings, remember that patience and the right conditions—like well-draining soil and plenty of sunlight—are key.
With a little care, your juniper will thrive, offering year-round greenery and even edible berries for those who love foraging.
Now that you’re armed with the know-how, roll up your sleeves and get planting! 🌱 Ready to expand your green space? Check out our guide on designing a juniper hedge or explore other drought-tolerant shrubs to elevate your landscape.