
Vegetables
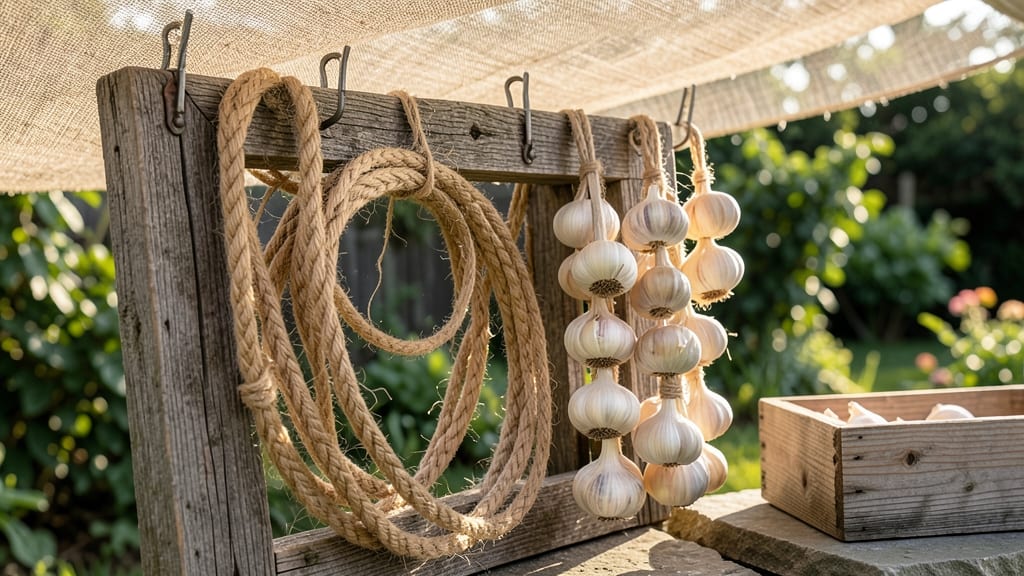
Hanging garlic to cure transforms last year’s harvest into next season’s treasure. ✨ The secret lies in timing—harvest when lower leaves brown but upper leaves stay green—and the right conditions: dry air, gentle airflow, and 60-80°F temperatures.
One wrong move, and you’ll end up with moldy bulbs instead of flavorful cloves. You’ll need just three simple tools: sturdy twine, a well-ventilated space (garage, barn, or even a porch), and patience. Skip the plastic bags—garlic needs to breathe.
Bundle stems in small groups of 6-8, leaving 2-3 inches of stem attached, and hang upside down like tiny lanterns. Within 3-4 weeks, the papery skins will turn golden and crisp. That’s your cue to trim stems, brush off dirt, and store in a cool, dark place.
The flavor deepens over time, making this the most rewarding preservation method for gardeners. Small-scale or large? The same principles apply. Just adjust bundle size—100 bulbs fit in a single bundle for big harvests, while a single bulb works for tiny spaces. Now let’s get those garlic braids drying!
📚 In This Guide
- What you need
- Instructions
- Tips and common mistakes
- Wrapping up and next steps
What you need
- ● Fresh, healthy garlic bulbs – Choose unpeeled, firm bulbs with tight cloves and no signs of sprouting or mold. Aim for 10-20 lbs (or as much as you plan to cure).
- ● Garlic braiding twine – 100-200 ft of natural, untreated cotton twine (about ¼-inch thick). Avoid synthetic twine, as it can trap moisture.
- ● Drying rack or mesh screen – A well-ventilated rack (like a garlic curing rack or DIY wooden frame with mesh) to elevate bulbs 2-3 inches off the ground.
- ● Clean, dry workspace – A shaded, well-ventilated area with a temperature between 60-80°F (15-27°C) and humidity below 70% (a garage, basement, or covered porch works great).
- ● Scissors or pruners – For trimming stems and roots cleanly.
- ○ Food-safe spray bottle – Filled with 1 part white vinegar to 3 parts water (optional but helpful for disinfecting).
- ● Garlic curing kits – Pre-made kits with racks, twine, and instructions (great for beginners!).
- ● Humidity monitor – To track moisture levels and prevent mold.
- ● Wooden clothespins or clips – For securing garlic braids to racks if twine slips.
- ● Labeling tags – To mark curing dates or varieties (e.g., "Silverskin 2024").
- ● Fan or dehumidifier – If your curing space tends to be too humid.
Step-by-Step instructions for curing hanging garlic
Here's how I cure garlic every year—it takes patience, but the results are worth it.
🪴 Step 1: Harvest and Prepare the Bulbs
Dig up your garlic when the lower leaves turn brown but the tops are still standing—usually 4-6 weeks after flowering. Gently shake off excess soil, but don't wash the bulbs. Let them dry in the sun for 1-2 hours to harden the skins slightly before handling.
Break apart the stems carefully, leaving 1-2 inches of stem attached to each bulb. This stem acts as a natural hanger. Discard any bulbs with soft spots or mold—those won't cure properly. I like to trim the roots to ½ inch to prevent rot during storage.
☀️ Step 2: Choose a Well-Ventilated Drying Space
Find a spot with good airflow and 60-70°F temperatures—a garage, shed, or covered porch works well. Avoid direct sunlight, which can scorch the skins. I hang my garlic in small bundles of 4-6 bulbs using twine or rubber bands to keep them secure.
Space bundles 6-12 inches apart so air circulates freely. If you're short on space, lay bulbs on a screen or mesh rack instead. Watch for condensation—if moisture builds up, move to a drier area immediately. Proper airflow prevents mold and ensures even curing.
⏰ Step 3: Cure for 2-4 Weeks
Let the garlic cure for 2-4 weeks, depending on humidity. You'll know it's ready when the skins are papery and dry, and the stems snap cleanly when bent. If the weather is damp, curing may take longer—don't rush it.
Check weekly for signs of spoilage: soft spots, foul odors, or fuzzy growth. Remove any affected bulbs immediately to prevent spreading. Once cured, trim the stems to ¼ inch and store in a cool, dark place with 40-50% humidity for long-term preservation.
🌱 Step 4: Store for Optimal Freshness
Store cured garlic in a breathable container like a mesh bag or open cardboard box. Avoid plastic, which traps moisture and causes rot. Keep it in a cool, dark place—a pantry or root cellar works best.
Check stored garlic every few months and discard any bulbs that feel soft or sprouting. Properly cured garlic can last 6-12 months this way. If you notice sprouting, separate the cloves and replant them—you might get a second harvest!
Tips & tricks for perfect hanging garlic cure
Took me a while to figure these out, so here goes—these details make all the difference between store-bought garlic and your own perfectly preserved harvest.
Harvest Timing: The 4-6 weeks after flowering window is critical—this is when the bulbs have fully matured but haven't started to sprout. I test readiness by checking if the lower leaves are brown while the tops are still standing. If you harvest too early, the bulbs won't store well; too late, and they'll sprout before curing. Confession: I skipped this step for years and wondered why my garlic never lasted past winter!
Sun Drying Secret: That 1-2 hour sun drying in Step 1 isn't just about removing dirt—it toughens the skins, which prevents bruising during storage. For best results, place bulbs on a clean, flat surface like a baking sheet in bright but indirect sunlight. If you're in a humid climate, reduce to 1 hour to avoid premature softening.
Bundle Size Matters: The instructions mention bundles of 4-6 bulbs, but I've found that 5 bulbs per bundle creates the perfect balance of airflow and stability. Too few bulbs can dry unevenly, while too many trap moisture. Use soft twine or rubber bands that won't cut into the stems—nylon or bungee cords work well. I also like to hang bundles with stems pointing downward slightly to prevent water pooling.
Humidity Watch: During the 2-4 week curing period, humidity is your silent enemy. If you notice condensation forming on your garage walls or the bulbs feel damp to the touch, move them immediately to a drier location. A dehumidifier set to 50% humidity can be a game-changer if your climate is consistently damp. I keep a small fan nearby to circulate air without creating drafts that could dry the bulbs too quickly.
Pro Tips for Hang Garlic To Cure
- Took me a while to figure these out, so here goes—these details make all the difference between store-bought garlic a...
- Harvest Timing: The 4-6 weeks after flowering window is critical—this is when the bulbs have fully matured but haven'...
- Sun Drying Secret: That 1-2 hour sun drying in Step 1 isn't just about removing dirt—it toughens the skins, which pre...
Frequently asked questions
Got questions about curing garlic? You’re not alone! Here are answers to the most common concerns—so you can hang garlic like a pro and enjoy its bold flavor all year.
How long does it take for garlic to fully cure?
Most hardneck and softneck varieties take 4–6 weeks to cure in a dry, airy space (like a garage or pantry). Check for readiness when the skins are papery, stems are dry, and cloves rattle when shaken. Patience pays off—rushing can lead to mold or spoilage!
Can I cure garlic in a humid climate?
but you’ll need extra vigilance! Use a dehumidifier or hang garlic in a well-ventilated area with low humidity (below 65%). A mesh bag or open basket helps airflow. If mold appears (fuzzy spots), remove the affected bulbs immediately to save the rest.
What if my garlic starts to sprout before curing?
Sprouting means your garlic is too moist or curing too slowly. Move it to a drier, warmer spot (70–80°F) and check for airflow. If sprouts are small, you can trim them after curing—just avoid eating the green shoots (they’re bitter). For severe sprouting, try curing smaller braids or single bulbs for better airflow.
Is cured garlic the same as dried garlic powder?
Not quite! Cured garlic retains its whole cloves and intense flavor, while garlic powder is dehydrated and ground. Cured garlic is perfect for cooking whole cloves (like in soups or marinades), while powder is great for seasoning. For powder, dehydrate cured cloves first (2–3 hours at 200°F), then grind.
Can I freeze garlic instead of curing it?
Yes! Freezing is a quick alternative if you’re short on time. Peel and chop cloves, then freeze in airtight containers or ice cube trays with water/oil (for easy portioning). Frozen garlic lasts 6–12 months but loses some texture. For best flavor, curing is still king—it enhances sweetness and reduces moisture for longer shelf life.
What’s the best way to store cured garlic long-term?
Once fully cured, store garlic in a cool (55–65°F), dark, and dry place (like a pantry or root cellar). Avoid refrigeration—it can cause moisture buildup and spoilage. Braids or mesh bags work well, but never store in plastic bags (traps humidity). Properly stored, cured garlic lasts 6–12 months!
Wrapping up and next steps
Hanging and curing garlic is a simple yet rewarding way to preserve its bold flavor and natural benefits for months—even years!
With just a few supplies and a little patience, you’ve mastered a time-honored tradition that keeps your pantry stocked with aromatic, fresh-tasting garlic. Now’s the time to put your new skills to use! Gather your harvest, follow the steps, and soon you’ll be enjoying homemade garlic in everything from soups to marinades.
Ready to take it further? Experiment with flavors—try infusing your cured garlic with herbs like rosemary or thyme, or even a pinch of red pepper flakes for a spicy kick. Happy curing, and here’s to next year’s harvest! 🌱✨