
Tools
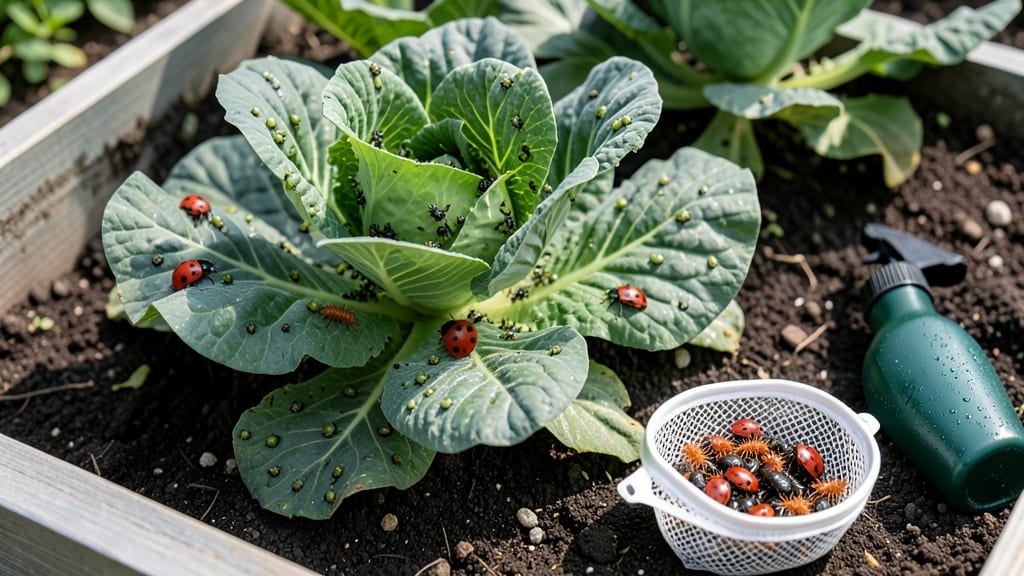
The first aphid crisis taught me how to introduce ladybugs to the garden: they arrive in 24 hours—if you set it up right. 🌱 These tiny soldiers need the right welcome, not just a quick release.
I’ve learned the hard way that dumping them in without prep means they’ll vanish faster than your pests multiply. The secret isn’t just buying ladybugs—it’s creating a garden they’ll want to stay in.
A shallow dish of water with pebbles (so they don’t drown), a few dandelion leaves for snacks, and some leaf litter for shelter turns your yard into their permanent home. Most people skip this step and wonder why the bugs disappear by morning.
You’ll see them patrolling your plants within days, munching through aphids like a buffet. The key is timing: introduce them at dawn or dusk when it’s cool, and avoid spraying any pesticides—even "organic" ones can wipe out your new allies. This method works for roses, veggie gardens, or even houseplants.
The payoff? Fewer pests, more flowers, and a garden that actually balances itself. Let’s get those ladybugs settled in for good.
📚 In This Guide
- What you need
- Instructions
- Tips and common mistakes
- Wrapping up and next steps
What you need
- ● Ladybugs (live): Purchase 100–500 adult ladybugs (preferably Hippodamia convergens or Adalia bipunctata) from a reputable supplier. Avoid wild-caught ones—they may carry pests or diseases.
- ● Release container: A 1–2 gallon breathable mesh bag (like a butterfly habitat) or a ventilated cardboard box with small holes (poke 5–10 holes with a nail or drill).
- ● Water source: A shallow dish with 1–2 inches of water and a few pebbles (to prevent drowning). Add a tiny bit of honey or sugar water for energy.
- ● Shade cloth or umbrella: A lightweight 50–70% shade cloth (or a floppy hat!) to protect ladybugs from direct sun during release.
- ● Garden-friendly habitat: A spot with aphids, mites, or soft-bodied insects (their favorite snacks!) and plants with smooth leaves (like roses, basil, or beans) for shelter.
- ● Ladybug hotel: A small wooden box with straw or pinecones for overwintering (if releasing in fall).
- ● Neem oil or insecticidal soap: Only use after release to avoid harming the ladybugs. Wait 24–48 hours post-introduction.
- ● GPS or map: If releasing in a large garden, note key release zones for follow-up checks.
- ● Kid-friendly gloves: For little helpers who want to assist (but avoid handling ladybugs directly!).
Step-by-step instructions for attracting ladybugs to your garden
Here's how I lure these beneficial predators in within days—not months.
🌿 Step 1: Create a Ladybug-Friendly Habitat
Ladybugs need shelter and water to stay. Start by adding a shallow dish of water with pebbles (so they can escape) near your plants. I place mine under leafy plants like dill or fennel, where the shade keeps the water cooler. These beetles also love small patches of wildflowers, especially those with tiny white or yellow blooms—their favorite food source between pest attacks.
Skip the fancy ladybug "hotels." A simple stack of flat stones or hollow plant stems (like sunflower stalks) works just as well. The key is creating micro-habitats where they can hide during the day and hunt at night. I've seen them cluster under loose bark mulch too—just leave a few spots uncovered.
☀️ Step 2: Plant Their Favorite Nectar Sources
Ladybugs need nectar and pollen to reproduce, so plant cosmos, marigolds, or yarrow near your veggies. I always include dill or cilantro—their lacy leaves attract aphids, which draw ladybugs like a dinner bell. Even a small pot of sweet alyssum on your patio works if space is tight.
Timing matters: Plant these 4-6 weeks before you expect to see ladybugs. The flowers should be in full bloom when they arrive. Avoid pesticides—even "organic" sprays can repel them. I've had ladybugs abandon gardens after a single neem oil application, so I only use soapy water sprays for pests when they're around.
🪴 Step 3: Release Them at the Right Time
Buy ladybugs from a reputable supplier (not garden centers—they often sell harlequin species that eat plants). Release them early morning or late afternoon when temperatures are below 75°F. I place them on aphid-infested leaves so they start hunting immediately—this keeps them from flying away.
Don't expect them to stay forever. Most will leave after 2-3 days unless you provide constant food and water. I release 2-3 batches over a week for best results. If you see them flying away, check for wind or lack of food—they won't linger without both.
💧 Step 4: Maintain Conditions to Keep Them Long-Term
Ladybugs need consistent moisture but hate soggy soil. Water plants early in the day so the foliage dries by evening. I avoid overhead watering when they're present—it washes away aphids (their food) and can drown them. Instead, use a soaker hose near the base of plants.
Leave some aphid populations—they're the ladybugs' main food. I let a few colonies build on dandelions or plantain (weeds they love) to ensure a steady food supply. If aphids disappear completely, the ladybugs will leave too. Think of it as a balanced ecosystem, not pest eradication.
⏰ Step 5: Monitor and Reinforce Their Stay
Check for ladybugs daily by gently shaking plants over a white sheet—they'll scatter and reveal their presence. If you see harlequin ladybugs (with black spots and orange shells), remove them—they eat plants. Native species have red or orange shells with black spots and are the good guys.
For fastest results, repeat releases every 2 weeks during growing season. I've had ladybugs establish permanent colonies in gardens where I provide year-round food and shelter. The first generation might leave, but their offspring will stay if conditions are right.
Tips & tricks for attracting ladybugs to your garden
Here's what nobody tells you—these small details make all the difference between temporary visitors and a thriving colony.
Timing is Everything: The 4-6 week window before planting nectar sources is critical because ladybugs need established food sources when they arrive. I've seen gardens fail when people plant flowers too late—the ladybugs show up hungry and leave immediately. If you're working with a tight timeline, start with sweet alyssum in pots, as it blooms quickly and attracts them faster than other plants.
Water Safety First: That shallow dish with pebbles isn't just decoration—it's their lifeline. I've watched ladybugs drown in still water without escape routes. Place the dish near plants but not directly under them, so rain doesn't overflow it. For extra safety, add a few small twigs as additional escape routes.
Release Strategy: When you release those 2-3 batches over a week, space them out by 3 days between releases. This mimics natural colonization patterns and gives each group time to establish territory. I've found that releasing them on aphid-infested leaves (like those on dill or cilantro) is the fastest way to get them hunting immediately—no wandering around confused.
Long-Term Maintenance: The aphid populations you intentionally leave aren't being lazy—they're creating a food buffer. I've seen ladybugs completely wipe out aphids in 24 hours, only to leave when their food source disappears. Keep a few dandelions or plantain in a corner of your garden specifically for this purpose. They're tough weeds that ladybugs love, and they'll always have a backup meal.
Pro Tips for Introduce Ladybugs To Garden
- Here's what nobody tells you—these small details make all the difference between temporary visitors and a thriving co...
- Timing is Everything: The 4-6 week window before planting nectar sources is critical because ladybugs need establishe...
- Water Safety First: That shallow dish with pebbles isn't just decoration—it's their lifeline. I've watched ladybugs d...
Frequently asked questions
Got questions about welcoming ladybugs to your garden? You’re not alone! Here are some of the most common concerns—and straightforward answers—to help you attract these tiny, beneficial allies with confidence.
When is the best time to release ladybugs in my garden?
The ideal time is spring or early summer (April–June), when temperatures hover between 50–75°F (10–24°C). Avoid releasing them in extreme heat, cold, or during heavy rain—ladybugs need time to acclimate and hunt pests. If you’re dealing with a sudden aphid outbreak, opt for pre-purchased ladybugs (not eggs) for faster action.
How do I know if my ladybugs are thriving after release?
Look for signs like visible ladybug activity (crawling on plants or flying short distances) and fewer pests (e.g., aphids, mites, or soft-bodied insects). If they disappear quickly, check for predators (birds, spiders, or wasps) or lack of food/water. A thriving population means they’re staying—and working!
Do ladybugs need water, and how can I provide it?
Yes! Place a shallow dish of water with pebbles or a damp sponge near their release spot. Ladybugs can drown in deep water, so keep it shallow. Alternatively, mist plants lightly in the morning—the dew provides hydration. Avoid pesticides near water sources, as they’ll contaminate it.
What if ladybugs don’t stay in my garden?
If they vanish, they might be seeking shelter (try adding native plants, leaf litter, or a small ladybug house) or lacking food. Release them near aphid-infested plants and avoid neonicotinoid pesticides, which repel them. For stubborn cases, consider releasing them in stages (e.g., 2–3 times over a week).
Are there natural alternatives if ladybugs aren’t an option?
Try these low-effort alternatives:
- Lacewings: Their larvae devour aphids voraciously—release them like ladybugs.
- Parasitic wasps: Target specific pests (e.g., aphid midge for aphids).
- Neem oil or insecticidal soap: Organic sprays that disrupt pests without harming ladybugs.
- Attracting birds: Install a bird feeder to lure natural predators of garden pests.
Wrapping up and next steps
Introducing ladybugs to your garden is a simple yet powerful way to boost natural pest control and keep your plants thriving! 🌱 By following these humane tricks—like using nectar-rich plants, providing shelter, and avoiding pesticides—you’ll create an inviting space for these beneficial insects. Remember, patience and consistency are key; soon, your garden will become a ladybug paradise.
Ready to take the next step? Start by planting a few ladybug-friendly flowers or setting up a small habitat today. Your garden (and future harvests) will thank you!