
Landscaping
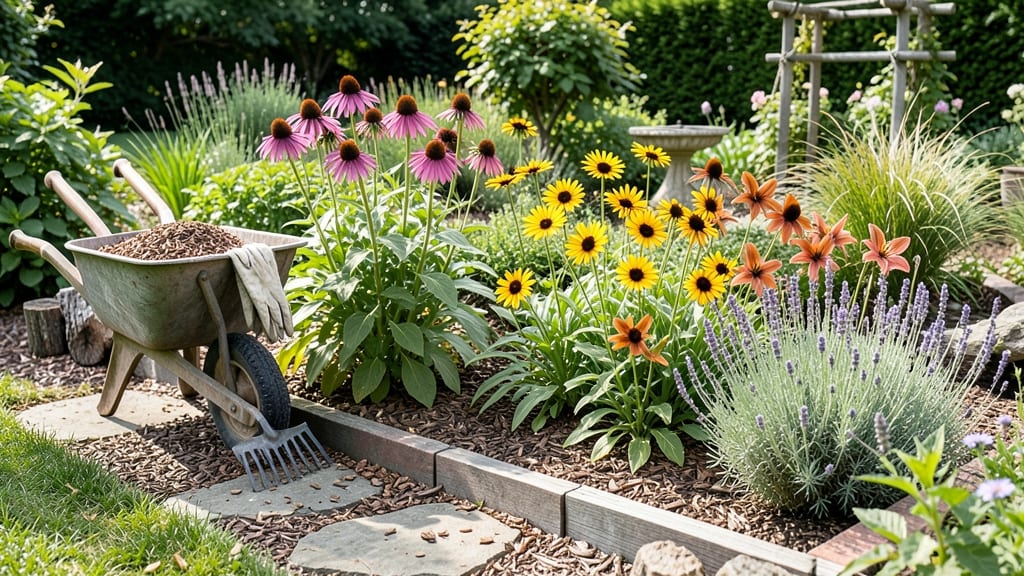
Your first sketch could change your garden forever. ✨ Landscaping a flower garden isn’t about rules—it’s about creating layers that bloom from spring’s first daffodils through frost-kissed asters. I’ve designed three gardens where color never fades, and maintenance stays light, even when life gets busy.
The secret lies in three simple layers: tall perennials for structure, mid-height blooms for color, and ground covers to fill gaps. Pair that with hardscaping—paths, borders, or a single stone bench—and suddenly your garden feels intentional, not chaotic.
My first attempt used a 5-gallon bucket of mulch and a spray paint stencil for borders. Now it’s the envy of the neighborhood. By the end of this, you’ll have a season-long color plan that thrives with minimal work.
Picture morning light catching purple salvia while black-eyed Susans glow in late summer, all while your back stays free from weeding wars. The best part? Every layer builds on the last—no guesswork, just beauty. Works for small urban plots or sprawling backyards. Here’s how to start without overthinking it.
📚 In This Guide
- What you need
- Instructions
- Tips and common mistakes
- Wrapping up and next steps
What you need
- ● Soil amendments: Compost (2–3 cubic yards, depending on garden size)
- ● Peat moss or coconut coir (1–2 bags, 2–3 cubic feet each)
- ● Slow-release fertilizer (10–20 lbs, 10-10-10 NPK ratio)
- ● Mulch: Organic mulch (shredded bark, pine straw, or wood chips—4–6 bags, 2 cubic feet each)
- ● Plants: Perennials (5–10 plants, e.g., coneflowers, black-eyed Susans, daylilies)
- ● Annuals (10–15 plants, e.g., petunias, marigolds, impatiens for seasonal color)
- ● Shrubs or ornamental grasses (2–4 plants, e.g., butterfly bush, fountain grass)
- ● Hand tools: Garden trowel (1–2, stainless steel)
- ● Pruners (bypass or anvil type, 1 pair)
- ● Handheld weeder (1)
- ● Garden gloves (1–2 pairs, durable fabric)
- ● Heavy-duty tools: Shovel (round-point or flat, 1)
- ● Garden fork (1, for aerating soil)
- ● Wheelbarrow (1, 3–4 cubic feet capacity)
- ○ Optional but helpful: Soil pH tester (1, digital or test kit)
- ● Hose with adjustable nozzle (for watering)
- ● Knee pads (1–2 pairs, for comfort)
- ● String line and stakes (for marking layout)
- ● Sunlight assessment: Note which areas get full sun (6+ hours), partial shade (3–6 hours), or full shade (<3 hours).
- ● Water access: Ensure a nearby spigot or hose connection for easy hydration.
- ● Local climate knowledge: Check your USDA hardiness zone to pick resilient plants.
- ● Budget: Plan for $150–$500+ depending on plant selection and soil prep needs.
Instructions for designing a low-maintenance flower garden
Here's how to create a vibrant, season-long display that thrives with minimal effort.
🌿 Step 1: Plan Your Layers and Color Palette
Start by sketching your garden layout using a 4-layer approach: tall perennials at the back, mid-height shrubs, low-growing annuals, and ground covers. I always begin with the tallest plants—3-4 feet—to frame the space and provide structure. Choose plants with staggered bloom times to ensure continuous color from early spring through fall.
Select a cohesive color palette (3-4 hues) that complements your home's exterior. For example, purples and blues pair beautifully with silver foliage, while warm reds and oranges create striking contrast against green. Note each plant's mature height and spread to avoid overcrowding—18-24 inches between established perennials is ideal for easy maintenance.
☀️ Step 2: Prepare the Soil for Season-Long Success
Test your soil's pH and amend it to create the perfect foundation. Most flowering plants thrive in slightly acidic to neutral soil (6.0-7.0). Work 2-3 inches of compost into the top 6-8 inches of soil, mixing thoroughly. This improves drainage while retaining moisture—critical for drought-tolerant varieties.
For heavy clay soil, incorporate sand or perlite to break up compaction. In sandy soil, add peat moss or coconut coir to improve water retention. I like to till in a slow-release fertilizer (like 10-10-10) at this stage to provide nutrients throughout the growing season. Avoid fresh manure—it can burn tender roots and attract pests.
🪴 Step 3: Install Plants in Strategic Groups
Begin planting with your tallest specimens at the back of the bed, spacing them 2-3 feet apart depending on their mature size. Mid-height plants (typically 18-30 inches) go in the middle layer, while low-growing annuals and perennials fill the front. Group plants with similar water needs together—drought-tolerant varieties like lavender and sedum shouldn't mix with thirsty impatiens.
Dig holes twice as wide as the root ball but only as deep as the container. Gently remove plants from their pots, loosen any circling roots, and place them in the hole so the top of the root ball sits level with the surrounding soil. Backfill with native soil, firming lightly to eliminate air pockets. Water deeply to settle the roots—you'll know it's right when water drains evenly from the base.
💧 Step 4: Establish Mulch and Watering Routines
Spread 2-3 inches of organic mulch (like shredded bark or straw) over the soil surface, keeping it 2 inches away from plant stems to prevent rot. Mulch conserves moisture, suppresses weeds, and regulates soil temperature. For the first 2-3 weeks, water deeply every 2-3 days until new growth appears—this encourages strong root establishment.
Once plants are established, adjust to once-weekly deep watering (about 1 inch per week), allowing the top 1-2 inches of soil to dry between sessions. Early morning watering prevents fungal diseases, and drip irrigation systems deliver moisture directly to roots without wetting foliage. Avoid overhead sprinklers—they can spread disease and waste water through evaporation.
✂️ Step 5: Maintain with Seasonal Pruning and Deadheading
After the first flush of blooms, deadhead spent flowers regularly to encourage continuous flowering. For perennials, cut back one-third of the foliage in early spring to promote bushier growth. I always prune with clean, sharp shears at a 45-degree angle just above a leaf node—this prevents water from pooling and reduces disease risk.
In late fall, cut back tall perennials by half and remove any dead or diseased foliage. Leave 3-4 inches of stem on hardy perennials like coneflowers and black-eyed Susans—they provide winter interest and protect the crown from freezing. For tender annuals, pull them up completely and compost the debris to prevent pests from overwintering in the garden.
Tips & tricks for perfect flower garden Landscaping
Between us, the difference between a garden that looks like a catalog and one that fades after a season often comes down to these overlooked details.
Layering Like a Pro: In Step 1, when you're sketching your layout, consider adding a fifth "hidden" layer—understory plants like ferns or ajuga that thrive in shade. These fill gaps between larger plants and create lush texture without competing for space. Think of it as the "frosting" that ties your four main layers together visually.
Soil Prep Shortcuts: Testing soil pH might seem intimidating, but most garden centers offer free testing kits. If you're in a hurry, aim for a 6.5-7.0 range—most flowering plants tolerate this neutral zone. For the 2-3 inches of compost in Step 2, I recommend using a mix of finished compost and worm castings (they're nutrient-dense and won't burn plants). The worm castings also improve soil structure.
Planting Precision: When you're placing plants in Step 3, use a small stake or marker to outline where each root ball will sit before digging. This prevents overcrowding and helps you visualize the mature spread. For the 2-3 feet spacing between tall perennials, remember that mature size matters more than current size—check plant tags for "mature height" information, not the current pot size.
Watering Wisdom: The once-weekly deep watering rule in Step 4 works best with the right tools. Invest in a rain gauge or tuna can with markings to measure your 1 inch per week. For container gardens, use a moisture meter to check soil dryness—containers dry out faster than in-ground beds. I've learned this the hard way after killing several thirsty annuals by guessing instead of measuring.
Pro Tips for Landscape A Flower Garden
- Between us, the difference between a garden that looks like a catalog and one that fades after a season often comes d...
- Layering Like a Pro: In Step 1, when you're sketching your layout, consider adding a fifth "hidden" layer—understory ...
- Soil Prep Shortcuts: Testing soil pH might seem intimidating, but most garden centers offer free testing kits. If you...
Frequently asked questions
Got questions about transforming your space into a vibrant, low-maintenance flower garden? Here are some common ones we hear—and the answers you need to get started!
What’s the best time of year to landscape a flower garden?
The ideal time depends on your climate, but spring (after the last frost) or early fall are the sweet spots. These seasons offer mild weather, allowing plants to establish roots before extreme heat or cold. For perennials, fall planting gives them a head start in the ground. If you’re in a warm zone, winter can work too—just avoid peak summer heat!
How much water do new flower beds need?
Newly planted flowers need 1–1.5 inches of water per week (including rainfall). Water deeply 2–3 times per week for the first month to encourage root growth. After that, taper to 1 inch per week. Mulch helps retain moisture—apply a 2–3 inch layer around plants (but keep it away from stems). Drip irrigation is a game-changer for consistency!
Can I use mulch in a flower garden, and what kind should I avoid?
Mulch suppresses weeds, retains moisture, and regulates soil temperature. Opt for organic mulches like shredded bark, straw, or wood chips. Avoid dyed or treated mulches (they can harm plants) and fresh grass clippings (they mat down and stink). For a polished look, try cypress or cedar mulch—they resist decomposition longer.
What are the most common pests in flower gardens, and how do I prevent them?
Watch for aphids, slugs, snails, and deer—they’re the usual troublemakers. Prevent pests naturally by:
- Choosing disease-resistant varieties (check plant tags!).
- Encouraging beneficial insects (like ladybugs) with companion plants like marigolds or basil.
- Using physical barriers (row covers for veggies, fences for deer).
- Avoiding overwatering (slugs love damp soil!).
How can I add color to my garden on a budget?
Skip expensive annuals and focus on perennials, biennials, and native plants—they’re cost-effective and return year after year. Try bulbs (daffodils, tulips), self-seeding flowers (cosmos, poppies), or cuttings from friends’ gardens. Swap plants with neighbors or shop dormant-season sales (fall/winter) for deeper discounts. A little color goes a long way!
Do I need to winterize my flower garden?
Yes, but it’s simple! Cut back dead foliage (except perennials like ornamental grasses), mulch heavily (4–6 inches), and protect tender plants with burlap or frost cloth. For containers, move them to a sheltered spot or wrap them in insulation. Don’t prune spring-blooming plants until after they flower—they set buds early! A little prep ensures your garden bounces back brighter in spring.
Wrapping up and next steps
Landscaping a stunning, low-maintenance flower garden is all about layering—combining perennials, annuals, shrubs, and ground covers for year-round beauty with minimal effort. 🌸 From planning your color palette to choosing the right plants and mulching for success, every step builds a resilient, vibrant space that thrives with seasonal transitions.
You’ve got the tools and know-how—now it’s time to roll up your sleeves and create! Start small with one bed or section, or dive in with confidence. Next up? Grab your gloves, sketch your design, and let your garden bloom with intention. Happy planting! 🌱✨