
Vegetables
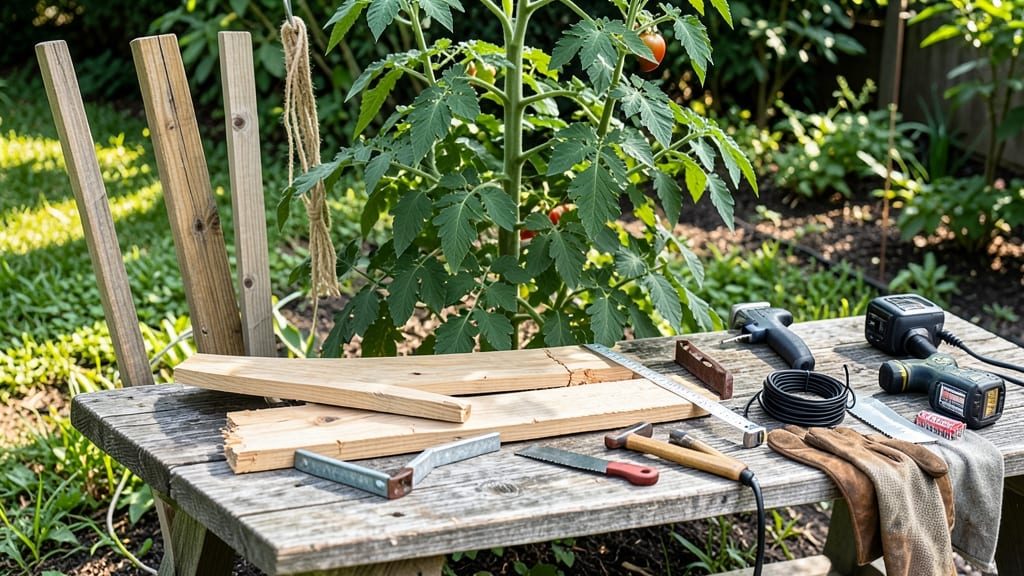
Building your own wooden tomato cage saves money and gives vines the rock-solid support they need to reach their full potential. 🌱 I’ve seen flimsy cages collapse under 10-pound tomatoes—this design won’t. With just a few basic tools and scrap lumber, you’ll create a frame that lasts multiple seasons and outgrows store-bought options.
The key is using 2x2 lumber for vertical posts and horizontal crossbars—no fancy joinery required. Pre-drill screw holes to prevent splitting, and add a few extra crossbars near the top where vines get heaviest.
For indeterminate varieties, aim for a 6-foot-tall cage with 12-inch spacing between supports; determinate tomatoes need half the height but the same sturdy structure. You’ll end up with a cage that keeps plants upright, improves airflow (reducing disease), and makes harvesting easier. The best part?
Each cage costs under $15 and takes less than an hour to assemble—far better than the $20 plastic alternatives that bend by midsummer. Works for any garden size, from backyard plots to container setups. Here’s exactly how to build one that won’t let you down.
📚 In This Guide
- What you need
- Instructions
- Tips and common mistakes
- Wrapping up and next steps
What you need
- ● Wooden stakes or posts: 4 pieces, each 4–6 feet tall (depending on desired height) and 2x2 inches in diameter. Cedar or pine work well for durability.
- ● Wooden slats or 1x2 boards: 8–12 pieces, each 3–4 feet long (cut to size if needed). These will form the cage’s vertical and horizontal supports.
- ● Galvanized screws or decking screws: 1.5–2 inches long, about 20–30 screws total (stainless steel prevents rust).
- ○ Wood glue (optional but recommended): For extra reinforcement at joints.
- ● Measuring tape and pencil (for marking cuts).
- ● Circular saw, miter saw, or handsaw (to cut wood to size).
- ● Drill/driver with drill bit (for pre-drilling screw holes, if needed).
- ● Speed square or carpenter’s square (for ensuring right angles).
- ○ Clamps (optional) (to hold pieces steady while assembling).
- ● Sandpaper (80–120 grit) (to smooth rough edges).
- ○ Wood stain or paint (optional) (for weatherproofing—choose non-toxic options if edibles are nearby!).
- ● Corrugated metal roofing or wire mesh (to reinforce the top for wind resistance).
- ● Hinges or removable panels (for easier access to prune tomatoes).
- ● Concrete footings or rebar (to anchor stakes deeper for stability in windy areas).
- ● Twine or zip ties (to secure loose slats temporarily during assembly).
Step-by-Step instructions for building a sturdy wooden tomato cage
Here's the method I've perfected over seasons—strong enough to support 20-pound tomatoes without bending.
🪴 Step 1: Gather and Cut the Materials Precisely
You'll need 4 vertical posts (each 7 feet tall) and 16 horizontal slats (each 24 inches long). I use 2x2 pressure-treated lumber for the posts—it resists rot better than untreated wood. For the slats, 1x2 cedar works perfectly because it's lightweight yet sturdy.
Cut the vertical posts first. Mark 72 inches on each piece (accounting for the top where the vine will spiral). For the horizontal slats, cut 16 pieces at 24 inches each. The reason for these exact measurements? A 7-foot height gives vines plenty of room to grow vertically, while 24-inch spacing between slats prevents fruit from rotting against the wood.
✂️ Step 2: Assemble the Vertical Frame
Start by placing two vertical posts 2 feet apart on a flat surface. Use 3-inch exterior wood screws to attach the first horizontal slat 6 inches from the top. Repeat this process for the second post, ensuring both slats are perfectly level. This creates the top "ring" of your cage.
Next, add a second slat 18 inches below the first on both posts. Continue this pattern, spacing each slat 18 inches apart down the full length of the posts. You'll end up with 4 slats per post, creating a sturdy ladder-like structure. This spacing ensures the cage remains stable while allowing airflow around the plant.
🪴 Step 3: Connect the Posts to Form the Cage Structure
Now, pair the two assembled posts together. Place them 2 feet apart and align the slats perfectly. Use 2x4 stakes as temporary supports to hold them in place while you attach the remaining slats. For each horizontal level, add two slats—one on each side—to bridge the gap between the posts. Secure them with 3-inch screws at both ends.
Repeat this process with the second pair of posts, maintaining the 2-foot width between them. Once both sides are complete, you'll have two identical rectangular frames. The key here is symmetry—uneven connections will cause the cage to wobble when weighted with fruit.
🌱 Step 4: Reinforce the Base and Add Stability
Flip the cage upright and place it in your garden. Drive 4 stakes (each 18 inches long) into the ground at a 45-degree angle, positioning them at the corners of the cage's base. This creates a diagonal support system that prevents the cage from tipping over in wind or when laden with tomatoes.
To further stabilize, add two diagonal braces between the top and bottom of opposite corners. Cut 2x2 lumber at 30 inches and screw them into place. This step is critical—without reinforcement, a fully loaded cage can collapse under the weight of a single large tomato.
☀️ Step 5: Finish and Position for Optimal Growth
Sand any rough edges or splinters to prevent injury to your vines. I like to apply a water-based wood sealant to protect the wood from moisture while allowing it to breathe. Let it dry completely before planting.
Position the cage in a location with full sun exposure (at least 6-8 hours daily). The 2-foot width between posts gives you enough space to weave the main stem through the slats as it grows, encouraging upward growth rather than sprawling. Start training the vine early—once it reaches 3 feet tall, gently tie it to the cage with soft plant ties to avoid damaging the stem.
Tips & tricks for building a sturdy wooden tomato cage
Here's what I've learned after years of testing—these small details make all the difference between a cage that sags and one that supports your heaviest tomatoes.
Precision in Step 1 is Everything: When cutting your 7-foot posts to 72 inches, use a sharp saw and mark measurements twice to avoid errors. The extra 12 inches (72" vs. 60") at the top creates the spiral space for vines to climb naturally. I've seen cages fail when this detail was skipped—don't make that mistake. The 18-inch spacing between slats might seem arbitrary, but it's the perfect balance between stability and airflow that prevents rot.
Symmetry Matters in Step 3: The 2-foot width between posts isn't just a random measurement—it's the ideal width for tomato vines to weave through without crowding. When connecting your frames, use a level to ensure both sides are perfectly parallel. I learned this the hard way when my first attempt had one side slightly wider, causing the cage to lean dangerously when loaded with fruit.
Reinforcement Secrets in Step 4: Those 45-degree stakes and 30-inch diagonal braces aren't just decorative—they're what keeps your cage standing during summer storms. I recommend pre-drilling holes for the braces before assembly to prevent wood splitting. For extra peace of mind, add a fifth stake in the center of the base if you're in a windy area.
Sun Exposure Strategy: While the instructions mention 6-8 hours of sun, I've found that positioning your cage with its longest side running north-south maximizes exposure. This prevents shading from neighboring plants and ensures even growth. Also, avoid placing it directly against a fence or wall—leave at least 18 inches of clearance for airflow.
Pro Tips for Make A Wooden Tomato Cage
- Here's what I've learned after years of testing—these small details make all the difference between a cage that sags ...
- Precision in Step 1 is Everything: When cutting your 7-foot posts to 72 inches, use a sharp saw and mark measurements...
- Symmetry Matters in Step 3: The 2-foot width between posts isn't just a random measurement—it's the ideal width for t...
Frequently asked questions
Got questions about building your wooden tomato cage? You’re not alone! Here are answers to the most common queries to help you craft the perfect DIY support for your lush tomato vines.
What’s the best wood to use for a tomato cage?
Opt for cedar, redwood, or pressure-treated pine—they resist rot and pests. Avoid untreated wood, as moisture from soil and plants can cause warping or mold. If budget is tight, cedar or redwood last longer despite the higher upfront cost.
When is the best time to build a tomato cage?
Construct your cage before planting season (early spring) so it’s ready when seedlings go in. If you’re starting late, build it 2–3 weeks before transplanting to allow time for assembly and staking. Pro tip: Pre-assemble it indoors for a smoother garden setup!
Can I use a wooden tomato cage for other plants?
These cages work for pepper plants, cucumbers, beans, or even small fruit trees like tomatoes or indeterminate varieties. For heavier vines (e.g., squash), reinforce the frame with extra stakes or wider slats. Just adjust the height based on your plant’s growth habits.
What if my cage wobbles or collapses under the weight?
Wobbling usually means the base isn’t wide or deep enough. Sink the posts 12–18 inches into the soil and secure them with stakes or a metal rod for extra stability. For extra support, tie the cage to a heavy-duty stake or use galvanized wire to reinforce joints.
How can I make my wooden cage look nicer in the garden?
Skip paint (it can trap moisture), but you can stain the wood with a non-toxic sealant for a polished look. For a rustic vibe, leave it natural or add twine-wrapped slats. Bonus: Paint the top of the frame a bright color to deter pests while keeping the rest earthy!
Wrapping up and next steps
Building your own wooden tomato cage is a rewarding project that saves money and gives your garden a personalized, sturdy boost! With just a few basic materials and a little elbow grease, you’ve created a functional and eco-friendly solution to support your thriving tomato plants. 🌱✨
Now that you’re ready to assemble your cage, watch your tomatoes grow taller—and your confidence as a DIY gardener soar! Ready to plant? Grab those seeds and get growing—your garden (and future bruschetta) will thank you! 🍅🔨