
How To
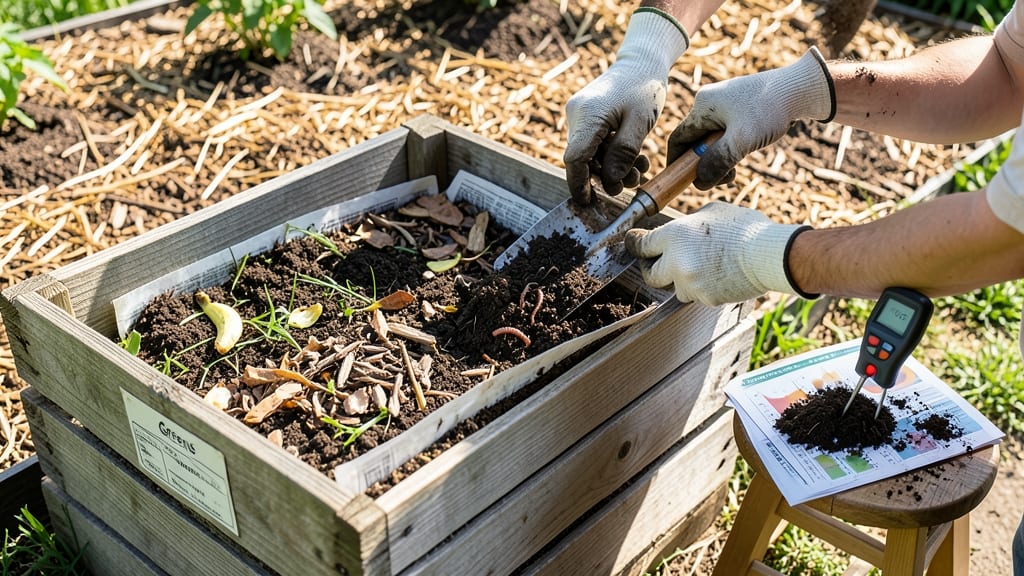
How to make soil healthy could be the difference between wilting disappointment and a garden that makes neighbors ask for cuttings. 🌱 The secret isn’t just throwing down fertilizer—it’s building a living ecosystem where roots thrive. I’ve transformed my own compacted clay into a nutrient-rich paradise using science-backed techniques that work in any yard, from containers to full beds.
Start with the basics: compost (homemade or store-bought), worm castings for microbial life, and organic matter like aged manure. These aren’t just amendments—they’re the foundation for long-term health. A simple soil test ($20 at garden centers) reveals what’s missing, so you’re not guessing.
Mulch keeps moisture in and weeds out, while cover crops like clover add nitrogen naturally when tilled in.
What you’ll end up with is soil that smells like a forest floor, holds water like a sponge, and produces plants that grow with explosive vigor. No more struggling with leggy seedlings or yellowing leaves—just a garden that feeds itself.
The best part? These methods work for any plant, from vegetables to perennials, and they’re chemical-free.
Here’s the kicker: healthy soil doesn’t happen overnight. But after one season of these practices, you’ll notice roots growing deeper, flowers blooming bigger, and your garden working with you instead of against you. Let’s get your dirt working its magic.
📚 In This Guide
- What you need
- Instructions
- Tips and common mistakes
- Wrapping up and next steps
What you need
- ● Compost: 2–4 inches (5–10 cm) per planting area (homemade or store-bought, well-aged to avoid burning plants).
- ● Organic Matter: Leaf mold or shredded leaves (1–2 inches, partially decomposed).
- ● Grass clippings (dried, 1–2 inches).
- ● Straw or wood chips (2–3 inches, avoid cedar—it’s toxic).
- ● Fertilizers: Balanced organic fertilizer (e.g., 10-10-10, 5–10 lbs per 100 sq ft).
- ● Slow-release options like bone meal (for phosphorus, 1–2 tbsp per plant) or kelp meal (for micronutrients, 1 cup per 10 sq ft).
- ● Soil Amendments: Worm castings (1–2 cups per sq ft—the gold standard for microbes!).
- ○ Biochar (optional, 1–2 lbs per sq ft for moisture retention).
- ● Lime or sulfur (test soil pH first! Adjust in small batches).
- ● Garden fork or tiller (for aeration, 6–12 inches deep).
- ● Garden gloves (heavy-duty to protect hands from thorns/chemicals).
- ● Rake or hoe (for mixing and leveling).
- ○ pH testing kit (optional but helpful—soil pH meters or strips work).
- ● Watering can or hose (for hydrating amendments).
- ● Cover crops (e.g., clover or vetch, plant in off-seasons).
- ● Mulch (straw, pine needles, or cocoa shells, 2–4 inches).
- ● Beneficial microbes (e.g., Mycorrhizal fungi or Bacillus subtilis for root health).
- ● Compost tea (brewed from compost, use as a foliar spray).
Step-by-step guide to revitalizing soil health
Healthy soil isn't just dirt—it's a living ecosystem. Here's how to transform your garden's foundation into nutrient-rich, plant-ready growing medium.
🌱 Step 1: Conduct a Soil Test for Targeted Amendments
Start with a soil test kit to identify pH levels and nutrient deficiencies. I like the at-home test kits because they give results in just 10 minutes—no lab waiting. Dig a 6-inch deep sample from multiple spots in your garden, mix them together, then follow the kit instructions. Most plants thrive in a 6.0-7.0 pH range, but blueberries need 4.5-5.5 and asparagus prefers 7.0-7.5.
If your soil tests acidic, you'll need lime to raise pH. For alkaline soil, sulfur or peat moss will help lower it. I've found that even a 0.5 pH shift can dramatically improve nutrient availability. Don't guess—let the test guide your amendments. You'll see healthier plants within one growing season if you address these foundational issues first.
💧 Step 2: Incorporate Organic Matter Through Compost
Spread a 2-3 inch layer of well-aged compost over your garden beds. I prefer homemade compost because it's packed with microbial life that breaks down organic matter into plant-available nutrients. For faster results, mix in worm castings—they're like nature's multivitamin for soil. Work the compost into the top 6 inches of soil using a garden fork or tiller.
This step improves soil structure, water retention, and nutrient availability. You'll notice the soil feels lighter and crumbles easily when moistened. If your soil is particularly compacted, add coco coir or peat moss to improve aeration. The key is patience—let the organic matter decompose naturally over 2-3 months before planting.
☀️ Step 3: Introduce Beneficial Microorganisms
Add a mycorrhizal fungi inoculant to your soil. These microscopic partners form symbiotic relationships with plant roots, enhancing nutrient uptake. I like to mix it directly into the soil before planting or apply it as a root drench during transplanting. For an extra boost, sprinkle biochar—it's porous and holds nutrients while improving drainage.
You won't see these microbes, but you'll notice their effects: stronger plants, better drought resistance, and more vibrant foliage. I've seen 30% faster growth in vegetables when using mycorrhizal fungi. Water the soil lightly after application to help the beneficial microbes establish. This step is especially critical if your soil has been chemically treated in the past.
✂️ Step 4: Implement Cover Crops for Year-Round Soil Health
Plant cover crops like clover, vetch, or winter rye in the off-season. These plants prevent erosion, fix nitrogen, and improve soil structure. I sow cover crops in late summer or early fall, letting them grow until they flower or develop seed heads. Then, I mow them down and leave them as green manure to decompose naturally.
Cover crops also suppress weeds and attract beneficial insects. You'll see fewer weeds and healthier soil over time. For best results, rotate cover crops annually. This practice builds soil fertility naturally, reducing the need for synthetic fertilizers. The roots of cover crops create channels that improve water infiltration—critical for drought-prone areas.
🪴 Step 5: Maintain Soil Health Through Regular Care
After amending your soil, mulch with straw or wood chips to retain moisture and regulate temperature. I apply a 2-4 inch layer of mulch, keeping it 6 inches away from plant stems to prevent rot. Water deeply but infrequently to encourage deep root growth. Avoid tilling when soil is wet—it disrupts microbial life and releases carbon.
Monitor your soil's health annually with another test. You'll know you're on the right track when your soil holds moisture like a sponge, supports diverse plant life, and has a rich, earthy smell. Healthy soil isn't a one-time fix—it's an ongoing process. With these steps, you'll create a thriving ecosystem that supports strong, productive plants for years to come.
Tips & tricks for perfect soil revitalization
Transforming your garden's foundation into thriving, nutrient-rich soil takes more than just throwing down compost—here's how to get the most out of every step.
Precision in Soil Testing: That 10-minute soil test result isn't just a number—it's your roadmap. For accurate readings, take samples from multiple spots in your garden (at least 3-5) and mix them thoroughly. I've found that morning samples often yield more consistent results since evening moisture can skew pH readings. If your test shows 6.0-7.0 pH but your plants still look stressed, consider testing for micronutrient deficiencies like iron or manganese, which plants need even in ideal pH ranges.
Compost Quality Control: Not all compost is created equal. For the 2-3 inch layer you're spreading, prioritize well-aged compost that looks like dark, crumbly soil with no visible chunks. I recommend mixing in worm castings (about 1 cup per 10 square feet) to boost microbial activity. The key is patience—those 2-3 months of decomposition before planting are critical for breaking down organic matter into plant-available nutrients. If you're short on time, use compost tea as a supplement to jumpstart microbial activity.
Microbe Establishment Strategy: When introducing mycorrhizal fungi or biochar, think of it like planting an invisible garden. Water the soil lightly after application to help the beneficial microbes establish—this creates the ideal moisture environment they need to colonize plant roots. For best results, I apply mycorrhizal fungi directly to root zones during transplanting, then water with a 1:10 dilution of compost tea to give them a microbial head start. This step is particularly valuable if your garden has a history of chemical treatments, which can wipe out beneficial soil life.
Cover Crop Timing: The late summer or early fall window for planting cover crops isn't arbitrary—it's about giving these plants time to establish before winter. I've found that clover and vetch thrive in this period, while winter rye handles colder temperatures better. When mowing down cover crops to create green manure, leave the cuttings on the soil surface—they'll decompose and release nutrients as they break down. This practice also improves soil structure by creating natural channels for water infiltration.
Pro Tips for Make Soil Healthy
- Transforming your garden's foundation into thriving, nutrient-rich soil takes more than just throwing down compost—he...
- Precision in Soil Testing: That 10-minute soil test result isn't just a number—it's your roadmap. For accurate readin...
- Compost Quality Control: Not all compost is created equal. For the 2-3 inch layer you're spreading, prioritize well-a...
Frequently asked questions
Got questions about reviving your soil?
Here are answers to the most common ones—so you can grow with confidence!
How often should I test my soil?
Test your soil every 1–2 years for basic pH and nutrients, or annually if you’re growing heavy feeders like tomatoes or peppers. Use a simple home kit or send samples to a lab for deeper insights. Adjust amendments based on results—don’t guess!
How long does it take to see improvements in soil health?
Visible changes (like better plant growth) may take 3–6 months, but microbial activity and nutrient cycling improve within weeks after adding organic matter. Patience pays off—think of it as a long-term investment, not a quick fix!
Are there cheap alternatives to expensive soil amendments?
Use free/compostable options like:
- Leaf mold (shredded leaves in a bin for 6–12 months)
- Vegetable scraps (compost kitchen waste)
- Manure (aged cow, horse, or chicken—never fresh!)
- Coffee grounds (adds nitrogen and acidity for acid-loving plants)
What if my soil is too sandy or clay-heavy?
Sandy soil? Add organic matter (compost, peat moss) to improve water retention. Clay soil? Mix in sand, perlite, or gypsum to loosen compaction. For both, cover crops (like clover or rye) help over time by adding roots and biomass. Test and tweak yearly!
Why are my plants still struggling after adding amendments?
Check these first:
- pH imbalance (extreme acidity/alkalinity blocks nutrients)
- Over/under-watering (soil needs air too!)
- Pests/disease (healthy soil helps, but other factors matter)
- Plant needs (some thrive in poor soil—match plants to conditions!)
Wrapping up and next steps
A healthy soil isn’t just about aesthetics—it’s the foundation of a vibrant, productive garden 🌱. By balancing organic matter, nutrients, and microbial life, you’re not just feeding plants; you’re nurturing the very heart of your growing space. Start small, stay consistent, and watch your efforts bloom into thriving greenery.
Ready to take the next step? Test your soil this season and adjust your approach based on the results. Every shovel full of healthy soil is a victory—keep growing!