
How To
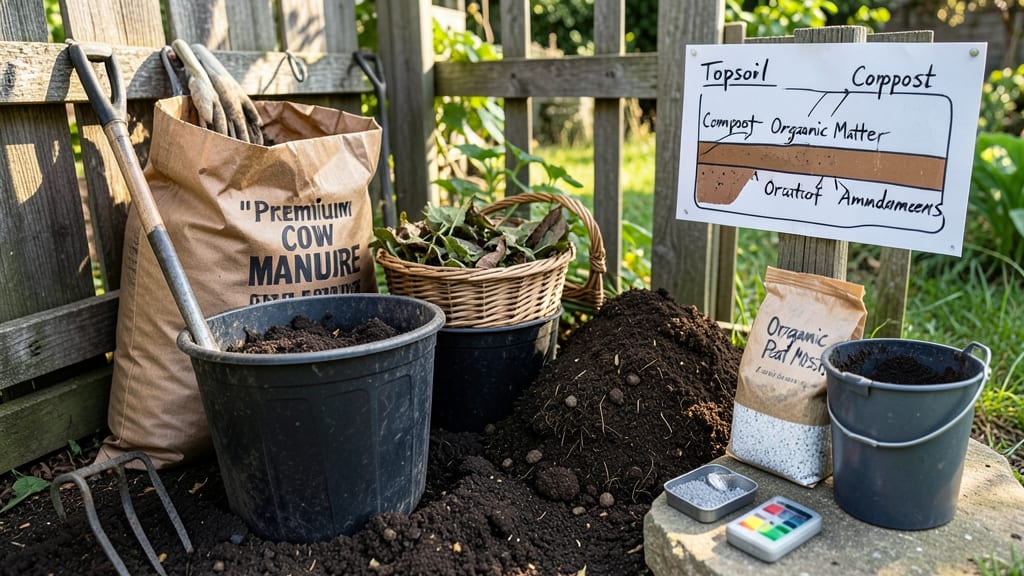
How to make your own soil for vegetable gardens deserves a little extra love—because the difference between sad, stunted plants and a thriving harvest often comes down to what’s in the dirt. You don’t need to buy bags of expensive mix to get it right. I’ve been building my own garden soil for three seasons now, and the results speak for themselves: plants that grow faster, resist pests better, and produce more than ever before.
The secret isn’t complicated—it’s about balancing three key ingredients: organic matter for nutrients, a bulking agent for structure, and something to keep it light and breathable. You’ll need compost (homemade or store-bought), coconut coir or peat moss for moisture retention, and perlite or vermiculite to prevent compaction.
The ratio is simple: two parts compost, one part coir/peat, and one part perlite—but feel free to adjust based on your soil’s starting condition.
What you end up with is a crumbly, dark mix that holds moisture like a sponge but drains like a dream. Roots spread easily, beneficial microbes thrive, and your vegetables get exactly what they need to grow strong.
The best part? This mix stays fertile for at least two growing seasons if you top-dress with compost each year. No more guessing what your plants need—they’ll tell you with their growth.
Works for any vegetable garden, whether you're starting from scratch or reviving tired soil. The method scales too—double the recipe for raised beds, halve it for containers. Let's get your plants the foundation they deserve!
📚 In This Guide
- What you need
- Instructions
- Tips and common mistakes
- Wrapping up and next steps
What you need
- ● Topsoil (or garden soil): 50% of your mix (about 10-12 cubic feet for a 4’x8’ bed). Choose a high-quality, organic option.
- ● Compost: 25-30% of your mix (3-4 cubic feet). Use well-aged, decomposed compost for maximum nutrients.
- ● Peat moss or coconut coir: 10-15% of your mix (2-3 cubic feet). Improves moisture retention and aeration.
- ● Perlite or vermiculite: 5-10% of your mix (1-2 cubic feet). Adds lightness and drainage.
- ○ Balanced fertilizer (optional but recommended): 1-2 cups per 4’x8’ bed. Use a 10-10-10 or similar ratio for even growth.
- ● Garden fork or spade: For turning and mixing soil layers.
- ● Wheelbarrow or large container: To haul and blend materials easily.
- ● Gloves and protective eyewear: Safety first when handling soil and amendments!
- ○ pH testing kit (optional): To check soil acidity/alkalinity (ideal range: 6.0-7.0 for most veggies).
- ● Watering can or hose: For moistening the mix before planting.
- ● Worm castings: 1-2 cups per bed. Boosts microbial activity and nutrient availability.
- ● Biochar: 5-10% of your mix. Enhances water retention and soil structure.
- ● Bone meal or kelp meal: For phosphorus (roots) or potassium (overall health).
- ● Wood ash (sparingly): Raises pH slightly—use only if your soil is acidic.
Tips & tricks for building custom vegetable garden soil
These practical insights will help you create the perfect nutrient-rich foundation for your plants—without common pitfalls.
Base Material Consistency: When mixing equal parts compost, aged manure, and garden soil, use a scale for precision rather than volume measurements. Organic matter varies in density—what looks like "equal parts" by volume might actually be 1:2:3 by weight. For example, a 5-gallon bucket of compost might weigh 10 pounds, while the same volume of manure could weigh 15 pounds. This imbalance can throw off your nutrient ratios, so weigh each component separately when possible.
Nutrient Layering Strategy: In Step 2, when adding worm castings and bone meal, incorporate them in layers rather than all at once. Start with half the worm castings, mix thoroughly, then add the bone meal, followed by the remaining castings. This gradual incorporation prevents nutrient "hot spots" where certain areas become overly concentrated, which can burn plant roots. Think of it like building a lasagna—each layer contributes something essential without overwhelming the next.
Testing Your Mix Before Use: After the 24-hour stabilization period in Step 3, conduct a simple "squeeze test" to verify your soil's readiness. Grip a handful firmly—it should hold together but crumble when pressed gently. If it falls apart completely, add a bit more water; if it stays in a solid clump, mix in a handful of perlite or sand to improve aeration. This test ensures your soil has the perfect balance of moisture retention and drainage before planting.
Pro Tips for Make Your Own Soil For Vegetable Gardens
- These practical insights will help you create the perfect nutrient-rich foundation for your plants—without common pit...
- Base Material Consistency: When mixing equal parts compost, aged manure, and garden soil, use a scale for precision r...
- Nutrient Layering Strategy: In Step 2, when adding worm castings and bone meal, incorporate them in layers rather tha...
Frequently asked questions
Got questions about crafting your perfect vegetable garden soil?
You’re not alone! Here are answers to the most common queries to help you grow with confidence.
How long does homemade soil mix last?
With proper storage (dry, covered, and in a cool place), your custom soil mix can last 1–2 years. Over time, organic matter breaks down, so refresh with compost or aged manure before replanting. For long-term use, store components separately and remix as needed.
Can I make this soil mix in one day?
While some ingredients (like compost) benefit from aging, you can assemble a functional mix in a few hours. Just ensure materials are dry and evenly blended. For faster results, use pre-composted materials or worm castings to skip the waiting game.
Is homemade soil cheaper than store-bought?
Yes—dramatically! Store-bought bags (e.g., potting mix) cost $3–$5 per cubic foot, while DIY soil costs pennies per gallon. Over time, you’ll save hundreds by sourcing compost, peat moss, or perlite locally. Plus, you control quality and avoid additives like synthetic fertilizers.
What if my soil smells bad?
A slight earthy scent is normal, but a rotten or ammonia-like odor means excess moisture or fresh manure. Fix it by:
- Adding dry materials (peat moss, sand) to absorb moisture.
- Mixing in more compost to balance fresh organics.
- Aging the mix for 2–4 weeks before use.
Can I reuse old garden soil?
Reusing soil is great for sustainability, but test it first. If it’s compacted or nutrient-depleted, amend it with:
- Fresh compost (10–20%).
- Perlite or vermiculite (to improve drainage).
- A balanced fertilizer (optional).
Wrapping up and next steps
Creating your own nutrient-rich soil for a vegetable garden is simpler—and more rewarding—than you might think! 🌱 With just a few key ingredients like compost, organic matter, and a balanced mix of textures, you’ve got the foundation for a thriving garden.
The best part? Every layer you add is a step toward healthier plants, fresher harvests, and a deeper connection to the earth.
Now that you’re armed with the how-to, it’s time to roll up your sleeves and get growing! Start small—even a single raised bed or container can make a difference. Which veggies will you plant first? 🥕🌿