
Landscaping
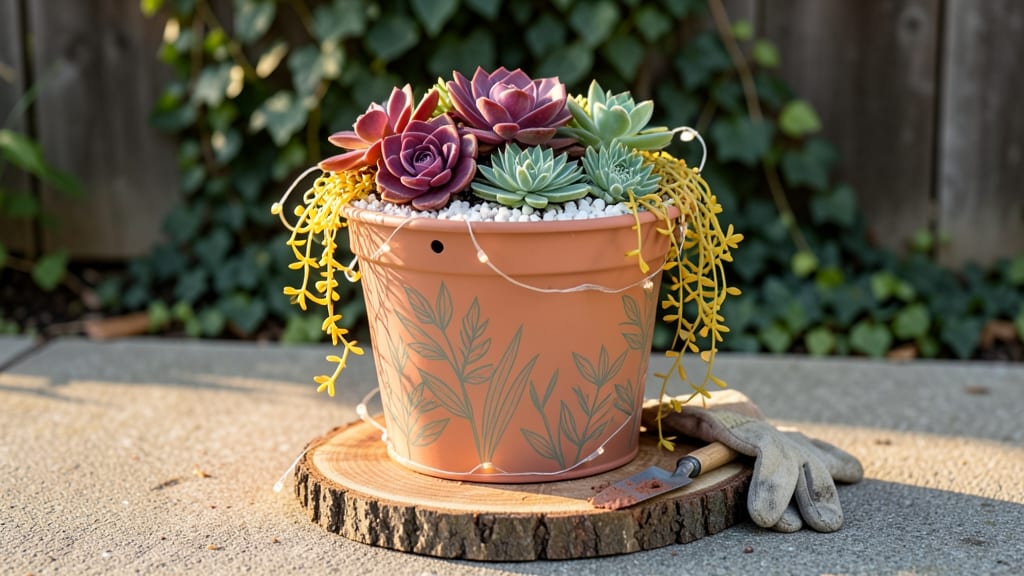
Learn how to decorate a 5-gallon bucket planter into a stylish, drainage-savvy garden showstopper—no fancy tools required. ✨ I’ve turned these everyday containers into everything from lush herb gardens to eye-catching flower displays, all while keeping roots happy and water flowing freely out the bottom.
The best part? It’s beginner-friendly and packed with creative potential.
Start with two simple hacks: drill drainage holes (or use a pre-punched bucket) and line it with landscape fabric to keep soil in place. Then, let your creativity shine—paint it weathered gray for a rustic look, wrap it in burlap for texture, or stencil a botanical design.
The key is balancing function (like adding a saucer to catch runoff) with aesthetics that match your space.
You’ll end up with a planter that’s as pretty as it is practical—perfect for herbs on your kitchen windowsill, trailing flowers on a balcony, or even a mini vegetable garden in a small yard.
The drainage system prevents soggy roots, while the decor makes it a statement piece. Plus, swapping out soil and plants keeps it fresh season after season.
Works for any skill level and fits almost anywhere. Whether you’re growing basil, petunias, or cherry tomatoes, these buckets become the unsung heroes of small-space gardening. Ready to give it a try?
📚 In This Guide
- What you need
- Instructions
- Tips and common mistakes
- Wrapping up and next steps
What you need
- ● 5-gallon bucket (food-grade or plastic, with or without a lid—your choice!)
- ● Drill (with 1/4-inch or 3/8-inch drill bit for drainage holes)
- ● Sandpaper or emery cloth (120-grit or finer, for smoothing rough edges)
- ● Paint or stain (outdoor-rated, non-toxic if edible plants are involved)
- ● Paintbrush or foam brush (for detailed work) + roller (for larger areas)
- ○ Clear sealant or polyurethane (optional but recommended for weatherproofing)
- ● Drainage gravel or pebbles (1–2 inches, like pumice or aquarium stones)
- ● Potting soil (well-draining mix, 1–2 bags depending on plant size)
- ● Plants or seeds (succulents, herbs, or flowers—pick your favorites!)
- ● Decorative elements: Twine, lace, or burlap for rustic charm; mosaic tiles or stencils for flair
- ● Hanging hardware: S-hooks or chains (if repurposing as a hanging planter)
- ● LED string lights (battery-operated for a magical touch)
- ● Stencils or vinyl decals (for custom designs or quotes)
- ● Watering can or self-watering kit (for low-maintenance plants)
Step-by-Step instructions for decorating a 5-Gallon bucket planter
Transform that plain plastic bucket into a stylish, functional planter with these creative techniques.
🪴 Step 1: Prep the Bucket for Planting
Start by drilling 4-6 drainage holes in the bottom of your bucket using a ½-inch drill bit. Space them evenly around the edges—this prevents root rot by letting excess water escape. I like to place them about 1 inch from the bottom so the soil doesn't wash out when watering. If you're using a metal bucket, pre-drill pilot holes to avoid cracking the material.
Next, line the bottom with landscape fabric to keep soil from escaping through the holes while still allowing water to drain. Secure it with a staple gun or by tucking it neatly into the bucket. This step is especially important if you're planting herbs or succulents, which hate soggy roots. A little extra effort here means healthier plants down the line.
🎨 Step 2: Paint or Stain for Rustic Charm
Clean the bucket thoroughly with soapy water and let it dry completely before decorating. For a rustic look, use exterior-grade paint in matte or chalky finishes—these hide imperfections better than glossy options. I recommend a stencil or freehand design for a handmade touch. If you're using a metal bucket, a metallic spray paint adds a sleek, industrial vibe that pairs well with modern gardens.
Let the paint dry 24 hours before adding soil, or you'll risk smudging. Pro tip: Use acrylic paint for plastic buckets—it's more durable and won't crack under sunlight. If you're short on time, a quick stain (like a dark walnut or sage green) can give the bucket a natural, weathered appearance without the drying wait.
🌿 Step 3: Add Decorative Elements
Now for the fun part—personalizing your planter! Wrap the bucket with burlap or twine for a farmhouse feel, or attach wooden slices around the top edge as a rim. I like to use chalkboard paint on a small section of the bucket to label plants—just grab a piece of chalk and write the name directly on the surface. For a whimsical touch, add miniature garden flags or fairy lights if you're placing it near a patio.
If you're planting something tall (like grasses or ornamental millet), consider adding a decorative pot saucer underneath to catch runoff. This keeps your space tidy and protects surfaces from water stains. The key here is balance—don’t overcrowd the bucket with too many embellishments, or it’ll look cluttered instead of charming.
💧 Step 4: Fill With Soil and Plant
Fill the bucket with well-draining potting mix—avoid garden soil, which compacts and suffocates roots. For a 5-gallon bucket, you’ll need about 4 gallons of soil, leaving 1 inch at the top for watering. Press the soil lightly to remove air pockets, then create a small hole for your plant. Gently remove it from its nursery pot and place it in the bucket, covering the roots with soil.
Water the plant thoroughly until water runs out the drainage holes—this helps settle the soil and removes air bubbles. If you're planting succulents or drought-tolerant plants, mix in perlite or sand to improve drainage. A little mulch on top (like gravel or decorative stones) keeps moisture in and adds a polished finish. Here’s where your drainage work pays off—no more soggy roots ruining your decor!
✂️ Step 5: Maintain and Refresh
Check the drainage holes every 3-4 months—soil and debris can clog them over time. Use a wire or small hook to clear any blockages. If your paint starts to fade, touch it up with a small brush. For metal buckets, a light coat of clear sealant every season keeps rust at bay. I also like to rotate my buckets occasionally so all sides get even sunlight—this keeps plants healthy and your decor looking fresh.
When it’s time to replant, give the bucket a quick scrub with mild soap and water to remove old soil residue. If the paint’s looking worn, a fresh coat will make it good as new. The best part? Your decorated bucket isn’t just functional—it’s a statement piece that evolves with your garden. Happy planting!
Tips & tricks for perfect 5-Gallon bucket planter decor
Here's what I've learned after transforming buckets into stunning planters—these little details make all the difference.
Drainage Design: When drilling your 4-6 drainage holes in Step 1, I recommend creating a small lip around each hole with a pencil or marker before drilling. This prevents soil from washing out while still allowing proper drainage. For metal buckets, use a nail to gently tap pilot holes first—this prevents cracking and makes the final drilling much easier.
Paint Prep: The 24-hour drying time in Step 2 is non-negotiable for plastic buckets, but for metal ones, you can cut this to 12 hours if you use spray paint. Always apply a thin primer coat first—this helps the paint adhere better and prevents peeling. I've ruined three buckets by skipping this step and ended up with chipped paint after just one season.
Material Selection: For Step 3's decorative elements, avoid using regular twine—opt for jute or hemp twine instead. It's more durable and won't degrade as quickly in outdoor conditions. If you're using wooden slices, seal them with outdoor varnish first to prevent moisture damage. This small step makes your decor last seasons instead of just one summer.
Soil Strategy: In Step 4, don't just fill with any potting mix. For herbs and succulents, mix your 4 gallons of well-draining soil with 1 cup of perlite or vermiculite. This creates better aeration and prevents compaction. I've found that pre-moistening the soil slightly before adding plants helps it settle more evenly around roots.
Pro Tips for Decorate A 5 Gallon Bucket Planter
- Here's what I've learned after transforming buckets into stunning planters—these little details make all the difference.
- Drainage Design: When drilling your 4-6 drainage holes in Step 1, I recommend creating a small lip around each hole w...
- Paint Prep: The 24-hour drying time in Step 2 is non-negotiable for plastic buckets, but for metal ones, you can cut ...
Frequently asked questions
Got questions about turning your 5-gallon bucket into a stylish planter? We’ve got answers! Here are some of the most common concerns—and how to tackle them like a pro.
Can I use a 5-gallon bucket planter for any plant?
Most herbs, succulents, and small vegetables (like lettuce or peppers) thrive in 5-gallon buckets. However, larger plants (e.g., tomatoes or shrubs) may outgrow the space. Check your plant’s mature size—if it’s too big for the bucket, opt for a bigger container or pair it with a trellis!
What’s the best way to decorate a bucket without damaging it?
Skip harsh chemicals like paint thinner or sandpaper—these can weaken the plastic. Instead, try vinyl decals, chalkboard paint (applied with a primer), or washi tape for removable flair. For a rustic look, wrap the bucket in burlap or twine and secure it with hot glue.
How long does it take to decorate and prep a bucket planter?
If you’re DIY-ing from scratch, budget 1–2 hours for drilling drainage holes, cleaning the bucket, and adding decor. Pro tip: Pre-drill holes first—this saves time and prevents messy mid-project fixes! For a quick refresh (like adding paint or labels), you can wrap it up in 30 minutes or less.
What if my bucket planter leaks or drains too fast?
Leaks usually mean your drainage holes are too big or too many. Reduce the size with a drill bit or cover holes with coffee filters or mesh to slow water flow. For extra stability, place the bucket on a saucer or tray to catch runoff. Overwatering? Let the top inch of soil dry out before adding more water.
Can I reuse a bucket that’s been used for something else (like paint or chemicals)?
Nope!
Buckets previously holding chemicals, paint, or food (like milk) can contaminate your soil. Thoroughly clean with hot, soapy water and rinse multiple times. For stubborn residues, soak in a vinegar-water mix (1:1 ratio) before repurposing. When in doubt, grab a new bucket—your plants will thank you!
Wrapping up and next steps
Decorating a 5-gallon bucket planter is a creative, budget-friendly way to elevate your garden with rustic charm and practicality! Whether you’re repurposing old buckets or starting fresh, the key is blending functionality—like built-in drainage—with personalized style.
From painting and stenciling to adding handles or weatherproofing, every step transforms a simple container into a statement piece.
Now that you’ve got the how-to, it’s time to get hands-on! 🌱 Grab your supplies, pick your favorite design, and let your green thumb shine. Ready to plant? Start small, experiment boldly, and enjoy the process—your garden (and neighbors) will thank you!