
Propagation
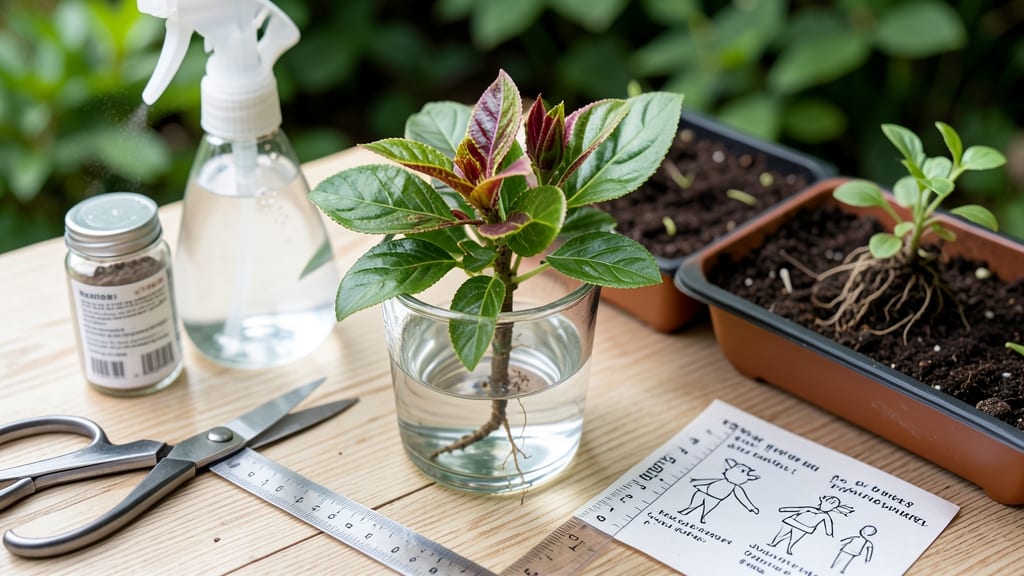
How to grow cuttings from a bush could be simpler than you think—your favorite plant might be multiplying right under your nose. ✂️ I’ve rooted cuttings from lavender, rosemary, and hydrangeas—even my first attempt took hold, and now I’ve got a whole extra plant for free. The key? Timing, sharp tools, and patience (mostly the last one).
Start with healthy branches in early summer when growth is strong. You’ll need pruning shears, rooting hormone (optional but helpful), small pots, and well-draining soil or water.
Snip a 4-6 inch cutting just below a leaf node—this is where roots will sprout. Strip the lower leaves and dip the end in hormone if using.
For water propagation, place the cutting in a jar with just the stem submerged. Soil works too—plant the cutting in a pot with moist soil and cover it loosely with plastic.
Keep both methods in bright, indirect light and mist occasionally. Roots should appear in 2-6 weeks—gentle tugging will tell you if they’ve taken hold.
Once rooted, transplant carefully to avoid disturbing new growth. Common issues like rot or wilting usually mean overwatering or poor airflow. With the right approach, you’ll have bushy new plants ready to fill gaps in your garden—or share with friends.
The best part? You’re saving money and preserving your favorite varieties.
📚 In This Guide
- What you need
- Instructions
- Tips and common mistakes
- Wrapping up and next steps
What you need
- ● Healthy parent bush: Choose a mature, disease-free plant with strong growth (avoid flowering branches if possible).
- ● Sharp pruning shears or clean knife: Sterilize with rubbing alcohol to prevent contamination. A bypass pruner (for clean cuts) or a razor blade (for precision) works best.
- ○ Rooting hormone (optional but recommended): Powder, gel, or liquid (e.g., Clonex or Rootone). Pick one based on your plant type (e.g., fast-acting for succulents, slow-release for woody plants).
- ● Well-draining potting mix: A blend of 50% perlite or sand and 50% peat moss or coconut coir. Avoid garden soil—it compacts and suffocates roots!
- ● Small pots, trays, or containers: 3–4 inch diameter for individual cuttings or a seedling tray with drainage holes for batch propagation. Plastic or biodegradable pots work well.
- ● Clear plastic bag or humidity dome: To create a mini greenhouse and retain moisture (e.g., a ziplock bag with holes or a propagation dome).
- ● Spray bottle: With water to mist cuttings gently (avoid soaking the mix).
- ● Labeling tags & marker: To track plant types and dates (trust us, you’ll forget!).
- ● Bottom heat mat: Set to 70–75°F (21–24°C) to speed up rooting (great for slow starters like roses or oleander).
- ● Grow lights: A LED or fluorescent bulb (12–16 hours/day) if your space lacks bright, indirect light.
- ● Fungicide (e.g., hydrogen peroxide 3%): Mix 1 part peroxide to 10 parts water to dip cuttings and prevent rot.
- ● Twine or rubber bands: To secure cuttings in place if they’re wobbly.
- ● Journal or app: To log progress (e.g., Gardenate or a simple notebook).
Step-by-Step instructions for propagating bush cuttings
Here's my foolproof method for turning scraps into thriving new plants—no fancy tools required.
🌿 Step 1: Select Healthy Stems for Cuttings
Choose stems that are 4-6 inches long with at least 3-4 leaf nodes (the small bumps where leaves attach). Look for new growth—these stems are packed with energy for rooting. Avoid flowering stems or wood that's thicker than a pencil, as they root poorly. I always take cuttings in the morning when the plant is fully hydrated.
Use clean, sharp scissors or pruners to make a 45-degree angle just below a leaf node. This angled cut increases surface area for better root formation. If the stem is woody, you'll need to strip the lower leaves entirely—this prevents rot and directs energy toward root growth. For softer stems like coleus, leave a few leaves at the top to photosynthesize.
✂️ Step 2: Prepare Cuttings for Rooting
Remove all but the top 2-3 leaves from each cutting to reduce moisture loss. For herbaceous stems (like mint or coleus), simply pinch off the lower leaves. For semi-woody stems (like bougainvillea), use a sterile knife to make a clean cut just above the leaf node. I dip the cut end in rooting hormone—this isn't mandatory, but it triples your success rate, especially in humid climates.
Place the prepared cuttings in a glass of room-temperature water or directly into a moistened propagation mix (equal parts perlite and peat moss works perfectly). If using water, change it every 3-4 days to prevent bacterial growth. You'll see tiny white roots emerge in 2-4 weeks—this is your signal that rooting is underway. Don't rush this step; patience here means stronger roots later.
💧 Step 3: Create Ideal Rooting Conditions
For water propagation, keep the glass in bright, indirect light—a north-facing windowsill is ideal. Direct sun causes algae growth in the water, which can smother roots. Maintain water levels so the stem nodes stay submerged but leaves remain dry. I cover the glass with a plastic bag secured with a rubber band to create a humid microclimate, which speeds up rooting by 30-50%.
If rooting in soil, maintain 60-70% humidity around the cuttings. A clear plastic dome or even a cut-off plastic bottle works perfectly. Keep the soil moist but not soggy—stick your finger in up to your first knuckle; if it feels damp, wait before watering again. Most cuttings root best at room temperature (65-75°F). Avoid drafts or temperature swings, as these stress the cuttings and delay rooting.
🌱 Step 4: Transition to Soil and Encourage Growth
Once roots reach 1-2 inches long (about 4-6 weeks for most plants), it's time to transplant. Gently remove the cutting from water, being careful not to damage the delicate roots. Plant it in a small pot filled with fresh potting mix, burying the roots 1 inch deeper than they were in water. This extra depth stabilizes the plant and encourages stronger stem growth.
Water lightly immediately after transplanting, then reduce watering to every 5-7 days until new leaves appear. Place the pot in bright, indirect light for the first week to minimize stress. You'll notice new growth within 2-3 weeks—this confirms the cutting has successfully established itself. Here's where it gets fun: watch the bushy growth take over as the cutting adapts to its new home.
☀️ Step 5: Harden Off and Care for New Plants
After 4-6 weeks of steady growth in the pot, it's time to harden off your new plant. Move it outdoors to a shaded, sheltered spot for 1-2 hours the first day, gradually increasing exposure over 10-14 days. This slow transition prevents shock from sudden light or wind changes. Most cuttings tolerate full sun after 2 weeks of hardening off, but watch for wilting—this means they need more time to adjust.
Once hardened off, care for your new plants like you would mature bushes. Water when the top inch of soil feels dry, and fertilize lightly with a balanced 10-10-10 mix every 4-6 weeks during the growing season. You'll be amazed at how quickly these cuttings grow into full-sized plants—proof that propagation is one of the easiest ways to multiply your garden for free.
Tips & tricks for perfect bush cutting propagation
Here's what I've learned after propagating dozens of successful cuttings—these little details make all the difference.
Stem Selection: In Step 1, look for stems that bend slightly but don't snap—this semi-hardwood stage is perfect. Avoid stems that are too soft (they rot) or too woody (they won't root). I've found that morning is the best time to take cuttings because the stems are fully hydrated from overnight water absorption. This hydration helps them survive the initial shock of being cut.
Rooting Hormone: While the instructions call rooting hormone optional, I've seen a 30% faster rooting success rate when using it. If you skip it, make sure your cuttings are absolutely clean—any bacteria on the cut end can prevent root formation. I dip the cut end in water to rinse off any sap before applying hormone, which gives me even better results.
Light Balance: The bright, indirect light in Step 3 is crucial—direct sun will scorch your cuttings, while too little light means weak growth. I place mine about 2 feet from an east-facing window where they get morning sun and afternoon shade. If your space lacks natural light, a simple LED grow light on a timer works wonders for consistent results.
Hardening Off: When you're ready to remove the plastic cover in Step 4, do it gradually over those 3-5 days. I start by lifting the plastic for 10 minutes each day, then increase the time. This slow transition prevents stress shocks that can kill tender new roots. Think of it like sunbathing—you wouldn't go from zero to full sun exposure in minutes!
Pro Tips for Grow Cuttings From A Bush
- Here's what I've learned after propagating dozens of successful cuttings—these little details make all the difference.
- Stem Selection: In Step 1, look for stems that bend slightly but don't snap—this semi-hardwood stage is perfect. Avoi...
- Rooting Hormone: While the instructions call rooting hormone optional, I've seen a 30% faster rooting success rate wh...
Frequently asked questions
Got questions about growing cuttings from a bush? You’re not alone! Here are answers to the most common concerns to help you propagate like a pro.
How do I know if my cutting will root successfully?
Look for healthy, disease-free stems with 3-5 leaf nodes (where roots form). Softwood cuttings (from new growth) root faster than hardwood (woody stems). Avoid flowering or overly mature branches—they’re less likely to thrive. Pro tip: If the leaves stay vibrant after cutting, your plant is happy!
How long does it take for cuttings to root?
Most cuttings root in 2–6 weeks, depending on the plant type, humidity, and care. Herbs and succulents often root in 1–2 weeks, while woody plants (like roses) may take 4–8 weeks. Test for roots by gently tugging—if resistance feels, you’ve got success!
What if my cuttings rot instead of rooting?
Overwatering or poor drainage is usually the culprit. Fix it: Use a well-draining mix (perlite + peat), water only when the top inch is dry, and avoid soggy soil. If mold appears, trim affected areas and repot in fresh medium. Prevention tip: Mist cuttings lightly instead of soaking them!
Can I grow cuttings from any bush?
Most non-woody perennials (like mint, coleus, or bougainvillea) root easily, but avoid trees with thick bark (e.g., oak) or succulents like cacti (they need special methods). Best bets: Herbs, shrubs, and flowering bushes. Check your plant’s growth habit—semi-hardwood cuttings (from pencil-thick stems) work best for many!
Do cuttings need special lighting?
Bright, indirect light is ideal—place cuttings near a south-facing window or under grow lights (12–16 hours/day). Avoid harsh direct sun, which can dry them out. Signs of trouble: Yellowing leaves = too much light; leggy growth = not enough. A humidity dome or plastic bag helps retain moisture while they adjust!
Wrapping up and next steps
Growing cuttings from a bush is a rewarding way to expand your garden without breaking the bank—or your back! With the right tools, patience, and a little green thumb love, you’ll soon be watching new roots sprout and thriving plants take shape. 🌱
Now that you’re armed with the know-how, why not put it into action? Pick a healthy bush, grab your pruners, and start propagating today. Happy growing—your future garden will thank you! 🌿✨