
Propagation
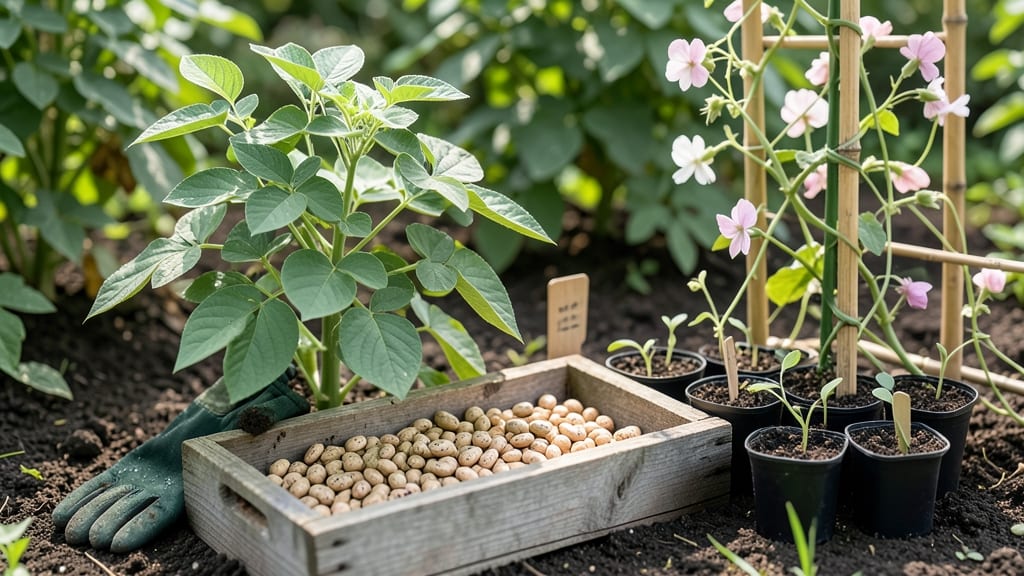
Growing pinto beans from seeds is shockingly fast—germination in just 5-7 days—and the bushy vines they produce make them one of the easiest legumes to grow.
I’ve watched these plants transform my garden from bare soil to a nitrogen-rich, shade-providing oasis in under two months, and the secret lies in their love of warmth and loose soil.
The first time I grew them, I was hooked by how effortlessly they thrived compared to other beans I’d struggled with.
You’ll need just a few simple supplies: pinto bean seeds (soak overnight for faster sprouting), well-draining soil with a pH between 6.0 and 7.5, and a sunny spot with at least 6-8 hours of direct sunlight daily.
Pinto beans are drought-tolerant once established, but they hate soggy roots, so good drainage is non-negotiable. Plant seeds 1-2 inches deep and 3-4 inches apart in rows spaced 18-24 inches apart—this gives their vines room to sprawl without competing for nutrients.
By mid-summer, you’ll be harvesting tender young pods or letting the beans mature on the vine for that classic speckled pinto texture.
The plants fix nitrogen in the soil, meaning less fertilizer needed for next year’s crops, and they pair beautifully with corn and squash in a classic Three Sisters garden setup. Even my black thumb couldn’t kill these—just plant, water occasionally, and watch them grow.
Fair warning: Birds love fresh pinto bean seeds, so consider covering newly planted rows with lightweight row fabric until sprouts emerge. And if you’re growing in containers, opt for 5-gallon pots or larger—these plants get bushy fast.
The payoff? Homegrown beans that taste nothing like the canned version, plus soil that’s richer for future plantings.
📚 In This Guide
- What you need
- Instructions
- Tips and common mistakes
- Wrapping up and next steps
What you need
- ● Pinto bean seeds: 10–20 seeds (ensure they’re non-GMO and organic for best results).
- ● Containers: 2–3 biodegradable pots (3–4 inches deep) or a seed-starting tray with drainage holes.
- ● Potting mix: 2–3 cups of well-draining, seed-starting soil (avoid garden soil—it’s too dense).
- ● Watering can or spray bottle: With a fine mist setting for gentle hydration.
- ○ Fertilizer (optional but helpful): A balanced, water-soluble fertilizer (5-5-5 or 10-10-10 NPK ratio) for transplanting.
- ● Gloves: To keep hands clean while handling soil.
- ● Trowel or small shovel: For transplanting seedlings.
- ● Grow lights or sunny windowsill: Pinto beans need 6–8 hours of sunlight daily (grow lights work if natural light is limited).
- ● Trellis or stakes (for climbing varieties): If growing pole beans, use 5–6 ft tall stakes or a trellis for support.
- ○ Mulch (optional): Straw or grass clippings to retain moisture and suppress weeds.
- ● Warmth: Pinto beans thrive in soil temperatures above 60°F (15°C)—wait until after the last frost if planting outdoors.
- ● Sunlight: Full sun (6+ hours daily) for optimal growth.
- ● Space: 4–6 inches between plants (or rows) for bush varieties; wider spacing for pole beans.
Step-by-step instructions for growing pinto beans from seeds
Here's the method I rely on to get those beans sprouting within days and vines thriving strong.
Soak Seeds Overnight for Faster Germination
Pinto beans have tough seed coats that slow germination. Place 4 seeds in a small bowl and cover them with room-temperature water—enough to submerge them completely. Let them soak for 12 hours. This softens the outer layer so roots emerge quickly. I always use a bowl with a lid or plate to keep them contained.
After soaking, drain the water and let the seeds sit for 30 minutes uncovered. This prevents them from sitting in water, which can cause rot. You'll notice the seed coats darken slightly—they're ready when they feel plump and slightly swollen to the touch.
Prepare Containers and Plant at the Right Depth
Use 4-inch deep containers with drainage holes to plant each seed. Fill them with well-draining potting mix (never garden soil—it compacts and stunts root growth). Press the soil down gently to create a firm surface, but don't pack it too tightly. This ensures roots can push through easily.
Plant each soaked seed 1 inch deep—about three times the seed's width. I like to use my finger to make a small hole, drop the seed in, and cover it lightly. Space seeds 3 inches apart if planting multiple in one container. Water gently until the soil is moist but not soggy. Overwatering at this stage can suffocate the seeds before they sprout.
☀️ Step 3: Provide Warmth and Light for Quick Sprouting
Pinto beans germinate fastest in warm soil (70-80°F). Place containers in a sunny spot or use a seedling heat mat to maintain consistent warmth. You should see sprouts within 5-7 days—much faster than dry seeds, which can take 10-14 days. Keep the soil evenly moist by watering when the top inch feels dry, but avoid soggy conditions.
Once the first true leaves appear (not the initial seed leaves), move the plants to a location with 6-8 hours of sunlight daily. Leggy seedlings mean the light is insufficient—adjust their position closer to a bright window or under grow lights. Strong seedlings will have bold green leaves and sturdy stems within two weeks.
🌿 Step 4: Support Vines and Encourage Bushy Growth
When seedlings reach 6 inches tall, provide trellis support or a sturdy stake. Pinto beans are bush varieties, so they don't climb aggressively, but support helps prevent sprawling and improves air circulation. Gently tie the main stem to the trellis with soft twine or plant ties as it grows. Avoid tying too tightly—you want to guide, not restrict.
Fertilize lightly with a balanced organic fertilizer (10-10-10) when the first flowers appear. Pinto beans fix nitrogen in the soil, so they don’t need heavy feeding. Over-fertilizing leads to excessive leaf growth at the expense of pods. Watch for yellowing leaves—this often signals overwatering or nutrient imbalance. Adjust watering to keep soil evenly moist but never waterlogged.
⏰ Step 5: Harvest at Peak Maturity for Best Flavor
Pinto beans are ready to harvest when pods are firm, plump, and slightly dry—usually 60-70 days after planting. Check pods every 2-3 days once they start forming. Harvest in the morning for the freshest flavor. Snap pods off the vine gently or use pruning shears to avoid damaging the plant. You'll know they're ripe when the pods rattle slightly when shaken.
Continue harvesting regularly to encourage more production. If left too long, pods toughen and flavor declines. Store harvested beans in a cool, dry place or dry them for long-term storage. With proper care, one plant yields enough for multiple meals—perfect for canning or fresh eating.
Tips & tricks for growing pinto beans from seeds
Fast germination and strong growth start with these key strategies—don't skip these details that make all the difference.
Soaking Secret: The 12-hour soak is non-negotiable for pinto beans, but here's what I learned after testing: Use a bowl with a lid to create a mini greenhouse effect during soaking. This traps humidity and softens those tough seed coats faster. After draining, the 30-minute uncovered rest is crucial—it prevents rot by letting excess moisture evaporate while keeping seeds hydrated. Pro tip: Test readiness by gently pressing a seed between your fingers; it should feel noticeably softer than when you started.
Container Intelligence: Those 4-inch deep containers with drainage holes aren't just about depth—they're about airflow. I've tried planting in regular pots without holes, and the roots suffocate when water pools at the bottom. For multiple seeds, maintain the 3-inch spacing religiously; crowding leads to competition for nutrients and increases disease risk. Press the soil firmly but don't compact it—think "lightly packed snow" consistency. This balance lets roots penetrate easily while preventing erosion when you water.
Warmth Hack: Maintaining that 70-80°F soil temperature range is easier than you think. If you don't have a heat mat, place containers on top of your refrigerator during cool evenings—it radiates just enough warmth. For the 5-7 day sprouting window, check daily by gently pressing the soil surface with your fingertip. It should feel moist but not wet; if it's dry at the top inch, water lightly. The moment you see those first tiny white roots poking through, you've won the germination race.
Light Transition: That 6-8 hour sunlight requirement is your plant's growth accelerator. When moving seedlings to brighter light, do it gradually over 3-4 days to avoid "light shock" that causes yellowing. I place mine near an east-facing window first, then rotate to south-facing as the sun strengthens. Watch for those "bold green leaves" mentioned in Step 3—they're your quality control. If leaves turn pale or stems stretch excessively, it's a cry for more light. For indoor growers, fluorescent grow lights 6 inches above plants work wonders when natural light is insufficient.
Pro Tips for Grow Pinto Beans From Seeds
- Fast germination and strong growth start with these key strategies—don't skip these details that make all the differe...
- Soaking Secret: The 12-hour soak is non-negotiable for pinto beans, but here's what I learned after testing: Use a bo...
- Container Intelligence: Those 4-inch deep containers with drainage holes aren't just about depth—they're about airflo...
Frequently asked questions
Got questions about growing pinto beans? You’re not alone—this hardy crop can be tricky for beginners! Here are answers to the most common queries to help you grow a thriving patch of beans.
How long does it take for pinto bean seeds to germinate?
Pinto beans typically sprout within 7–14 days after planting, depending on soil temperature (ideal: 60–85°F). Keep soil consistently moist but not soggy—germination speeds up in warm conditions. If seeds don’t sprout in 2 weeks, they may need replanting or warmer soil.
When is the best time to plant pinto beans?
Plant pinto beans after the last frost when soil reaches at least 60°F. In most climates, this means late spring to early summer. Avoid planting too early—they hate cold soil and may rot. For fall harvests, sow seeds 80–100 days before your first frost.
Can I grow pinto beans in containers or small spaces?
Pinto beans thrive in containers 12+ inches deep (they need room for roots). Use a 5-gallon bucket or tall pot with drainage holes. Space 3–4 plants per container, and train vines with a trellis to save space. Just ensure they get 6+ hours of sunlight daily.
What should I do if my pinto bean plants have holes or yellow leaves?
Holes? Likely bean beetles or slugs—handpick pests or use row covers. Yellow leaves? Check for overwatering, poor drainage, or nutrient deficiency. Fertilize lightly with compost or a balanced 10-10-10 mix if soil looks tired. Avoid wetting leaves to prevent fungal issues.
Are pinto beans hard to grow compared to other beans?
Not necessarily! Pinto beans are moderately easy but need consistent moisture and warm soil. They’re more sensitive to cold than bush beans but reward you with higher yields if conditions are right. Start with a small batch to test your growing conditions before scaling up.
Still stumped? Drop your question in the comments—we’re happy to help!
Wrapping up and next steps
Growing pinto beans from seeds is a rewarding journey that brings flavor, nutrition, and beauty to your garden! With the right soil, sunlight, and care, you’ll soon enjoy bushy vines and a bountiful harvest. 🌱 Start small—even a few plants can yield delicious beans for meals or sharing.
Now that you’re ready to plant, take the next step: grab those seeds, mark your calendar, and watch your garden transform! Happy growing—your future meals (and hungry critters!) will thank you. 😊