
Pests
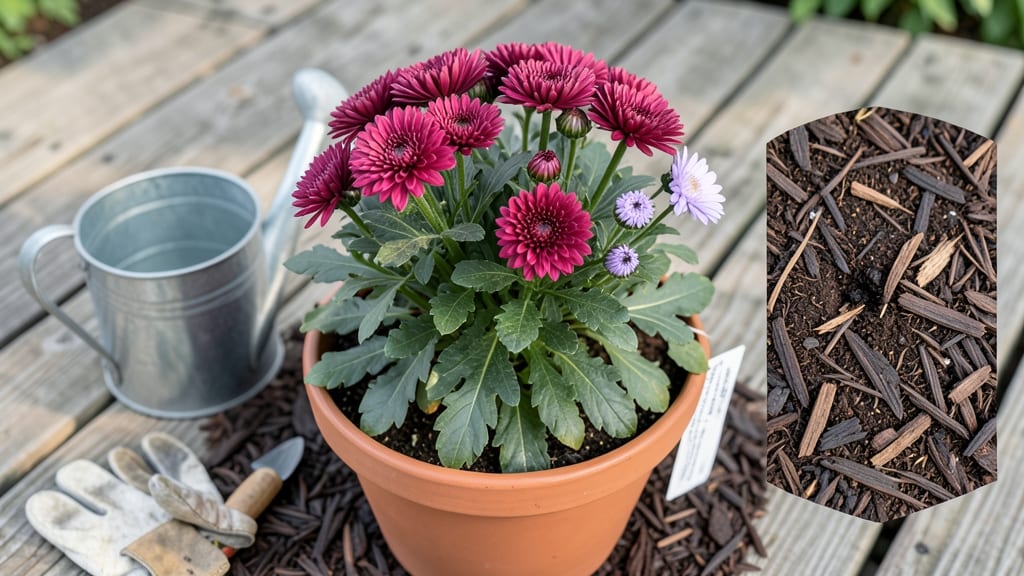
Your wilting chrysanthemums aren’t a lost cause—here’s how to keep them alive and thriving. 🌼 I’ve nursed back more than my share of sad-looking mums—yellowing leaves, floppy stems, even total collapse—only to see them bounce back with the right care.
The secret isn’t complicated: it’s about matching their needs to their natural rhythm, not forcing them into our schedules.
Most chrysanthemums die from two simple mistakes: either drowning in overwatered soil or starving for light they can’t reach.
I learned the hard way when my first batch of fall mums turned into a sad, leggy mess—until I adjusted their watering to once a week (or when the top inch of soil feels dry) and moved them to 6+ hours of sunlight daily.
Pests like spider mites and aphids also sneak in when plants are stressed, but a quick spray of soapy water usually sends them packing.
With the right routine, your chrysanthemums will reward you with bold blooms for months, not just a few weeks. The key is consistency: check their roots monthly, trim dead flowers to encourage new growth, and fertilize every 4-6 weeks with balanced plant food.
Even indoor varieties can thrive with proper care—no more throwing them out when they look done for the season.
Here’s the best part: these tricks work whether you’re growing them in garden beds, containers, or even as houseplants. Let’s turn those droopy stems into a year-round showstopper—no green thumb required, just a little patience and the right moves.
📚 In This Guide
- What you need
- Instructions
- Tips and common mistakes
- Wrapping up and next steps
What you need
- ● Chrysanthemum plants: Choose healthy, disease-free mums from a nursery. Opt for hardy varieties like 'Mammoth' or 'Bonanza' for year-round care.
- ● Well-draining potting soil: A 5-gallon bag of peat-based or coco coir mix (avoid heavy clay soil). Add perlite or sand (1 part perlite to 4 parts soil) for aeration.
- ● Containers: Pots with drainage holes (6–12 inches in diameter, depending on plant size). Terracotta or plastic works—just ensure stability!
- ● Watering can or hose with a gentle spray nozzle: Avoid overwatering; a 1-gallon capacity can is ideal for small pots.
- ● Balanced fertilizer (10-10-10 or 20-20-20): A 1-pound bag will last for multiple feedings. Use every 4–6 weeks during growing season.
- ● Pruning shears: Sharp, bypass-style shears (4–6 inches long) for trimming dead blooms or leggy stems.
- ○ Mulch (optional but helpful): Shredded bark or straw (2–3 inches thick) to retain moisture and regulate soil temperature.
- ● Slow-release fertilizer granules: Mix into soil at planting for low-maintenance nutrition.
- ● Grow lights (LED, full-spectrum): If indoor-growing, a 12–16 hour/day light source mimics natural sunlight.
- ● Pest control: Neem oil or insecticidal soap (for aphids, spider mites, or whiteflies).
- ● Support stakes or cages: Tall varieties may need 6–12 inch bamboo stakes for stability.
- ● Soil moisture meter: Prevents guesswork—insert into soil before watering.
Step-by-Step instructions for keeping chrysanthemums alive
Here’s how I keep these hardy blooms thriving with minimal fuss—no green thumb required.
☀️ Step 1: Place Them Where Light Meets Balance
Chrysanthemums love 6-8 hours of direct sunlight daily, but they’ll sulk in scorching afternoon heat. I place mine where morning sun warms them gently, then afternoon shade (like a sheer curtain) protects them from fading. Watch for leaves curling or wilting—this means they’re either burning or thirsty.
If you only have shade, don’t stress. These plants tolerate partial shade (4-6 hours of light) and still bloom, though flowers may be smaller. The key is consistency: Move pots only if you notice stems stretching toward the light like they’re begging for more.
💧 Step 2: Water Deeply but Sparingly
Water when the top inch of soil feels dry to the touch—this is your golden rule. I stick my finger in the soil; if it’s damp, wait. Overwatering is the #1 killer of chrysanthemums, causing roots to rot and stems to weaken. When you water, do it deeply until water runs out the drainage holes—this encourages strong roots.
Mulch with 2-3 inches of organic mulch (like shredded bark) to lock in moisture and keep roots cool. This also prevents soil from drying out too fast, which is especially helpful in hot climates. Avoid wetting the leaves when watering—this invites fungal diseases that can turn leaves brown and crispy.
✂️ Step 3: Prune for Bushier Blooms and Health
Pinch back the top set of leaves when the plant is about 6 inches tall. This might seem harsh, but it forces the plant to branch out, giving you a fuller, bushier chrysanthemum with more flowers. I use clean, sharp scissors to snip just above a leaf node—never tear the stem.
Deadhead spent blooms regularly by cutting the stem back to the nearest set of leaves. This redirects the plant’s energy into producing new flowers instead of seeding. If you notice yellow leaves at the bottom, don’t panic—it’s normal aging. Just remove them to keep the plant looking tidy and healthy.
🪴 Step 4: Feed and Protect Through Seasons
Feed with a balanced, water-soluble fertilizer (like 10-10-10) every 4-6 weeks during the growing season. I mix it at half-strength to avoid burning the roots—chrysanthemums are sensitive to over-fertilizing. Stop feeding in late summer to encourage blooming and prepare for dormancy.
In winter, move potted chrysanthemums to a cool, bright spot (like a garage or basement) where temperatures stay between 40-50°F. If left outside in freezing temps, mulch heavily and protect with burlap wraps. You’ll know they’re dormant when stems turn brown and leaves drop—this is normal and nothing to worry about.
⏰ Step 5: Revive and Repot as Needed
In early spring, trim back any dead or damaged stems to just above a healthy leaf node. This jump-starts new growth. If your chrysanthemum looks cramped (roots circling the pot or growing out the drainage holes), it’s time to repot into a container 2-3 inches larger with fresh potting mix.
Here’s the thing—chrysanthemums are tough. If you’ve neglected them (like, really neglected them), don’t give up. Trim back all but the healthiest stems, repot in fresh soil, and give them a drink of water. Within weeks, you’ll see fresh growth—proof that these plants are forgiving as long as you give them light, water, and a little TLC.
Tips & tricks for perfect chrysanthemum care
These simple tricks will help your chrysanthemums thrive all year—no gardening degree required.
Light Placement Matters: In Step 1, when positioning your chrysanthemums for 6-8 hours of sunlight, rotate the pots every few days. This ensures even growth and prevents stems from leaning toward the light. I notice my plants grow straighter and fuller when I do this simple rotation—it takes just 30 seconds but makes a huge difference.
Soil Moisture Test: For Step 2's watering routine, use a wooden skewer instead of just your finger to test soil moisture. Insert it about 1 inch deep—if it comes out mostly clean, it's time to water. This method is more accurate than finger testing, especially in sandy soils where moisture drains quickly. I keep a skewer in my gardening caddy for this exact purpose.
Pruning Precision: When you pinch back those top leaves in Step 3, aim for just above a leaf node where new growth will emerge. I learned this the hard way—cutting too close to the stem can damage it. Use clean scissors and make cuts at a 45-degree angle to prevent water from pooling on the cut surface, which can lead to rot.
Winter Survival Strategy: In Step 4, when moving chrysanthemums to cooler spots for winter, don't rush the process. Acclimate them gradually over 7-10 days by moving them to slightly cooler locations each day. This helps prevent shock, especially if they've been enjoying warm indoor temperatures. I place mine near a north-facing window first before moving to the garage.
Pro Tips for Keep Chrysanthemums Alive
- These simple tricks will help your chrysanthemums thrive all year—no gardening degree required.
- Light Placement Matters: In Step 1, when positioning your chrysanthemums for 6-8 hours of sunlight, rotate the pots e...
- Soil Moisture Test: For Step 2's watering routine, use a wooden skewer instead of just your finger to test soil moist...
Frequently asked questions
Got questions about keeping your chrysanthemums blooming and healthy? You’re not alone! Here are some of the most common concerns—and their solutions—to help you troubleshoot like a pro.
Why are my chrysanthemum leaves turning yellow?
Yellowing leaves usually signal overwatering or poor drainage. Let the top inch of soil dry out between waterings, and ensure pots have drainage holes. If the roots are soggy, repot in fresh, well-draining soil. Pro tip: Yellowing can also mean nutrient deficiency—try a balanced fertilizer to revive them!
Can chrysanthemums survive winter outdoors?
Most chrysanthemums are hardy to USDA zones 5–9, but they need protection in colder climates. Mulch the base with 2–3 inches of straw or leaves, and wrap containers in burlap. In freezing zones, dig up potted plants and store them in a cool, dark garage until spring. Pro tip: Cut back dead foliage in early spring to encourage new growth!
How do I get rid of pests like aphids or spider mites?
Start with a strong spray of water to dislodge pests, then treat with neem oil or insecticidal soap (mix 1 tsp per quart of water). For severe infestations, use horticultural oil or introduce ladybugs (natural predators). Check the undersides of leaves daily—early action prevents outbreaks!
Can I grow chrysanthemums from cuttings?
Take 4–6 inch cuttings from healthy stems in early summer, strip the lower leaves, and dip in rooting hormone. Plant in moist perlite or sand, cover with a plastic bag to retain humidity, and place in bright, indirect light. Roots should form in 3–4 weeks. Pro tip: Keep soil consistently moist but not soggy!
When is the best time to prune chrysanthemums?
Prune in early spring (before new growth) to shape the plant and remove dead stems. For fall blooms, pinch back tips in late summer to encourage bushier growth. Avoid heavy pruning after September—it can delay flowering. Pro tip: Use clean, sharp shears to prevent disease!
Wrapping up and next steps
Keeping your chrysanthemums alive and blooming is all about consistent care—whether it’s nailing the right soil, sunlight, or pest control. With the right tools and a little patience, your garden will reward you with vibrant, long-lasting flowers. 🌸
Now that you’re armed with these simple tricks, why not take the next step? Try experimenting with different varieties or share your newfound knowledge with fellow plant lovers. Happy gardening—your chrysanthemums are counting on you! 🌱✨